Mastering Your Ozempic Pen: A Step-by-Step Guide to Confident Injections
Introduction
The journey to embracing a healthier lifestyle often involves navigating new routines and, at times, new medical tools. For many individuals managing type 2 diabetes or seeking support for weight management, medications like Ozempic® can be a pivotal part of this path. While the idea of self-injection might initially feel overwhelming, it is a skill that, with the right guidance and practice, quickly becomes a straightforward part of one’s routine. Understanding the precise steps for safe and effective administration is not just about compliance; it’s about confidently harnessing the benefits of your prescribed treatment.
This comprehensive guide is designed to demystify the process, walking you through exactly how you use the Ozempic pen step by step. Our goal is to break down each action, from the initial preparation of your pen to its proper disposal, ensuring you feel clear, capable, and confident with every injection. At TrimRx, our journey began with a shared vision: to help individuals embrace healthier lifestyles by merging cutting-edge telehealth innovations with effective weight loss solutions. We have built our platform as a user-friendly and supportive space where individuals receive personalized, medically supervised care—all designed to make sustainable weight loss attainable and tailored to the individual. We believe that sustainable weight loss should be achieved through science, empathy, and a transparent approach, and that includes providing clear, actionable information about your treatment.
Throughout this post, we will cover the essential “prep, check, select, inject” framework, delve into best practices for safety and efficacy, and introduce you to additional support resources that can further empower your health journey. By following these detailed instructions and leveraging the comprehensive support available, you can confidently integrate your Ozempic® injections into your routine, taking meaningful steps closer to your health goals.
Understanding Ozempic® and Its Role in Your Health Journey
Before diving into the mechanics of injection, it’s beneficial to understand what Ozempic® is and its intended purpose. This foundational knowledge ensures you appreciate why each step in the administration process is critical for your health.
What is Ozempic®?
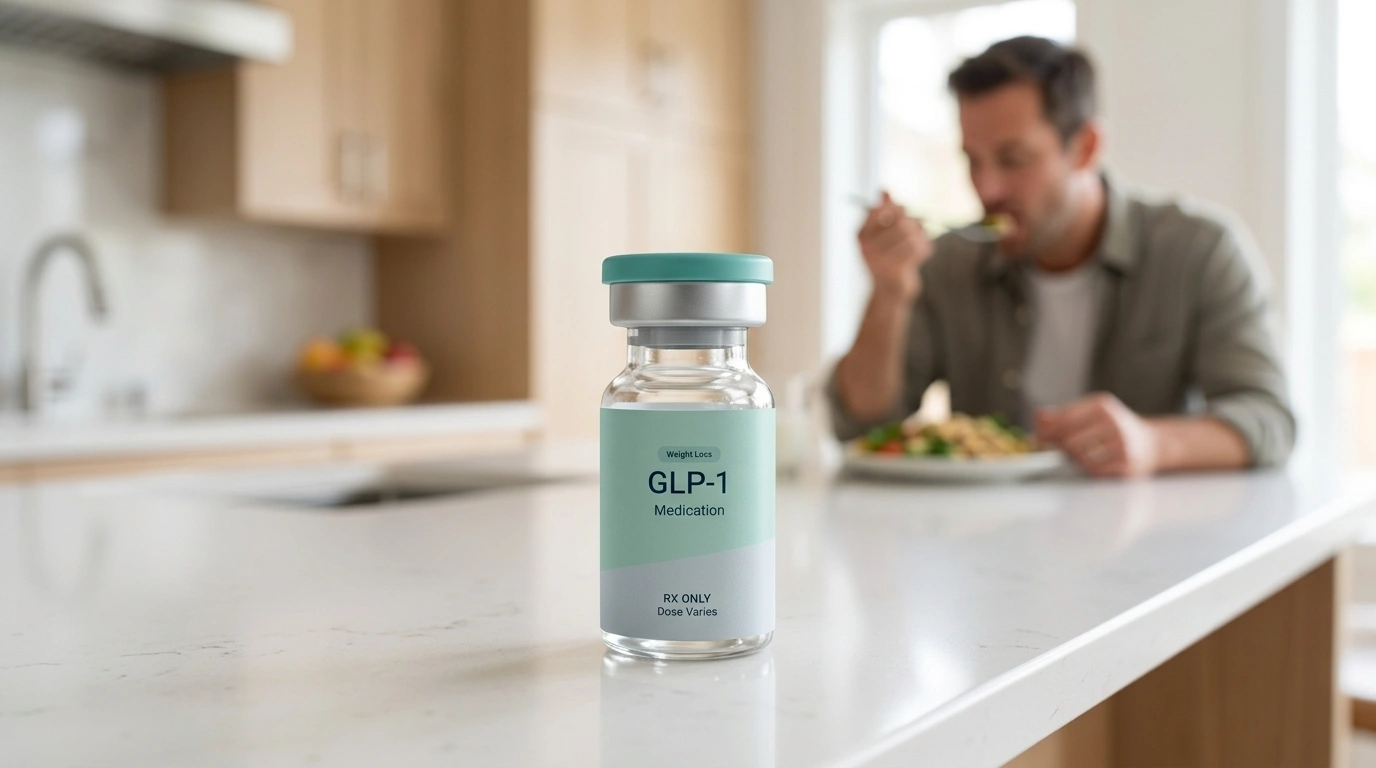
Ozempic® is a brand name for semaglutide, a medication belonging to a class of drugs known as GLP-1 (glucagon-like peptide-1) receptor agonists. Administered as a weekly subcutaneous injection, Ozempic® is FDA-approved to improve blood sugar control in adults with type 2 diabetes, alongside diet and exercise. It is also FDA-approved to reduce the risk of major cardiovascular events, such as heart attack or stroke, in adults with type 2 diabetes and established cardiovascular disease. Beyond these indications, the active ingredient, semaglutide, has garnered significant attention for its role in weight management due to its ability to influence appetite and satiety.
As a GLP-1 receptor agonist, semaglutide works by mimicking the action of a natural hormone in your body. This hormone helps regulate blood sugar by increasing insulin release when blood sugar levels are high, decreasing the amount of sugar produced by the liver, and slowing down gastric emptying. The latter effect is particularly relevant for weight management, as it can lead to increased feelings of fullness and reduced food intake.
The Importance of Proper Administration
The precise and correct administration of any medication is paramount, but it holds particular significance for injectable treatments like Ozempic®. Accurate dosing and technique ensure that the medication is absorbed effectively, delivering its intended therapeutic benefits while minimizing potential risks. Deviations from proper procedure can lead to inconsistent medication levels, reduced efficacy, or even localized reactions at the injection site.
At TrimRx, we profoundly understand that every individual’s journey is unique, and personalized care is at the heart of what we do. Our platform is designed to ensure you receive medically supervised care that is tailored to your specific needs and health profile. While this guide provides general instructions on how you use the Ozempic pen step by step, your healthcare provider will always offer the most personalized advice specific to your condition and prescription. To find out if prescription medications like Ozempic®, or other options such as compounded semaglutide, oral semaglutide, compounded tirzepatide, oral tirzepatide, Mounjaro®, Zepbound®, or Wegovy®, are right for you, we encourage you to take our free assessment quiz. This crucial first step helps us determine your eligibility and create a personalized treatment plan that aligns with our values of science, empathy, and transparency.
Getting Started: Preparing for Your Ozempic® Injection
Successful and safe injection begins with thorough preparation. Having all your necessary supplies ready and performing a few essential checks ensures a smooth and sterile process.
Essential Supplies You’ll Need
Before each injection, gather the following items. This practice not only makes the process more efficient but also reduces the chances of errors or contamination.
- Your Ozempic® Pen: Ensure it’s the specific pen prescribed by your healthcare provider.
- A New Needle: Ozempic® pens use NovoFine® Plus or NovoFine® needles. Always use a new needle for each injection.
- Alcohol Swab: For cleaning your chosen injection site.
- FDA-Cleared Sharps Disposal Container: Or a heavy-duty plastic household container with a tight-fitting, puncture-resistant lid (like a laundry detergent bottle) for safe disposal of used needles and pens.
- Gauze or Cotton Ball (Optional): For gently pressing on the injection site if there’s a small amount of bleeding after the injection.
Pre-Injection Checklist: Safety First
Before you even think about attaching a needle, a quick but diligent check of your medication and hygiene practices is vital.
Check the Pen Label and Medication
First, confirm that the label on your Ozempic® pen precisely matches the medication and dosage your healthcare provider prescribed. This prevents medication errors. Next, carefully inspect the liquid inside the pen. It should be clear and colorless, free of any particles. If the liquid appears cloudy, discolored, or contains solid particles, do not use the pen. Additionally, ensure the medication has not expired and has not been frozen. Ozempic® should never be used if it has been frozen. Our commitment to your safety means all medications, including Ozempic®, provided through TrimRx, are sourced from FDA-registered and inspected pharmacies, giving you peace of mind regarding quality and integrity.
Wash Your Hands Thoroughly
Before handling your pen or any accessories, wash your hands thoroughly with soap and water. This simple yet critical step helps minimize the risk of introducing bacteria or contaminants to the injection site.
Attaching a New Needle
Always use a new needle for each and every injection. This is a non-negotiable step to prevent contamination, infection, leakage of medication, and blocked needles. Never reuse needles, as this can lead to dulled needles causing more discomfort, and an increased risk of infection.
- Remove the Paper Tab: Peel off the protective paper tab from a new needle.
- Push and Turn: Push the new needle straight onto the pen and turn it clockwise until it is on tight. A secure attachment prevents leakage during injection.
- Remove Caps: Carefully pull off the outer needle cap and save it for later disposal of the needle. Then, pull off and discard the inner needle cap.
- Critical Safety Note: It is imperative that you never share your Ozempic® pen or needles with anyone else, even if the needle has been changed. Sharing can transmit serious infections between individuals. This is a fundamental safety principle for all injectable medications, and our transparent service always emphasizes these crucial guidelines for your well-being.
Step-by-Step Guide: How Do You Use the Ozempic Pen Step by Step
Now that your pen is prepared and you’re ready, let’s walk through the core steps of administering your Ozempic® injection.
Step 1: Performing the Flow Check (For New Pens Only)
The flow check is an essential step, but it only needs to be performed before the very first injection with each new Ozempic® pen. Its purpose is to ensure that the pen is functioning correctly and that medication can flow through the needle properly, guaranteeing an accurate dose when you inject.
- Turn the Dose Selector: Rotate the dose selector until the dose counter shows the flow check symbol. This symbol typically looks like two dots or a small line.
- Hold Pen Upright: Hold the pen with the needle pointing upwards.
- Press and Hold Dose Button: Press and hold down the dose button until the dose counter shows ‘0’. While holding, a small drop of Ozempic® should appear at the needle tip.
- Troubleshooting: If no drop appears, repeat the flow check procedure up to six times. If, after multiple attempts, a drop still does not appear, change the needle and repeat the flow check one more time. If there is still no drop, do not use the pen. Contact the manufacturer or your healthcare provider for guidance. This ensures you never administer a potentially incomplete or incorrect dose.
Step 2: Selecting Your Prescribed Dose
Once the flow check is complete (for new pens), the next critical step is to accurately dial in your prescribed dose. Your healthcare provider will determine the correct Ozempic® dose for you, and it’s crucial to follow their instructions precisely.
- Turn the Dose Selector: Rotate the dose selector until your prescribed dose appears in the dose counter window. You will feel clicks as you turn, and the dose counter will indicate the milligrams (mg) you are selecting.
- Verify Dose: Double-check that the number displayed in the dose counter window precisely matches the dose your doctor has instructed you to take.
- Important Consideration: If the dose counter stops before your prescribed dose, it indicates that there is not enough Ozempic® left in the pen for a full dose. In this situation, do not attempt to inject a partial dose. Instead, you must use a new Ozempic® pen to ensure you receive your full, intended dose. Our comprehensive service ensures you receive the correct medication as prescribed, alongside unlimited support and doctor consultations to guide you through any questions you may have, including those about dosing and pen availability.
Step 3: Choosing and Preparing Your Injection Site
Selecting and preparing the injection site correctly is crucial for effective medication absorption and to minimize discomfort or skin irritation.
Rotating Injection Sites
It is essential to change (rotate) your injection site with each injection. This practice helps prevent lipohypertrophy (a thickening of the fatty tissue under the skin) and ensures consistent medication absorption. If you choose to inject in the same general area, always use a slightly different spot within that area, maintaining at least an inch distance from the previous injection point.
Approved Injection Sites
Ozempic® is injected subcutaneously (under the skin). The approved sites for injection include:
- Abdomen: The fatty tissue around your stomach, at least two inches away from your belly button.
- Thigh: The front of your thigh.
- Upper Arm: The back of your upper arm (this area may be easier for someone else to inject if you prefer assistance).
Preparation
- Clean the Site: Before injecting, thoroughly wipe the chosen injection site with a fresh alcohol swab.
- Allow to Dry: Let the alcohol dry completely on your skin. This ensures the disinfectant works effectively and prevents stinging when the needle is inserted.
- Avoid Certain Areas: Do not inject Ozempic® into skin that is tender, bruised, scaly, hard, or scarred. Also, avoid injecting into moles, birthmarks, or tattoos. Critically, do not inject Ozempic® into a vein or muscle. Reflective question: How do you currently plan to incorporate this rotation into your weekly routine to ensure consistency and prevent irritation? Having a simple mental map or rotating pattern can be very helpful.
Step 4: Administering Your Injection
This is the final step, where you deliver the medication. Precision and patience are key here.
- Insert the Needle: Gently but firmly insert the needle into the cleansed skin at a 90-degree angle. Ensure that you can clearly see the dose counter throughout the injection process.
- Inject the Dose: Once the needle is in, press and hold down the dose button firmly. You may hear or feel a click, indicating the injection has begun.
- Observe and Count: Keep a close eye on the dose counter. It will move back towards ‘0’ as the medication is delivered. Continue holding the dose button down until the dose counter shows ‘0’. After it reaches ‘0’, continue to hold the dose button down and count slowly to six (1-2-3-4-5-6) before removing the needle from your skin. This critical pause ensures that the full dose has been delivered and prevents medication from leaking out.
- Remove the Pen: Carefully withdraw the needle straight out from your skin.
- Post-Injection Care (Optional): If you notice a small amount of bleeding at the injection site, gently press a clean cotton ball or gauze over the area until the bleeding stops. Do not rub the injection site, as this can affect absorption or cause irritation.
After the Injection: Proper Disposal and Storage
Your responsibilities don’t end with the injection itself. Proper handling of used needles and storing your pen correctly are crucial for safety and medication integrity.
Safe Needle and Pen Disposal
Immediate and correct disposal of used needles and pens is vital to prevent accidental needle sticks and the spread of infection.
- Immediate Disposal: As soon as you have completed your injection and removed the needle from your skin, immediately remove the needle from the pen. Do not, under any circumstances, try to recap the needle. Recapping is a common cause of accidental needle sticks.
- Sharps Container: Place the used needle directly into an FDA-cleared sharps disposal container. If an FDA-cleared container is not immediately available, a heavy-duty plastic household container, such as an empty laundry detergent bottle or a rigid plastic milk jug, can serve as a temporary alternative. Ensure this container is puncture-resistant, has a tight-fitting and secure lid, and is clearly labeled “SHARPS” or “BIOHAZARD.”
- Disposing of Empty Pens: Once an Ozempic® pen is empty, it should also be disposed of in the sharps container, following the same guidelines as used needles.
- Community Guidelines: Always follow your local community guidelines for the proper disposal of sharps containers. Do not dispose of sharps containers in your regular household trash, recycling bins, or down toilets. There are often designated collection sites or mail-back programs for safe sharps disposal.
Storing Your Ozempic® Pens
Correct storage ensures the medication remains effective and safe to use.
- New, Unused Pens: Store new, unused Ozempic® pens in the refrigerator at a temperature between 36°F and 46°F (2°C to 8°C). Keep them in their original carton to protect them from light until they are ready for use, up until the expiration date printed on the label.
- Pen in Use: Once you start using an Ozempic® pen, you can store it for up to 8 weeks. It can be kept either at room temperature, between 59°F and 86°F (15°C to 30°C), or in the refrigerator (36°F to 46°F or 2°C to 8°C). After 8 weeks, the pen should be discarded, even if there is still Ozempic® left in it.
- Crucial Warnings:
- Do not freeze Ozempic®. If any Ozempic® pen has been frozen, it must not be used, as freezing can compromise the medication’s integrity and effectiveness.
- Keep away from heat and light. Avoid storing your pen in direct sunlight or in places exposed to high temperatures, such as in a car’s glove compartment on a hot day.
- Keep out of reach of children. Always store Ozempic® and all other medications out of the sight and reach of children and pets.
Our dedication to transparent service means we guide you through every aspect of your treatment, ensuring you have the comprehensive information needed for safe storage and use. This meticulous attention to detail is part of our commitment to your health and peace of mind.
Beyond the Injection: TrimRx’s Holistic Support for Your Health Goals
Mastering the mechanics of how you use the Ozempic pen step by step is a significant achievement, but it’s just one component of a broader, more holistic approach to health and weight management. At TrimRx, we believe in empowering you with not just the tools, but also the continuous support and personalized care needed for lasting success.
Personalized Pathways to Wellness
Our journey at TrimRx began with a shared vision: to help individuals embrace healthier lifestyles by merging cutting-edge telehealth innovations with effective weight loss solutions. We have meticulously crafted our platform to be a user-friendly and supportive space where individuals receive personalized, medically supervised care. This approach is designed to make sustainable weight loss attainable and genuinely tailored to each unique individual. We firmly believe that sustainable weight loss should be achieved through science, empathy, and a transparent approach, providing clear guidance and unwavering support every step of the way.
For individuals seeking comprehensive, medically supervised weight loss solutions that align with their specific health needs, our personalized program offers a range of options. These include prescription medications such as Ozempid® (semaglutide injection), Zepbound® (tirzepatide injection), and Wegovy® (semaglutide injection), all of which are FDA approved for their respective indications. Additionally, we provide expertly formulated compounded semaglutide and compounded tirzepatide, as well as oral semaglutide and oral tirzepatide. It is important to note that these compounded medications are provided through FDA-registered and inspected pharmacies, ensuring quality and safety.
To discover if these personalized prescription medications are suitable for your health goals and unique profile, we invite you to take our free assessment quiz. This comprehensive assessment helps us understand your individual needs, medical history, and lifestyle, allowing us to create a tailored treatment plan just for you. Our comprehensive service includes much more than just medication; it encompasses essential doctor consultations, necessary lab work, unlimited support from our dedicated team, and convenient shipping of your medications directly to your door, all with no hidden fees. Our approach remains consistent regardless of dosage changes, emphasizing our commitment to transparent service and your continuous care.
Immediate Support for Your Journey
We recognize that support comes in many forms, and some needs can be addressed with immediate, accessible solutions. Alongside our personalized prescription programs, we offer a selection of quick-access supplements designed to complement your weight loss journey and support overall wellness. These supplements are available for immediate purchase, providing flexible options to empower your health journey without requiring an initial consultation.
Consider integrating our GLP-1 Daily Support into your daily regimen. This supplement is specifically formulated to help maintain metabolic balance and digestive comfort, offering foundational support for your body’s natural processes. Alternatively, explore our Weight Loss Boost, which is designed to provide additional metabolic and energy support, helping you feel more invigorated and supported as you pursue your goals.
Our brand is built on principles of empathy, innovation, trustworthiness, and unwavering support. We are results-oriented and deeply committed to personalized care, offering compassionate guidance that respects every individual’s unique path. By combining advanced medical science with modern technology, we strive to make effective and safe weight loss solutions accessible and achievable for everyone.
Conclusion
Confidently understanding how you use the Ozempic pen step by step is a crucial milestone on your health journey. By diligently adhering to these guidelines for preparation, flow checking, precise dosing, correct injection technique, and responsible disposal, you not only ensure the optimal efficacy of your treatment but also uphold the highest standards of safety for yourself and those around you. This detailed knowledge empowers you, transforming what might initially seem complex into a manageable and routine aspect of your personal wellness plan.
At TrimRx, we are more than just a provider; we are dedicated partners in your health journey. We are committed to offering not only access to clinically proven weight loss solutions but also the comprehensive support and personalized care you truly deserve. Our unwavering commitment to transparent service and safety, exemplified by our exclusive partnerships with FDA-registered and inspected pharmacies for medication provision, underscores our profound dedication to your well-being and peace of mind.
Whether you are just beginning to explore the transformative potential of prescription weight loss medications or are seeking immediate, complementary wellness support to enhance your health regimen, we are here to guide you every step of the way. Take the empowering first step towards a healthier, more confident you by completing our free assessment quiz to receive a personalized treatment plan tailored to your needs. Alternatively, explore our range of quick-access supplements today to find immediate support for your overall wellness journey. Your path to sustainable health and well-being starts here, with knowledge, support, and personalized care.
Frequently Asked Questions (FAQs)
1. How often should I inject Ozempic®?
Ozempic® is typically injected once a week, on the same day each week, regardless of meals. Your healthcare provider will give you specific instructions regarding your dosing schedule. It’s important to stick to this schedule as closely as possible to maintain consistent medication levels in your body.
2. What if I miss a dose of Ozempic®?
If you miss a dose of Ozempic®, you should take it as soon as you remember, provided it is within 5 days after the missed dose. If more than 5 days have passed since the missed dose, you should skip the missed dose and take your next dose on your regularly scheduled day. Do not take two doses to make up for a missed dose. Always consult your healthcare provider if you are unsure about what to do after a missed dose.
3. Can I reuse my Ozempic® needle?
No, you should never reuse your Ozempic® needle. A new needle must be used for each injection. Reusing needles can lead to dulling of the needle, increasing discomfort during injection, and significantly raising the risk of contamination, infection, or a blocked needle. Always dispose of used needles immediately in an FDA-cleared sharps container after each injection.
4. Where should I store my Ozempic® pen?
New, unused Ozempic® pens should be stored in the refrigerator between 36°F and 46°F (2°C to 8°C) until their expiration date. Once you start using a pen, it can be stored for up to 8 weeks, either at room temperature (59°F to 86°F or 15°C to 30°C) or in the refrigerator. After 8 weeks, the pen should be discarded, even if there is still medication inside. Never freeze Ozempic®, and always keep it away from heat and direct sunlight, out of the reach of children.
Transforming Lives, One Step at a Time
Keep reading

Semaglutide Molecule Explained: Why It Lasts a Week
Introduction Semaglutide lasts about a week in the body because it is engineered to cling to a blood protein called albumin and to resist…

Semaglutide MASH Approval: What ESSENCE Data Means
The 2026 FDA approval of semaglutide for MASH is a genuine milestone in liver medicine, and the ESSENCE trial is the data behind it.

Mazdutide vs Semaglutide: Head-to-Head Trial Data
Introduction Mazdutide adds a glucagon target to the GLP-1 mechanism that semaglutide uses alone, which in theory should drive more fat loss and better…

