Mastering the Routine: How to Give an Ozempic Shot with Confidence

Introduction
Did you know that nearly one in ten adults globally is managing a condition that may require self-injection therapy? While the prospect of administering your own medication can initially cause a flutter of nerves, the reality is that modern medical engineering has made this process remarkably straightforward and virtually painless. If you have been prescribed Ozempic® as part of your health journey, you are likely looking for a clear, supportive path to navigate your first few doses. Understanding how to give an Ozempic shot is not just about the physical act of the injection; it is about reclaiming control over your health through a consistent, informed routine.
At TrimRx, our journey began with a shared vision to help individuals embrace healthier lifestyles by merging cutting-edge telehealth innovations with effective weight loss solutions. We understand that starting a new medication involves more than just a prescription; it requires empathy, education, and ongoing support. Our platform is a user-friendly and supportive space where individuals receive personalized, medically supervised care—all designed to make sustainable health goals attainable and tailored to the individual. We believe that lasting change should be achieved through science, empathy, and a transparent approach.
The purpose of this guide is to provide you with a comprehensive, step-by-step walkthrough of the injection process. By the end of this article, you will feel equipped to handle your medication safely, understand the nuances of injection site rotation, and know how to store your pen to maintain its efficacy. We will cover everything from gathering your supplies and priming the pen to managing potential skin reactions and integrating supportive supplements into your daily life.
As you embark on this journey, you may wonder how this medication fits into a broader wellness strategy. Whether you are already using a prescribed medication or are just beginning to explore your options, taking the time to take our free assessment quiz can help determine if a personalized treatment plan is the right next step for you.
This post is unique because it blends clinical precision with the compassionate tone of an “educated friend.” We don’t just tell you where to poke; we explain the “why” behind every step, ensuring you feel like a partner in your own care. Together, we’ll explore the best practices for self-administration and how to optimize your results through science-backed support.
Understanding the Mechanics of the Ozempic® Pen
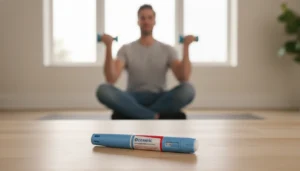
Before diving into the “how-to,” it is essential to understand what makes the Ozempic® pen a leader in patient-friendly design. Unlike traditional syringes that require manual drawing of medication from a vial, this pen is a pre-filled, multi-dose delivery system. It is engineered for precision, ensuring that each turn of the dial delivers the exact amount of medication your healthcare provider has prescribed.
The Science of Subcutaneous Injection
Ozempic® is administered as a subcutaneous injection. This means the medication is delivered into the fatty tissue layer just beneath the skin, rather than into a muscle or a vein. The subcutaneous layer has fewer blood vessels than muscle tissue, which allows the medication to be absorbed slowly and steadily into the bloodstream over the course of a week. This slow release is what makes the once-weekly dosing schedule possible.
Components of Your Delivery System
Your pen consists of several key parts that you should become familiar with:
- The Pen Cap: Protects the medication from light and keeps the needle attachment area clean.
- The Dosage Window: Displays the amount of medication selected.
- The Dose Selector: A dial at the end of the pen used to choose your specific dose.
- The Injection Button: The mechanism used to release the medication once the needle is inserted.
- The Paper Tab Needle: Each dose requires a fresh, sterile needle that is screwed onto the tip of the pen.
Our commitment at TrimRx is to ensure that our patients feel confident in using these tools. We partner exclusively with FDA-registered and inspected pharmacies for the shipping of weight loss medications, ensuring that the products you receive meet the highest standards of safety and quality.
Step 1: Preparing for Your Injection
Preparation is the foundation of a successful injection routine. By creating a calm environment and gathering all necessary items beforehand, you reduce the risk of errors and minimize any associated anxiety.
Setting the Scene
It is often helpful to choose a consistent day and time for your weekly dose. Many individuals find that a Sunday evening or Monday morning works best to keep them on track for the week ahead. Before you begin, ensure you are in a well-lit area with a clean flat surface to lay out your supplies.
Gathering Your Supplies
To give an Ozempic shot correctly, you will need the following items:
- Your Ozempic® Pen: Ensure it is the correct medication and has not expired.
- A New Needle: Never reuse a needle, as this increases the risk of infection and can lead to skin irritation.
- Alcohol Wipes: For disinfecting the injection site and the tip of the pen.
- A Sharps Container: For safe disposal of used needles. If you do not have a professional sharps container, a heavy-duty plastic container with a tight-sealing lid (like an empty detergent bottle) will suffice.
- Gauze or a Cotton Ball: To apply light pressure if there is a tiny drop of blood after the injection.
While you are preparing your environment, you might also consider how you are supporting your body’s nutritional needs. For instance, our GLP-1 Daily Support is designed to complement your journey by providing essential nutrients that support overall wellness during weight loss.
Inspecting the Medication
Take a moment to look at the liquid through the clear window of the pen. The medication should be colorless and perfectly clear. If the liquid looks cloudy, discolored, or contains visible particles, do not use it. Also, check the expiration date printed on the pen. Using expired medication can result in reduced effectiveness or unpredictable results.
Step 2: Attaching the Needle and Priming the Pen
Safety and precision are paramount when dealing with injectable medications. Attaching the needle correctly and ensuring the pen is functioning properly are the next critical steps.
Attaching the Sterile Needle
Wash your hands thoroughly with soap and warm water. Remove the pen cap and wipe the rubber stopper at the tip with an alcohol swab. Take a new needle, pull off the paper tab, and push the needle straight onto the pen. Screw it on tight until it is secure.
The needle comes with two caps: an outer cap and a smaller inner cap. Remove the outer cap and set it aside (you will need it later to safely remove the needle). Then, remove the inner cap and discard it. You will see a very fine, short needle. This design is intentional—it is meant to be as non-intrusive as possible.
Performing the Flow Check (Priming)
If you are using a brand-new pen for the first time, you must perform a flow check. This ensures that the pen is working and that any air bubbles are removed from the needle.
- Turn the dose selector until the flow check symbol (a small dashed line) lines up with the pointer in the dose window.
- Hold the pen with the needle pointing upward.
- Press and hold the injection button until the dose counter returns to “0”.
- A small drop of medication should appear at the needle tip.
If a drop does not appear, you may repeat this process up to six times. If a drop still doesn’t appear, the needle may be blocked, and you should try a new one. Once you see that drop, you are ready to select your actual dose.
Step 3: Selecting Your Dose and Choosing an Injection Site
The dose you inject is determined entirely by your healthcare provider. Never adjust your dosage without a consultation.
Dialing the Correct Amount
Turn the dose selector until your prescribed dose (e.g., 0.25 mg, 0.5 mg, or 1 mg) appears in the window. The dial will click as you turn it, providing a tactile confirmation of the setting. If you accidentally turn it too far, simply dial it back to the correct number.
Identifying the Best Injection Sites
There are three primary areas recommended for subcutaneous injections:
- The Abdomen: This is often the preferred site because it provides a large surface area and is easy to see. Aim for at least two inches away from your belly button.
- The Front of the Thighs: The upper, outer portion of the thigh is another excellent option, particularly for those who find the abdomen uncomfortable.
- The Upper Arm: This site is effective but can be more challenging to reach if you are injecting yourself without assistance.
The Importance of Rotation
One of the most important aspects of learning how to give an Ozempic shot is the habit of rotating sites. If you inject into the exact same spot every week, you may develop “lipohypertrophy”—small lumps of fat under the skin that can interfere with medication absorption. A simple way to rotate is to think of your abdomen as a clock and move the injection site an inch or two clockwise each week.
Before injecting, clean the chosen site with an alcohol wipe using a circular motion and let it air dry completely. Do not blow on the skin to dry it, as this can reintroduce bacteria.
Step 4: The Injection Process
This is the moment where many people feel the most hesitation, but with a clear understanding of the “6-second rule,” you can proceed with total confidence.
Inserting the Needle
Hold the pen so that you can clearly see the dose window. Firmly press the needle into your cleaned skin. You do not need to pinch the skin unless you have very little body fat in that area; for most people, a simple, firm insertion is sufficient.
Delivering the Dose
Press the injection button all the way down and keep it held. You will see the dose counter begin to move back toward “0.” You may hear a clicking sound as the medication is delivered.
The 6-Second Rule
Once the dose counter reaches “0,” do not immediately remove the needle. Count slowly to six (1-2-3-4-5-6). This ensures that the full dose has been completely expelled from the pen and absorbed by the subcutaneous tissue. If you pull the needle out too early, you might see a drop of medication on the skin, which means you didn’t receive the full amount.
Removing the Pen
After counting to six, pull the needle straight out of your skin. If you see a tiny drop of blood, you can press a cotton ball or gauze on the site for a moment. Do not rub the area, as this can increase irritation.
Step 5: Post-Injection Care and Disposal
Once the injection is complete, you must safely dispose of the needle to protect yourself and others.
Safe Needle Removal
Carefully place the outer needle cap back onto the needle without touching the needle itself. Once covered, unscrew the needle and drop it directly into your sharps container. Do not throw used needles into the regular household trash.
Storing Your Pen
Correct storage is vital for maintaining the stability of the medication.
- Unused Pens: Should be stored in the refrigerator between 36°F and 46°F. Never freeze them.
- In-Use Pens: Once you have started using a pen, it can be kept at room temperature (59°F to 86°F) or in the refrigerator for up to 56 days (8 weeks).
- Protection: Always keep the pen cap on when not in use to protect the medication from light.
If you are looking to further enhance your results and support your body’s metabolic health, our Weight Loss Boost can be a valuable addition to your routine, helping to maximize the efforts of your personalized program.
Managing Common Concerns and Side Effects
While the injection process itself is usually painless, some individuals may experience mild reactions or have concerns about side effects.
Addressing Skin Irritations
It is normal to occasionally experience a small amount of redness, itching, or bruising at the injection site. These symptoms are typically mild and resolve on their own within a day or two. If you notice a persistent rash, severe swelling, or signs of an allergic reaction (like hives or difficulty breathing), contact your healthcare provider immediately.
Strategies for “Needle Phobia”
If you are nervous about needles, you are not alone. To make the process easier:
- Take a Seat: Sitting down can help you feel more stable and in control.
- Temperature Matters: Some people find that letting the pen sit at room temperature for 15-20 minutes before injecting makes the sensation more comfortable than when the medication is ice-cold.
- Focus on Breathing: Take a deep breath in as you position the pen and a long breath out as you press the button.
At TrimRx, we pride ourselves on being results-oriented and supportive. We believe that sustainable weight loss is achieved through a combination of science and empathy. If you are ever unsure about your progress, remember that our comprehensive service includes unlimited support. You can always see if you qualify for our personalized treatment plans to ensure your journey is being guided by professionals who care about your unique needs.
Integrating Your Routine into a Healthier Lifestyle
Learning how to give an Ozempic shot is just one part of a larger wellness puzzle. At TrimRx, we view medication as a powerful tool that works best when supported by a holistic approach.
The Role of Personalized Care
Every individual’s metabolic health is unique. That is why our platform emphasizes personalized, medically supervised care. We don’t believe in a one-size-fits-all solution. Instead, we combine advanced medical science with modern technology to offer compassionate care that respects your specific journey. Our transparent approach means that our service remains consistent regardless of dosage changes, and we never include hidden fees.
Supplementing Success
While prescription medications like Compounded Semaglutide, Ozempic®, or Wegovy® (which require our assessment quiz) are highly effective, our quick-access supplements are available for immediate purchase to provide a steady foundation.
- Nutritional Support: Our GLP-1 Daily Support helps bridge the gap in your daily intake.
- Metabolic Enhancement: Our Weight Loss Boost is designed for those who want an extra edge in their wellness journey.
Conclusion
Mastering the art of how to give an Ozempic shot is an empowering milestone in your health journey. It represents a commitment to yourself and a step toward a more vibrant, healthy life. By following a structured routine—preparing your supplies, checking the flow, selecting the right site, and counting to six—you ensure that you are receiving the full benefit of your medication in the safest way possible.
At TrimRx, we are more than just a provider; we are your partner in health. Our commitment to using FDA-registered and inspected pharmacies and providing unlimited support reflects our dedication to your safety and success. Whether you are using Ozempic®, Mounjaro®, or a compounded alternative, the goal remains the same: sustainable, science-backed weight loss that fits your life.
Are you ready to take the next step in your personalized weight loss journey? We encourage you to complete our free assessment quiz to see if you qualify for our prescription programs. Together, we can build a future where health is attainable, transparent, and tailored specifically to you.
Frequently Asked Questions (FAQs)
1. Does the Ozempic® injection hurt?
Most people describe the injection as a very minor pinch, similar to a mosquito bite. The needles used are extremely thin and short, designed specifically for comfort. If you find the cold sensation of the medication uncomfortable, you can let the pen sit at room temperature for a short period before injecting to make the process more pleasant.
2. Can I reuse the needle if I am the only one using the pen?
No, you must never reuse a needle. Even after a single use, the tip of the needle can become dull or damaged, which leads to more pain and potential skin trauma. More importantly, reusing needles increases the risk of bacterial contamination and infection. Always use a fresh, sterile needle for every weekly dose.
3. What should I do if I forget the “6-second rule” and pull the needle out early?
If you pull the needle out before counting to six and see a drop of medication on your skin, it means you likely didn’t receive the full dose. However, you should not “top up” by injecting more medication immediately, as this could lead to an overdose. Simply note the occurrence and ensure you follow the full 6-second count for your next scheduled dose. If you have concerns, reach out to your support team for guidance.
4. Which injection site is the most effective for weight loss?
Clinical studies show that Ozempic® is absorbed effectively from the abdomen, thigh, and upper arm, and there is no evidence that one site leads to more weight loss than the others. The “best” site is the one that is most comfortable for you and allows you to easily rotate your injection points each week to maintain healthy skin tissue.
Transforming Lives, One Step at a Time
Keep reading

Ozempic Alternatives: Your Options Compared
If Ozempic isn’t the right fit, whether because of cost, side effects, availability, or results, you have real alternatives. The closest ones are other…
Ozempic vs Wegovy: Same Drug, Different Purpose
Here’s the fact that surprises most people: Ozempic and Wegovy are the same medication (semaglutide), just sold under different brand names, at different doses,…

When Do “Ozempic Vulva” Changes Start and Stabilize? A Timeline
Vulvar and genital changes from GLP-1 weight loss follow the pace of your weight loss, so they typically begin within the first few months…

