Where Can I Give My Ozempic Shot?
Introduction
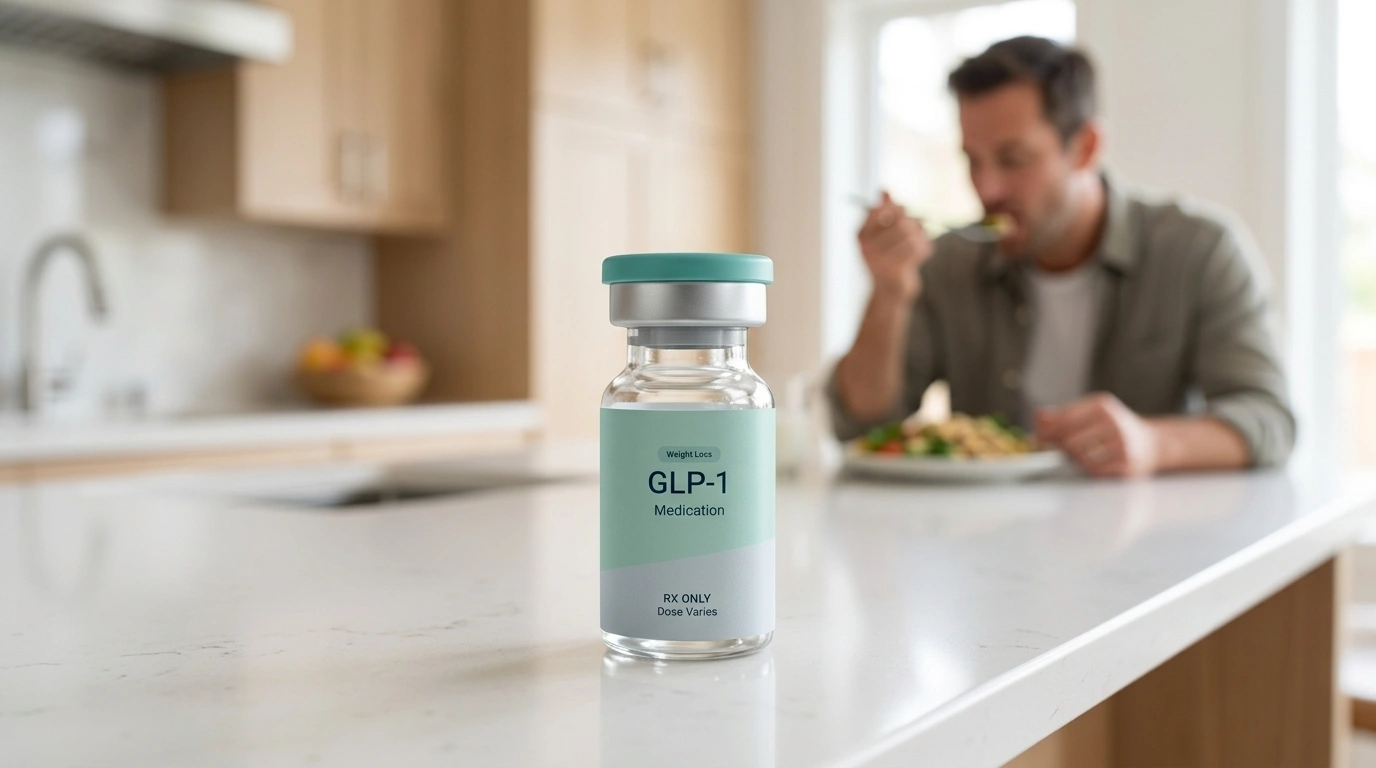
Standing in your kitchen with a medication pen in hand for the first time can feel overwhelming. You might feel a mix of excitement about your health goals and a understandable hesitation about the actual injection. At TrimRx, we believe that understanding the “how” and “where” of your treatment is the first step toward building the confidence you need for long-term success. Knowing exactly where to give your Ozempic® shot can minimize discomfort and ensure the medication is absorbed correctly by your body. If you’re considering prescription GLP-1 treatment, take the free assessment quiz.
Ozempic® is a once-weekly injectable medication containing semaglutide, which is a glucagon-like peptide-1 (GLP-1) receptor agonist. This means it mimics a natural hormone in your body that regulates appetite and blood sugar. For a quick primer on the hormone behind this treatment, read our GLP-1 explainer. This post covers the three approved injection sites, the proper technique for a subcutaneous injection, and how to manage your weekly routine for the best possible experience. Selecting the right spot and following a consistent rotation schedule ensures your journey toward metabolic health remains as comfortable as possible.
The Three Approved Injection Sites
To get the most out of your medication, you must inject it into a subcutaneous layer. A subcutaneous injection is a “fat-seeking” shot; it is designed to be delivered into the fatty tissue just below the skin but above the muscle. This allows the medication to be absorbed slowly and steadily into your bloodstream over the course of a week. For a deeper look at the biology behind these treatments, see how GLP-1 actually works for weight loss.
There are three primary areas on the body that provide the right amount of fatty tissue for this purpose.
The Abdomen (Stomach)
The abdomen is the most common choice for many people because it is easy to see and reach. It generally offers a wide area of subcutaneous fat, which can make the injection feel less pin-prickly than other spots. When using the abdomen, you should target the area between your ribs and your pubic bone.
However, there is a critical rule for the abdomen: stay at least two inches away from your belly button (umbilicus). The tissue directly behind the belly button is tougher and more fibrous, which can interfere with how the medication is absorbed. You should also avoid any areas where the skin is bruised, tender, red, or hard.
The Front of the Thigh
The thighs are an excellent alternative if you prefer to sit down while administering your dose. You should target the front or the outer side of your thigh, roughly halfway between your hip and your knee. This area is usually easy to stabilize, making it a favorite for those who might have a slight hand tremor or who feel more secure resting the pen against a flat surface.
Avoid the inner thigh, as the skin there is often more sensitive and contains more blood vessels and nerves closer to the surface. Stick to the “meaty” part of the upper, outer thigh for the most comfortable experience.
The Upper Arm
The back of the upper arm is the third approved site. This area can be highly effective, but it is often the most difficult to manage alone. To use this site, you need to target the fleshy, outer back part of the arm—the area often referred to as the triceps.
Because it is hard to “pinch” the skin on your own arm while holding a pen, many people only use this site if they have a partner or caregiver available to assist. If you are injecting yourself, the abdomen or thigh is usually a much more practical choice.
Key Takeaway: All three approved sites—the abdomen, thigh, and upper arm—are equally effective for medication absorption. Your choice should be based entirely on your personal comfort and ease of access.
Choosing the Best Site for Your Needs
While all three sites work well, you might find that your body reacts differently to each one. Some people report fewer gastrointestinal side effects when they inject in the thigh compared to the abdomen, though clinical evidence on this is largely anecdotal. Others find the abdomen to be the least painful because of the higher concentration of fatty tissue.
| Injection Site | Accessibility | Ease of Self-Injection | Best For |
|---|---|---|---|
| Abdomen | Excellent | Very High | Most users; best visibility |
| Thigh | Good | High | Users who prefer to sit; easy to stabilize |
| Upper Arm | Moderate | Low | Users with a partner to help |
If you are new to injections, we often recommend starting with the abdomen due to the superior visibility. Being able to see exactly what you are doing can reduce the anxiety associated with the first few doses.
Why the “Where” Matters: Subcutaneous vs. Muscle
It is vital to understand that Ozempic® is not meant to be injected into a muscle. This is known as an intramuscular injection, and it changes how the medication behaves. Because muscles have a much higher blood flow than fatty tissue, an accidental injection into the muscle could cause the semaglutide to be absorbed too quickly. This might lead to a higher peak of the medication in your system, potentially increasing the intensity of side effects like nausea or dizziness.
The needles provided with these medication pens are very short—usually only 4mm to 6mm. They are designed specifically to reach the subcutaneous layer without hitting the muscle, provided you are injecting into one of the three recommended areas. This is why targeting areas with “pinchable” fat is so important.
The Critical Importance of Site Rotation
One of the most common mistakes people make is injecting into the exact same spot every week because it feels familiar. However, “rotating” your injection site is essential for maintaining skin health and ensuring consistent medication absorption.
Avoiding Lipohypertrophy
If you inject into the same square inch of skin every week, you can develop a condition called lipohypertrophy. This is a buildup of fatty lumps under the skin caused by repeated trauma and the localized effect of the medication. These lumps aren’t just a cosmetic issue; they can become rubbery or hard. If you inject into one of these lumps, the medication may not be absorbed correctly, leading to “missed” or inconsistent dosing.
A Simple Rotation Strategy
You do not have to switch from your stomach to your thigh every week to rotate effectively. You can stay within the same general area as long as you move the site slightly.
- The Clock Method: If you prefer the abdomen, imagine a clock face centered on your belly button. On Week 1, inject at the 12 o’clock position (two inches away). On Week 2, move to 3 o’clock. On Week 3, move to 6 o’clock, and so on.
- The Side-to-Side Method: Simply alternate between the left and right sides of your body. Week 1 is the right side of the stomach; Week 2 is the left side of the stomach. Week 3 is the right thigh; Week 4 is the left thigh.
Key Takeaway: Always stay at least one inch away from your previous injection site for at least four weeks to allow the tissue to recover fully.
How to Prepare for Your Weekly Shot
Preparation is just as important as the injection itself. Creating a calm environment and having your supplies ready can turn a stressful moment into a routine health habit.
1. Temperature Check While unused pens should be stored in the refrigerator, many people find that injecting cold medication stings. You can leave your pen out at room temperature for about 15 to 30 minutes before your injection. This does not damage the medication but can make the liquid feel much more comfortable as it enters your body.
2. Inspect the Liquid Before you attach a needle, look at the medication through the window of the pen. It should be clear and colorless. If the liquid looks cloudy, discolored, or has particles floating in it, do not use it.
3. Gather Your Supplies You will need:
- Your medication pen
- A new, disposable needle
- An alcohol swab
- A cotton ball or gauze (optional)
- A sharps container for disposal
Step-by-Step Injection Guide
Following a standardized process helps ensure you receive the full dose and reduces the risk of infection.
Step 1: Wash Your Hands Cleanliness is the first line of defense. Wash your hands thoroughly with soap and warm water.
Step 2: Clean the Site Use an alcohol swab to wipe the area of skin you have chosen. Let the skin air-dry completely. If the skin is still wet with alcohol when you inject, it will likely sting.
Step 3: Attach and Prime the Needle Remove the paper tab from a new needle and screw it onto the pen. For a brand-new pen, you must perform a “flow check” (priming). Turn the dose selector to the flow check symbol and press the button until a drop of liquid appears at the needle tip. This ensures any air bubbles are removed.
Step 4: Dial Your Dose Turn the selector until the dash lines up exactly with the dose prescribed by your healthcare provider (for example, 0.25 mg or 0.5 mg).
Step 5: The Injection Hold the pen so you can see the dose window. Insert the needle straight into your skin at a 90-degree angle. Once the needle is in, press and hold the dose button. You will see the dose counter return to zero.
Step 6: The 6-Second Rule Do not pull the needle out immediately after the counter hits zero. Keep the button pressed and count slowly to six. This ensures that every bit of the medication has cleared the needle and entered your subcutaneous tissue.
Step 7: Safe Disposal Pull the needle straight out. If there is a tiny drop of blood, press gently with a cotton ball, but do not rub the area. Remove the needle from the pen and place it immediately into your sharps container.
Note: Never reuse a needle. Each needle is sterile and silicon-coated for a single use. Reusing them increases the risk of infection and makes the injection significantly more painful as the tip dulls instantly.
Troubleshooting Common Injection Issues
Even with the best preparation, you might encounter a few minor issues. Knowing how to handle them can prevent unnecessary worry. For a more complete guide to side effects, read Semaglutide Side Effects: Complete Guide and Management Tips.
A Drop of Liquid on the Needle
If you see a drop of liquid on the tip of the needle after you pull it out, don’t worry. This is normal and doesn’t mean you missed your dose. However, if a stream of liquid runs down your skin, you likely didn’t hold the needle in long enough. Do not inject more medication; simply wait until your next scheduled dose and remember to count to six next time.
Bruising at the Site
A small bruise is common, especially if the needle accidentally hits a tiny surface capillary. To minimize bruising, avoid “jabbing” the needle in. Use a smooth, steady motion and ensure you aren’t pressing the body of the pen too hard against your skin.
Bleeding
A single drop of blood is nothing to fear. It simply means you passed through a small surface vessel. Apply light pressure with a clean tissue or cotton ball. If you consistently experience bleeding or significant pain, you may be injecting too close to a muscle or using a site with very little body fat.
Managing Your Routine with TrimRx
At TrimRx, we believe that medication is just one piece of the puzzle. Our personalized programs are designed to support you through every stage of your journey, from the first time you use your pen to the moment you reach your maintenance goals. We provide access to clinical experts who can help you navigate these practical hurdles, ensuring you never feel like you are managing your health alone. If you’re ready to see whether a personalized prescription program is right for you, complete a free eligibility assessment.
Our platform connects you with licensed providers who can prescribe GLP-1 medications, including compounded semaglutide or tirzepatide when appropriate. While Ozempic® is a branded medication not affiliated with our company, we help patients access similar therapeutic pathways through FDA-registered, inspected compounding pharmacies. These personalized programs include ongoing medical supervision and support to help you manage side effects and optimize your results.
If you want everyday nutritional support during GLP-1 treatment, explore the GLP-1 Daily Support supplement.
If you’re looking for added metabolic support during weight loss, the Weight Loss Boost supplement is another option.
When to Contact a Healthcare Professional
While most injection site reactions are minor, you should be aware of signs that require medical attention. Contact your provider if you experience:
- Signs of infection: Increasing redness, warmth, swelling, or pus at the injection site.
- Severe skin reactions: A rash that spreads or intense itching.
- Lumps that don’t go away: If you feel hard knots under the skin that persist for weeks.
- Systemic allergic reactions: Difficulty breathing, swelling of the face or throat, or a rapid heartbeat (seek emergency care immediately in this case).
Most users find that the “side effects” of the injection itself—the mild pinch or the occasional bruise—fade quickly as they become more practiced.
Bottom line: Preparation, site rotation, and the “6-second rule” are the three pillars of a successful injection routine.
Conclusion
Mastering the “where” of your Ozempic® shot is a vital skill for anyone on a GLP-1 journey. By utilizing the abdomen, thigh, or upper arm and consistently rotating your sites, you protect your skin health and ensure your medication works exactly as intended. Remember that this process gets easier every week. What feels like a major event today will soon become a minor, 30-second part of your Sunday morning routine. If you’re comparing your options and want to understand the broader treatment path, Qualifying for Semaglutide: What You Really Need to Know is a helpful next read.
At TrimRx, our mission is to help individuals embrace healthier lifestyles through science, empathy, and a transparent, personalized approach to sustainable weight loss. We are here to serve as your knowledgeable guide, providing the clinical expertise and dedicated support you need to feel confident in your treatment.
Take the next step in your journey:
- See if you qualify for a personalized prescription program
- Explore our Weight Loss Boost supplement to support your routine
FAQ
Which injection site is the least painful for Ozempic?
Most patients find the abdomen to be the least painful site because it typically has the most subcutaneous fat, which cushions the injection. However, pain perception is subjective; if you find the abdomen sensitive, the front of the thigh is a popular and comfortable alternative.
Can I inject Ozempic into my arm if I am alone?
It is possible, but difficult. To inject into the upper arm correctly, you need to reach the fleshy part of the back of the arm, which is hard to see and stabilize by yourself. For self-injection, the abdomen or thigh is generally recommended for better control and safety.
Does the injection site affect how much weight I lose?
Clinical studies show that Ozempic® is equally effective regardless of which of the three approved sites you choose. While some people claim they have fewer side effects or better results in a specific spot, there is no scientific evidence to suggest that one site is superior for weight loss outcomes. If you want a broader perspective on treatment effectiveness, read Does GLP-1 Work?.
What happens if I forget to rotate my injection sites?
If you occasionally forget to rotate, it is unlikely to cause permanent harm. However, frequent injections in the same spot can lead to lipohypertrophy, which are lumps of fatty tissue. These lumps can make future injections less effective because the medication isn’t absorbed consistently through the thickened tissue.
Disclaimer: This content is for informational purposes only and does not constitute medical advice. It is not intended to diagnose, treat, cure, or prevent any disease or condition. Individual results may vary. Always consult a qualified healthcare professional before starting any weight loss program or medication.
Transforming Lives, One Step at a Time
Keep reading

Gas and Bloating on Ozempic or Semaglutide: Why It Happens and How to Manage It
Yes, gas, bloating, and belching are common on Ozempic and semaglutide, and for most people they’re a manageable part of the adjustment period. The…

Dizziness on Ozempic or Semaglutide: Why It Happens and What to Do
If you feel dizzy or lightheaded on Ozempic or semaglutide, you’re not alone, and in most cases the cause is manageable. The usual culprits…

Ozempic and Tylenol (Acetaminophen): Is It Safe?
Acetaminophen (the active ingredient in Tylenol) is generally considered safe to take with Ozempic or semaglutide, and there’s no dangerous direct interaction between them….

