How to Inject GLP 1 in Stomach: A Step-by-Step Guide
Introduction
Standing in your kitchen with a small needle in hand for the first time can feel overwhelming. Many individuals starting their weight loss journey experience a mix of excitement and genuine anxiety about self-administration. It is a significant step toward taking control of your metabolic health, but the “how-to” matters just as much as the medication itself. At TrimRx, we believe that understanding the mechanics of your treatment is the first step toward building the confidence needed for long-term success.
This guide provides a detailed walkthrough on how to inject GLP-1 medications into the abdominal area safely and effectively. We will cover preparation, the actual injection technique, and how to manage the process whether you are using a pre-filled pen or a vial and syringe. If you want a broader overview first, how GLP-1 actually works for weight loss is a helpful companion before you begin.
Understanding GLP-1 Medications and Subcutaneous Delivery
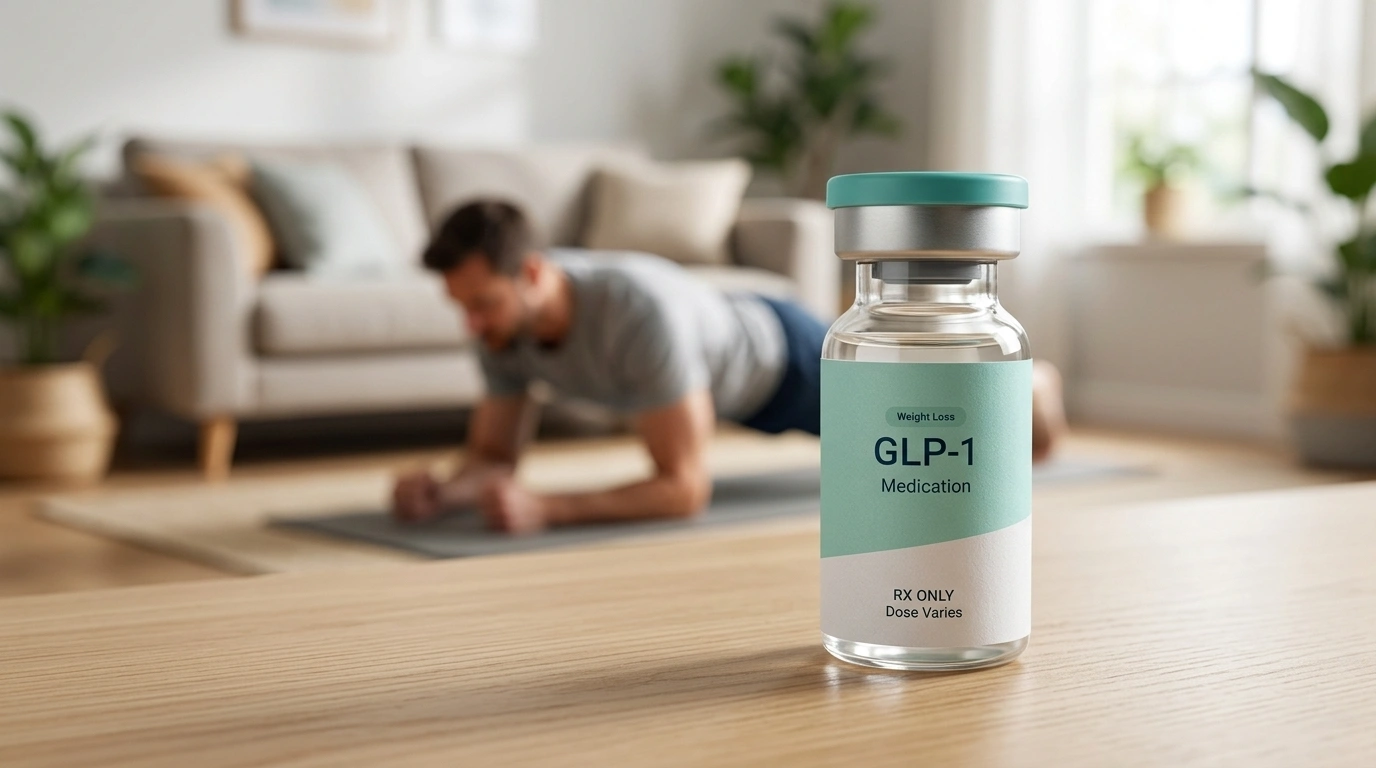
Before learning the physical steps of an injection, it helps to understand what you are administering. What GLP-1 is may sound technical at first, but the basic idea is simple and useful for anyone starting treatment. GLP-1 stands for glucagon-like peptide-1. These medications are receptor agonists, which means they mimic a hormone your body naturally produces in the gut. This hormone tells your brain you are full and helps your pancreas manage blood sugar levels.
GLP-1 medications, such as semaglutide and tirzepatide, are designed for subcutaneous injection. This means the medication must be delivered into the fatty tissue layer just beneath the skin. It is not meant to go into the muscle or directly into a vein. If you want a quick reference for the approved areas, a complete guide to GLP-1 injection sites breaks down the basics clearly. The subcutaneous layer allows the medication to be absorbed slowly and steadily into the bloodstream over several days.
Key Takeaway: Subcutaneous injections target the fatty layer between the skin and muscle to ensure the medication is absorbed at the correct rate for maximum efficacy.
Why the Stomach is a Preferred Injection Site
While GLP-1 medications can often be injected into the thigh or the back of the upper arm, the stomach is frequently the preferred choice for many patients. The abdomen offers a large, accessible surface area with a consistent layer of subcutaneous fat. This makes it easier to self-administer the dose without needing assistance from another person.
When you choose the stomach, you are looking for the area around your navel but not directly on it. The goal is to find a “fleshy” spot where the needle can easily enter the fatty tissue. For a closer look at abdominal technique, how to inject tirzepatide in the stomach for safe and effective use covers the same core principles. Research suggests that absorption rates can vary slightly between sites, but the most important factor is consistency and your personal comfort level.
Essential Supplies for Your Injection
Preparation is the foundation of a stress-free injection experience. Before you begin, clear a clean, well-lit space on a table or counter. You will need a few specific items depending on whether your provider has prescribed a branded pen or a compounded version of the medication.
The basic checklist includes:
- Your GLP-1 medication (refrigerated until needed).
- Alcohol prep pads or a cotton ball with rubbing alcohol.
- A sterile needle (if using a pen) or a sterile syringe (if using a vial).
- A puncture-resistant sharps disposal container.
- A clean tissue or gauze.
Note: If you are using compounded semaglutide or compounded tirzepatide, your medication will likely arrive in a multi-dose vial. These are prepared by FDA-registered, inspected compounding pharmacies and require the use of traditional insulin syringes.
Step-by-Step Guide: How to Inject GLP 1 in Stomach
Following a repeatable process helps reduce errors and lowers anxiety. Here is the standard protocol for a safe abdominal injection.
Step 1: Prepare the Medication
Take your medication out of the refrigerator about 15 to 30 minutes before you plan to inject. Injecting cold liquid can sometimes cause a slight stinging sensation. Let the vial or pen reach room temperature naturally. Never use a microwave or hot water to speed up this process, as extreme heat can damage the proteins in the medication.
Step 2: Wash Your Hands
Cleanliness is vital to prevent infection. Wash your hands thoroughly with warm water and soap for at least 20 seconds. Dry them with a clean towel or paper towel. Avoid touching other surfaces once your hands are clean.
Step 3: Inspect the Liquid
Look at the medication inside the pen or vial. It should be clear and colorless. If the liquid looks cloudy, discolored, or contains visible particles, do not use it. Contact your healthcare provider or the pharmacy for a replacement.
Step 4: Clean the Injection Site
Identify your injection spot. You should stay at least two inches away from your belly button. Use an alcohol prep pad to clean a circular area about two inches in diameter. Start at the center and spiral outward. Allow the skin to air dry completely for about 10 seconds. Do not blow on the skin to dry it, as this introduces bacteria.
Step 5: Prepare the Device
- For Pens: Remove the pen cap. Take a new sterile needle, peel off the paper tab, and screw it onto the pen. Remove both the outer and inner needle shields.
- For Vials: Wipe the rubber stopper of the vial with a fresh alcohol pad. Draw air into the syringe equal to your dose. Insert the needle into the vial, push the air in, flip the vial upside down, and slowly pull back the plunger to the correct unit mark.
Step 6: The Injection Technique
Boldly approach the skin at a 90-degree angle. If you have a thinner frame, you may gently pinch a one-inch fold of skin between your thumb and forefinger to create a firm surface. Use your other hand to insert the needle swiftly and steadily.
Once the needle is fully inserted:
- Depress the plunger or the pen button slowly and completely.
- If using a pen, you will likely hear a click or see the dose counter return to zero.
- Hold the needle in place for a full 5 to 10 seconds. This ensures the entire dose is absorbed and prevents the medication from leaking back out of the injection track.
Step 7: Withdraw and Dispose
Pull the needle straight out. Do not rub the site, as this can cause bruising. If there is a tiny drop of blood, press gently with a clean tissue. Immediately place the used needle or syringe into your sharps container.
Bottom line: A successful injection requires a clean environment, a 90-degree entry angle, and a 10-second hold to ensure the medication is fully delivered into the subcutaneous tissue.
Managing Compounded Medications via Syringe
Many members of the TrimRx community use compounded versions of medications like semaglutide or tirzepatide. Because these do not come in pre-filled, “auto-clicking” pens, the process requires a bit more manual attention. If you want a side-by-side breakdown of formats, pen vs vial for compounded semaglutide and tirzepatide explains the practical differences.
When drawing from a vial, it is essential to avoid air bubbles. If you see bubbles in the syringe, gently tap the side of the barrel with your fingernail until the bubbles rise to the top. Push the plunger slightly to expel the air back into the vial, then draw the liquid back down to your required dose. Using a fresh needle for every single injection is mandatory to maintain sterility and ensure the needle remains sharp for a painless entry.
Rotating Your Injection Sites
One of the most common mistakes is injecting into the exact same spot every week. Repeatedly using the same location can lead to a condition called lipodystrophy. This is the buildup of hard or lumpy fatty tissue under the skin, which can interfere with how well the medication is absorbed.
To avoid this, imagine your stomach is a clock face or a grid. If you injected at the “3 o’clock” position last week, move to “6 o’clock” or “9 o’clock” this week. You can also switch sides of the navel entirely. For a structured approach, how to rotate injection sites for semaglutide and tirzepatide goes deeper into rotation patterns. As long as you remain at least two inches away from the belly button and avoid scars, moles, or bruised areas, you are in the safe zone.
Quick Answer: You should rotate your injection site every week. Moving just one inch from the previous spot or switching to the other side of your abdomen helps prevent skin irritation and ensures consistent medication absorption.
Tips for Reducing Injection Pain
While the needles used for GLP-1 medications are very thin—often similar to those used by people with diabetes—it is normal to feel a bit of “needle phobia.”
- Numb the area: If you are particularly sensitive, you can apply an ice cube to the injection site for 30 seconds before cleaning it with alcohol. This can temporarily numb the surface nerves.
- Avoid the “dart” motion: You do not need to slam the needle in. A firm, steady, and swift motion is less likely to cause bruising than a slow, hesitant entry.
- Check the alcohol: Ensure the alcohol has dried before you poke the skin. If the skin is still wet, the needle can carry the alcohol into the puncture, causing a sharp sting.
- Relax your muscles: Try to keep your abdominal muscles relaxed. Tensing your “abs” can make the tissue firmer and the injection slightly more uncomfortable.
Dealing with Common Post-Injection Issues
After you finish, you might notice a few minor reactions. Most of these are completely normal and resolve on their own within a day or two. If you want a broader look at what can show up early in treatment, common GLP-1 side effects: what to expect covers the typical patterns.
- Redness or Itching: A small red “welt” or itchy spot is common. This is often a mild localized reaction to the medication or the preservative in the vial. A cool compress can help.
- Bruising: This usually happens if you accidentally hit a tiny blood vessel or if you rub the site too hard after the injection. It is cosmetic and will fade like any other bruise.
- Leaking: If a tiny drop of clear liquid appears on your skin after you pull the needle out, it usually means the needle wasn’t held in long enough. Don’t worry—most of the dose is already inside. Just remember to hold for 10 seconds next time.
Important: If you experience signs of a severe allergic reaction, such as difficulty breathing, swelling of the throat, or a widespread rash, seek emergency medical attention immediately.
Safety and Disposal Protocols
Safety does not end once the medication is in your body. Handling the “sharps” (needles) correctly protects you and those in your household.
Never throw loose needles into the regular trash or recycling bin. Use a dedicated sharps container. If you do not have a professional one, the FDA suggests using a heavy-duty plastic household container with a tight-fitting lid, such as a laundry detergent bottle. Label it clearly as “Biohazard” or “Used Sharps.” When the container is three-quarters full, follow your local community guidelines for hazardous waste disposal.
Starting Your Journey with TrimRx
Navigating the world of GLP-1 medications can feel complex, but you don’t have to do it alone. Our platform is designed to provide more than just a prescription; we provide a clear path forward. Through the TrimRx platform, you gain access to licensed healthcare providers who specialize in metabolic health and weight management.
Our process begins with a comprehensive, free assessment quiz that evaluates your health history, goals, and needs. If a provider determines that a GLP-1 medication is appropriate for you, the medication is shipped directly from an FDA-registered, inspected compounding pharmacy to your door. We focus on a transparent, telehealth-first model that removes the barriers of waiting rooms and hidden fees, ensuring you have the support you need for every injection and every milestone.
Conclusion
Mastering the abdominal injection technique is a skill that becomes second nature very quickly. By choosing a clean site, using the correct 90-degree angle, and rotating your locations, you ensure that your GLP-1 medication can work effectively to support your weight loss goals.
- Gather supplies and let the medication reach room temperature.
- Clean the site at least two inches from the navel.
- Inject at a 90-degree angle and hold for 10 seconds.
- Rotate your site every week to keep the skin healthy.
The journey toward sustainable weight loss is about more than just a weekly shot; it is about the personalized support and clinical expertise that helps you stay on track. If you are ready to see if a GLP-1 program is the right fit for your health profile, take the free assessment quiz today.
Key Takeaway: Proper injection technique in the stomach is safe, simple, and central to the success of your GLP-1 treatment program.
Are you ready to begin? Take the free assessment quiz today to explore your personalized weight loss options.
FAQ
Does it hurt to inject GLP-1 in the stomach?
Most people describe the sensation as a tiny pinch or a quick sting, similar to a mosquito bite. The needles used are very fine and short, specifically designed for subcutaneous use rather than deep muscle penetration. Following tips like letting the medication reach room temperature and relaxing your muscles can further minimize any discomfort. If you’re still deciding whether treatment is right for you, take the free assessment quiz before you get started.
Can I inject GLP-1 while lying down?
Yes, you can inject while lying down, sitting, or standing. The most important factor is that you have a clear view of the injection site and can maintain a 90-degree angle with the needle. Many people find sitting or standing easiest because it allows them to stabilize their hand against their body or a table.
What happens if I see a bubble in my syringe?
A tiny air bubble the size of a pinhead is generally not harmful in a subcutaneous injection, but large bubbles can result in you receiving a slightly lower dose of medication. If you are using a vial and syringe, tap the barrel to move the bubble to the top and gently push it out before injecting. If using a pen, follow the manufacturer’s priming instructions to clear the air.
Can I inject through my clothes?
No, you should never inject through clothing. Fabric can carry bacteria into the injection site, increasing the risk of infection, and can also snag the needle, causing pain or bending. Always clean the bare skin with alcohol and wait for it to dry before administering your dose.
Disclaimer: This content is for informational purposes only and does not constitute medical advice. It is not intended to diagnose, treat, cure, or prevent any disease or condition. Individual results may vary. Always consult a qualified healthcare professional before starting any weight loss program or medication.
Transforming Lives, One Step at a Time
Keep reading

How to Adjust Weight Loss Goals on GLP-1 Medications
Adjust weight goals on GLP-1 meds by tracking body composition and labs, optimizing protein, activity, sleep, and working with your provider on dosing.

Falsified Mounjaro pens prompt urgent safety advisory
MHRA warns of counterfeit Mounjaro pens (batch D873576); stop use and check batch numbers for infection risk.

Novo Nordisk shares drop as Alzheimer’s hopes for weight-loss drug fade
Novo Nordisk’s semaglutide failed to slow Alzheimer’s in large trials, prompting shares to fall and expert reactions.

