How to Give a GLP-1 Shot Safely and Effectively

Introduction
Standing in your kitchen with a small medication vial or a sleek injection pen can feel like a major crossroads. For many of us, the decision to start a weight loss journey is filled with hope, but the physical reality of administering a first injection often brings a wave of nerves. You might worry about the pain, the technique, or simply “doing it wrong.” At TrimRx, we believe that clinical excellence should never feel intimidating or overwhelming. Our goal is to replace that initial hesitation with total confidence by providing clear, empathetic guidance on every step of your treatment. This article will walk you through the exact process of preparing, administering, and managing your GLP-1 medication. Taking a GLP-1 shot is a straightforward skill that quickly becomes a simple, stress-free part of your weekly routine with the right preparation and technique.
Quick Answer: To give a GLP-1 shot, you inject the medication into the fatty tissue (subcutaneous layer) of your abdomen, thigh, or upper arm using a very small needle. The process involves cleaning the site with alcohol, inserting the needle at a 90-degree angle, and holding the injection for several seconds to ensure the full dose is delivered.
The Basics of Subcutaneous Injections
Before we dive into the physical steps, it helps to understand what you are actually doing. GLP-1 medications, such as semaglutide and tirzepatide, are administered as subcutaneous injections. This means the medication goes into the layer of fat just beneath your skin rather than into a muscle or a vein. For a broader overview, explore this guide to GLP-1 injection sites and techniques.
Subcutaneous tissue is an ideal delivery route for metabolic medications because it has few blood vessels. This allows the medicine to be absorbed slowly and steadily into your system over several days. This slow release is why many of these treatments only require a once-weekly dose. Because the needles used for these shots are extremely thin and short, most people find the sensation to be much milder than a standard vaccinations or a blood draw.
Defining Key Terms
When you begin this process, you will encounter a few technical terms. A GLP-1 receptor agonist is a type of medication that mimics a hormone your body naturally produces to regulate appetite and blood sugar. Compounded medication refers to prescriptions that are custom-prepared by licensed pharmacists in FDA-registered facilities to meet specific patient needs or address shortages. A subcutaneous injection (often called an “SQ” shot) is the specific method of delivery into the fatty tissue.
If you are considering whether a prescription program may be appropriate for you, you can complete a free eligibility assessment.
Choosing Your Injection Site
Selecting the right location is the first step toward a comfortable experience. There are three primary areas on the body where subcutaneous fat is easily accessible for self-injection. You can also review this complete guide to GLP-1 injection sites for additional placement guidance.
The Abdomen
The stomach is the most common choice for many patients. It offers a large surface area and is very easy to see and reach. You should aim for a spot at least two inches away from your belly button. Avoid any areas where the skin is bruised, scarred, or particularly firm.
The Thigh
The front or outer side of the thigh is another excellent option. This area is often preferred by people who find the abdomen more sensitive. Aim for the middle third of the thigh, staying away from the inner thigh where the skin is thinner and more sensitive.
The Upper Arm
The back of the upper arm (the triceps area) can also be used. However, this site can be difficult to reach on your own. Most people only choose the upper arm if a partner or caregiver is assisting them with the injection.
| Injection Site | Ease of Access | Best For |
|---|---|---|
| Abdomen | Very Easy | Self-administration and comfort |
| Thigh | Easy | Alternating sites to prevent irritation |
| Upper Arm | Difficult | If someone else is giving the shot |
Preparation and Safety Checklist
A successful injection starts long before the needle touches the skin. Setting up a clean, organized workspace helps reduce anxiety and ensures the highest level of safety. For more preparation and technique details, read this step-by-step GLP-1 injection guide.
1. Wash your hands. Use warm water and soap. This is the simplest way to prevent any bacteria from being introduced to the injection site or the medication equipment.
2. Check your medication. Look at the liquid inside the vial or the pen window. It should be clear and colorless. If the liquid looks cloudy, discolored, or has visible particles floating in it, do not use it. Contact your provider or the pharmacy for guidance.
3. Verify the expiration date. Always check the “Beyond Use Date” (BUD) or expiration date on your packaging. Medication loses its effectiveness over time, and using expired products can lead to inconsistent results.
4. Gather your supplies. You will need:
- Your medication (pen or vial)
- A fresh alcohol prep pad
- A new needle (for pens) or a sterile syringe (for vials)
- A sharps disposal container
- A cotton ball or small bandage (optional)
Key Takeaway: Proper preparation is 90% of the process. Starting with clean hands, clear medication, and an organized workspace ensures a safe and sterile environment for your weekly dose.
How to Inject Compounded GLP-1 Medications
Many of our participants use programs that involve compounded medications shipped from specialized pharmacies. These usually arrive as a vial and a pack of insulin-style syringes. While it requires one or two extra steps compared to a pre-filled pen, the process is very manageable.
Step 1: Prepare the Vial
Remove the plastic cap from the vial if it is new. Use an alcohol pad to firmly wipe the rubber stopper on top of the vial. This ensures the surface is sterile before the needle enters.
Step 2: Prepare the Syringe
Uncap your syringe carefully. Pull the plunger back to the line that matches your prescribed dose. This fills the syringe with air. Injecting this air into the vial creates pressure that makes it much easier to draw the liquid out.
Step 3: Draw the Medication
Push the needle through the center of the rubber stopper. Push the plunger down to inject the air into the vial. Then, turn the vial upside down with the needle still inside. Pull the plunger back slowly until the liquid reaches your exact dosage line.
Step 4: Remove Air Bubbles
With the needle still in the vial, look for any large air bubbles in the syringe. Gently tap the side of the syringe with your finger to make the bubbles rise to the top, then push the plunger slightly to move them back into the vial. Once your dose is accurate and bubble-free, pull the needle out of the vial.
Step 5: Administer the Shot
Clean your chosen injection site with a fresh alcohol pad and let it dry for about 15 seconds. Use your non-dominant hand to gently pinch a small fold of fatty tissue. Hold the syringe like a pencil and insert the needle at a 90-degree angle. Push the plunger down slowly until it stops. Count to five, then pull the needle straight out.
If you are considering a personalized prescription program, you can see if you qualify through a free assessment.
Using Branded Injection Pens
If you are using branded medications like Ozempic®, Wegovy®, Mounjaro®, or Zepbound®, your medication likely comes in a pre-filled, multi-dose, or single-use pen. These devices are designed for maximum convenience and often hide the needle from view.
Step 1: Attach the Needle
For multi-dose pens, you must attach a fresh needle for every shot. Peel back the paper tab on a new needle and screw it onto the end of the pen until it is tight. Remove both the outer and inner needle caps.
Step 2: Prime the Pen
If it is a new multi-dose pen, you may need to “prime” it to remove air. Turn the dose selector to the small symbol indicating a flow check. Hold the pen with the needle pointing up and press the button. A tiny drop of liquid should appear at the tip.
Step 3: Set Your Dose
Turn the dial at the end of the pen until your prescribed dose appears in the window. Ensure you do not turn it past the intended mark.
Step 4: Inject
Clean the skin and let it dry. Press the pen firmly against the skin at a 90-degree angle. Press the injection button. You will usually hear a click or see a progress bar move. Hold the pen in place for at least 6 to 10 seconds (check your specific pen’s instructions) to ensure the device has finished delivering the medicine.
Managing Post-Injection Care
Once the injection is complete, your focus shifts to safety and comfort. Following a few simple steps can prevent minor irritation. For more information about common reactions, review this guide to GLP-1 injection site reactions.
Dispose of your needle immediately. Never put a used needle in the regular trash. Place it directly into a puncture-proof sharps container. If you do not have a red medical sharps bin, a heavy-duty plastic laundry detergent bottle with a screw-on lid is often a safe, temporary alternative.
Avoid rubbing the site. It might be tempting to rub the area if it stings slightly, but this can actually increase irritation or cause the medication to absorb too quickly. If there is a tiny drop of blood, simply press a cotton ball firmly against the site for a few seconds.
Note the location. Keep a simple log or use a mobile app to track which side of your body you used. This helps you remember where to inject next week to ensure you are rotating sites properly.
Note: While minor redness or a small bruise at the injection site can be normal, you should contact a healthcare provider if you notice significant swelling, extreme pain, or signs of an allergic reaction like hives or difficulty breathing.
The Importance of Rotating Injection Sites
One of the most important habits to develop is site rotation. This means choosing a different spot for every shot. If you inject into the exact same square inch of skin every week, you risk developing a condition called lipodystrophy. Learn more about how to rotate injection sites for semaglutide and tirzepatide.
Lipodystrophy is a localized change in the fatty tissue. It can cause the area to become hard, lumpy, or scarred. Not only can this be uncomfortable, but scarred tissue does not absorb medication well. If you inject into a scarred area, your GLP-1 dose might not work as effectively as it should.
A Simple Rotation Strategy:
- Week 1: Right side of the abdomen.
- Week 2: Left side of the abdomen.
- Week 3: Right thigh.
- Week 4: Left thigh.
By the time you return to the first spot, the tissue will have had a full month to recover and heal.
Tips for a Pain-Free Experience
If you are particularly sensitive to needles, there are several ways to make the experience more comfortable. You can also explore this practical guide to choosing an injection site for additional comfort and rotation tips.
- Temperature matters. If you store your medication in the refrigerator, the cold liquid can sometimes cause a “stinging” sensation when injected. You can take your pen or vial out of the fridge and let it sit at room temperature for about 15 to 30 minutes before your shot.
- Let the alcohol dry. If you inject while the skin is still wet with alcohol, the needle can carry some of that alcohol into the skin, causing a sharp sting. Wait until the skin is completely dry.
- Relax the muscle. Even though you are injecting into fat, tensing the surrounding muscles can make the skin feel tighter and more sensitive. Take a few deep breaths and consciously relax your body before inserting the needle.
- The “90-Degree Rule.” Ensure you are going straight in at a 90-degree angle. Entering at a shallow angle can pull on the skin surface and cause unnecessary discomfort.
Myth: “I need to pinch my skin as hard as possible to avoid pain.” Fact: You only need a gentle pinch to create a firm surface of fatty tissue. Pinching too hard can actually cause more discomfort than the needle itself.
When to Seek Professional Guidance
While self-injection is a standard part of these programs, you should never feel like you have to figure it out alone. If you feel unsure about your technique, our specialists are here to guide you. You should reach out to a healthcare professional if:
- You are consistently having trouble drawing the medication into the syringe.
- You experience a large, painful welt that doesn’t go away within 24 hours.
- The pen device seems to be malfunctioning or leaking.
- You have questions about how to adjust your dose as part of your personalized program.
If you are ready to explore whether a personalized program may fit your needs, start with the free assessment quiz.
Conclusion
Mastering the GLP-1 injection is a significant milestone in your health journey. What feels like a daunting task today will soon become a quick, two-minute habit that fits seamlessly into your life. By following the steps of careful preparation, proper site selection, and consistent rotation, you ensure that your treatment is both safe and effective. At TrimRx, we are committed to providing you with the tools and support needed to navigate every part of this process with ease. Our personalized approach ensures you are never just a number, but a partner in a science-backed path toward sustainable wellness.
If you are ready to take the next step in your health journey with a program designed specifically for your body and goals, we invite you to take our free assessment quiz. This simple tool helps determine which options may be right for you, providing a clear starting point for your transformation.
FAQ
Does the GLP-1 injection hurt?
Most people describe the sensation as a tiny prick or a “pinch” that lasts only a second. The needles used for subcutaneous GLP-1 shots are much smaller and thinner than the needles used for flu shots or blood draws, making them very tolerable for the vast majority of patients.
What should I do if I see a small air bubble in my syringe?
Small, “pinhead” sized bubbles are generally not a cause for concern in a subcutaneous injection, but you should try to remove them. Gently tap the side of the syringe so the bubble rises to the top, then push the plunger slightly to expel the air back into the vial before you remove the needle.
Can I inject into my arm if I am doing it myself?
While possible, injecting into the back of the upper arm is difficult to do alone while maintaining the correct 90-degree angle. It is generally recommended to use the abdomen or thigh for self-injections and save the upper arm for times when you have someone to assist you.
Why is it important to rotate my injection sites?
Rotating sites prevents the buildup of scar tissue or hard lumps under the skin, known as lipodystrophy. Using a fresh spot every week ensures that the skin remains healthy and that your body can absorb the medication consistently and effectively. For additional guidance, read this guide to rotating injection sites.
Disclaimer: This content is for informational purposes only and does not constitute medical advice. It is not intended to diagnose, treat, cure, or prevent any disease or condition. Individual results may vary. Always consult a qualified healthcare professional before starting any weight loss program or medication.

Transforming Lives, One Step at a Time
Keep reading
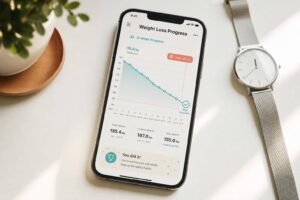
Weight Loss Progress Tracker
Track your weight loss over time, see progress clearly, and stay motivated with simple charts, summaries, and goal-based insights.
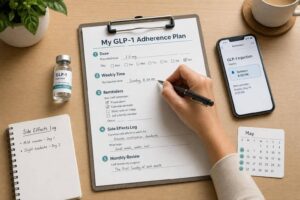
How to Create a Personalized Adherence Plan
Build a one-page GLP-1 adherence plan: record dose, pick a weekly time, set reminders, log side effects, and review monthly.

Weight Loss Medication Dosage Calculator
Estimate weight loss medication doses by weight and drug type, with starting guidance, dose progression info, and a clear medical disclaimer.


