Mastering Your Ozempic Pen: A Guide to Safe and Effective Injection Sites
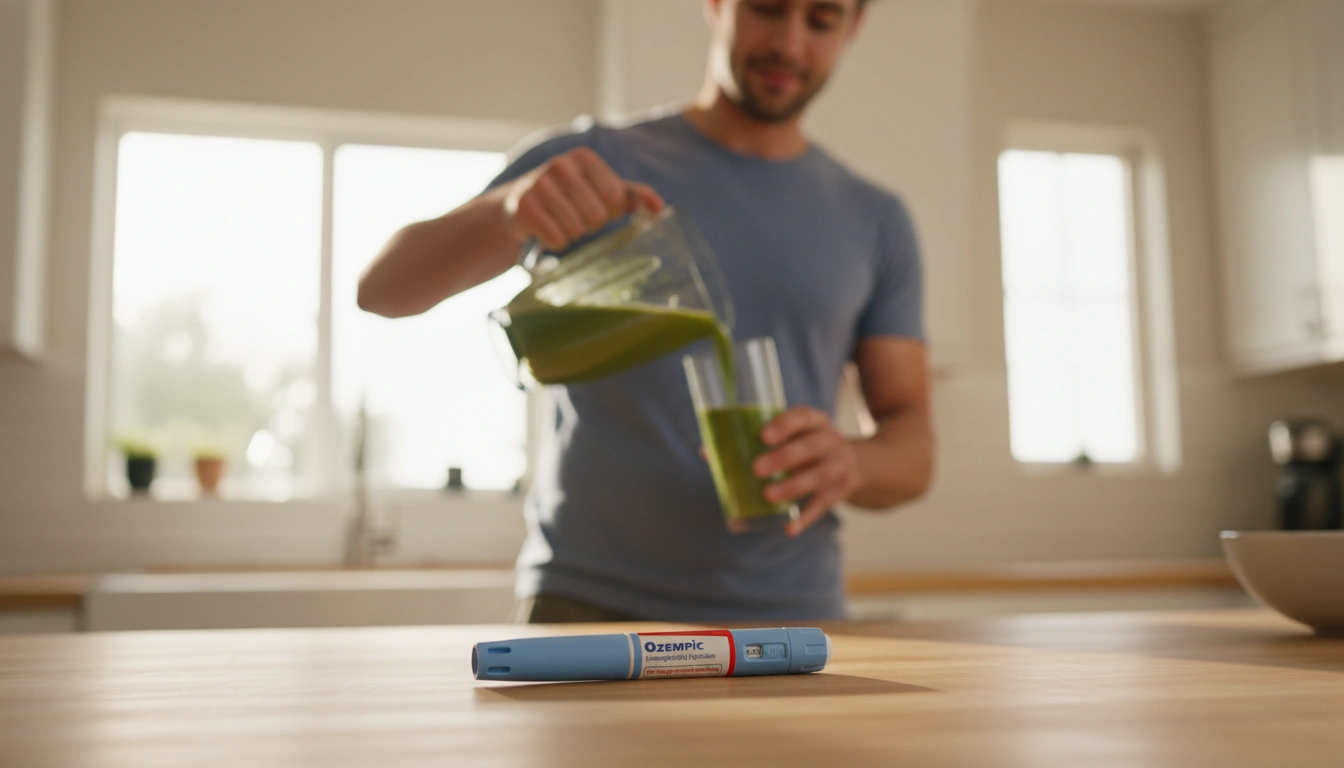
For many embarking on a weight management journey, the idea of self-administering medication can bring a mix of emotions—from hope for a new beginning to a touch of apprehension about the process itself. You might find yourself pondering the practicalities: “Where do I insert my Ozempic pen?” or “How can I ensure I’m doing this correctly?” These are incredibly valid questions, and it’s a natural part of taking control of your health. Understanding the proper technique for your Ozempic injection is more than just following instructions; it’s about empowering yourself with the knowledge to safely and effectively integrate this vital step into your weekly routine.
At TrimRx, our journey began with a shared vision: to help individuals embrace healthier lifestyles by merging cutting-edge telehealth innovations with effective weight loss solutions. We understand that sustainable weight loss should be achieved through science, empathy, and a transparent approach. Our platform offers a user-friendly and supportive space where individuals receive personalized, medically supervised care, designed to make sustainable weight loss attainable and tailored to each person’s unique needs. This guide is crafted to demystify the Ozempic injection process, focusing specifically on how to prepare, where to insert your Ozempic pen, and what to do after, ensuring you feel confident and secure with every dose. By the end, you will have a clear understanding of the best practices for administering your Ozempic medication, equipping you to manage this aspect of your health journey with greater ease and assurance. We’ll explore the essential steps from pen preparation to safe disposal, delve into the critical role of injection site rotation, and discuss how to ensure you’re getting the most from your medication.
Understanding Ozempic’s Role in Your Journey
Ozempic (semaglutide) is a medication that has become a cornerstone for many in managing type 2 diabetes and, for some, as an off-label prescription for weight management. As a GLP-1 receptor agonist, it mimics a natural hormone in your body that helps regulate blood sugar and appetite. What makes it particularly appealing is its once-weekly administration, thanks to semaglutide’s extended half-life, meaning it stays active in your system for approximately seven days. This convenience supports consistency, a crucial element in any successful health regimen.
Many individuals experience significant benefits, including improved blood sugar control and, often, meaningful weight loss, making it a valuable tool in a comprehensive health strategy. However, the effectiveness of any medication, including Ozempic, is significantly influenced by how it is administered. This is where proper injection technique and understanding where to insert your Ozempic pen become paramount. Our aim at TrimRx is to support you through every step, ensuring you have the knowledge and confidence to maximize the benefits of your prescribed treatment. We believe that empowering you with clear, accurate information is fundamental to a successful and sustainable weight loss journey, aligning perfectly with our commitment to compassionate, results-oriented care.
The Importance of Proper Injection Technique
Administering your Ozempic injection correctly is not merely about following a set of instructions; it’s about optimizing your health outcomes and ensuring your safety. Precise injection technique helps the medication absorb consistently into your body, which is crucial for its effectiveness in managing blood sugar and supporting weight loss. Incorrect technique, on the other hand, can lead to variable absorption, reduced efficacy, discomfort, or even localized skin reactions.
Think of it as laying the groundwork for your progress. Each week, as you prepare and administer your dose, you are actively participating in your own care. This process, when performed correctly, can significantly contribute to the positive changes you experience. It helps maintain stable medication levels, which is essential for consistent results. Our approach at TrimRx emphasizes not just providing access to effective solutions, but also equipping you with the knowledge and support to use them safely and effectively. We prioritize your understanding of every step, reflecting our commitment to transparent service and personalized care throughout your weight loss journey.
Preparing for Your Ozempic Injection
Before you even consider where to insert your Ozempic pen, meticulous preparation is key. This initial stage sets the foundation for a smooth and effective injection experience. Taking a few moments to gather your supplies and check your medication can alleviate stress and ensure the process goes as intended. This systematic approach is a hallmark of our supportive and personalized philosophy at TrimRx, ensuring you feel confident and prepared.
Gathering Your Essential Supplies
Having everything you need within arm’s reach before you begin can make a significant difference. Here’s a quick checklist of what you’ll want to have ready:
- Your Ozempic Pen: Ensure it’s the correct pen and dose prescribed by your healthcare provider.
- A New Pen Needle: Always use a fresh, sterile needle for each injection to minimize the risk of infection and ensure proper medication delivery.
- Alcohol Swab: For cleaning the injection site.
- Sharps Disposal Container: An FDA-cleared sharps container or a heavy-duty, puncture-resistant plastic container (like a laundry detergent bottle) with a tight-fitting lid is essential for safe needle disposal.
- Cotton Ball or Tissue (Optional): To gently press on the injection site after administering the dose, if needed.
Having these items prepared beforehand simplifies the process, making your weekly routine more manageable and less daunting.
Checking Your Ozempic Pen
Once your supplies are gathered, it’s time to inspect your Ozempic pen. This vital step helps confirm the integrity and safety of the medication you are about to use.
- Verify the Label: Always double-check that the label on your pen matches the medication and dosage your doctor prescribed. This is a critical safety measure to prevent medication errors.
- Inspect the Liquid: The liquid inside the pen should be clear, colorless, and free of any particles. If you notice that the liquid is cloudy, discolored, or contains any floating matter, do not use the pen. Contact your pharmacy or healthcare provider for guidance, as this could indicate the medication has been compromised.
- Check the Expiration Date: Locate the expiration date printed on the pen or its packaging. Never use medication that has expired, as its potency and safety cannot be guaranteed.
- Temperature Considerations: If your Ozempic pen is new and has been stored in the refrigerator, allow it to warm to room temperature for about 15-20 minutes before injection. Injecting cold medication can sometimes cause more stinging or discomfort.
These checks are simple yet crucial for safe and effective administration. They reflect our unwavering commitment to your safety and well-being, a core value at TrimRx. We partner exclusively with FDA-registered and inspected pharmacies for the shipping of weight loss medications, further underscoring our dedication to ensuring you receive high-quality, reliable products.
Hand Hygiene: A Fundamental Step
Before handling your Ozempic pen or any injection supplies, thoroughly wash your hands with soap and water for at least 20 seconds. This simple act dramatically reduces the risk of introducing bacteria to the injection site, protecting against potential infections. Ensuring clean hands is a basic yet critical component of safe self-administration, embodying the meticulous care we encourage in all aspects of your health journey.
Mastering the Ozempic Pen: A Step-by-Step Guide
Understanding the mechanics of your Ozempic pen is a fundamental step in ensuring proper medication delivery. The design of the pen is user-friendly, but familiarity with each component and action will build your confidence. Our aim is to provide you with a clear roadmap, turning what might initially seem complex into a simple, routine action.
Attaching the Needle Safely
Each injection requires a new, sterile needle. Reusing needles can increase the risk of infection, needle blockage, and leakage of medication. It’s also paramount to never share your Ozempic pen or needles with anyone else, as this can transmit serious infections.
- Remove the Paper Tab: Carefully pull off the protective paper tab from a new needle.
- Attach the Needle: Push the needle straight onto the pen and turn it until it is on tight. You should feel it securely attach.
- Remove Caps: Pull off the outer needle cap, then carefully pull off the inner needle cap. Dispose of these caps immediately. The needle is now exposed and ready for use.
This process ensures sterility and proper attachment, which are crucial for a comfortable and effective injection.
Performing the Flow Check (Priming)
For a new Ozempic pen, or if you’re unsure whether the pen is working correctly, you must perform a flow check (sometimes called “priming”). This ensures that a drop of medication appears at the needle tip, confirming that the pen is ready to deliver your dose.
- Turn to Flow Check Symbol: Rotate the dose selector until the flow check symbol (often two dots) appears in the dose counter window.
- Press and Hold Dose Button: Hold the dose button down until the dose counter shows “0”. A drop of Ozempic should appear at the needle tip.
- Repeat if Necessary: If no drop appears, repeat the flow check up to six times. If there is still no drop after repeating, change the needle and try once more. If a drop still doesn’t appear, do not use the pen; contact your healthcare provider or Novo Nordisk for assistance.
This step is essential for confirming the pen’s functionality and preventing a situation where you might attempt to inject without actually delivering medication.
Selecting Your Prescribed Dose
Once the pen is primed, you’re ready to dial in your specific dose. Your healthcare provider will determine the right Ozempic dose for you, often starting with a lower dose and gradually increasing it.
- Dial the Dose: Turn the dose selector until the dose your doctor prescribed appears in the dose counter window. The number must align precisely with the dose pointer.
- Check for Full Dose: If the dose counter stops before reaching your prescribed dose, it means there isn’t enough Ozempic left in the pen for a full dose. In this scenario, you must use a new Ozempic pen to ensure you receive the complete amount of medication. Do not attempt to inject a partial dose and then try to make up the difference with a new pen.
Accurate dose selection is fundamental to your treatment plan, ensuring you receive the intended therapeutic effects.
Where to Insert Ozempic Pen: Optimal Injection Sites
The selection of your injection site is a critical factor in ensuring your Ozempic medication is absorbed correctly and efficiently. Ozempic is designed for subcutaneous injection, meaning it must be administered into the fatty tissue just beneath the skin, not into a muscle or vein. Understanding where to insert your Ozempic pen and why certain areas are preferred is key to your treatment’s success.
Subcutaneous Injection Explained
Subcutaneous tissue, rich in capillaries, allows for slow and sustained absorption of the medication into your bloodstream. Injecting into muscle can lead to faster, more unpredictable absorption and can be more painful. Injecting into a vein is dangerous and must be avoided. The needle on your Ozempic pen is specifically designed to reach this subcutaneous layer when inserted correctly.
Recommended Injection Sites
There are three primary areas on your body recommended for Ozempic subcutaneous injections, each offering adequate fatty tissue:
The Abdomen (Stomach Area)
Many individuals find the abdomen to be the easiest and most accessible injection site. It generally has sufficient fatty tissue, making it a comfortable area for self-injection.
- Target Area: Inject into the area around your belly button, but always ensure you stay at least two inches (about two finger-widths) away from your navel.
- Avoid: Do not inject into the waistline or any areas where clothing might rub or constrict, as this can cause irritation or affect absorption. Avoid areas that are bruised, tender, hard, or scarred.
The Thigh
The thigh is another common and convenient site, particularly the outer and upper portions.
- Target Area: Focus on the front and outer aspect of your thigh, roughly between your hip and your knee. Identify a fleshy area with adequate subcutaneous fat.
- Avoid: Steer clear of the inner thigh, which might have less fatty tissue, and any areas with visible blood vessels or nerves.
The Upper Arm
While sometimes more challenging to reach for self-injection, the upper arm can also be an effective site, especially the back of the upper arm where there is typically sufficient fatty tissue. If you find it difficult to reach this area comfortably, you may need assistance from a trusted individual.
- Target Area: The fleshy outer surface of the upper arm, about three inches below your shoulder and three inches above your elbow, provides a suitable area.
- Avoid: Do not inject into the very top of your shoulder or close to the elbow joint.
Regardless of where you insert your Ozempic pen, always select a site that feels comfortable and has healthy, supple skin.
The Critical Practice of Site Rotation
Perhaps one of the most crucial aspects of managing your injections is rotating your injection sites each week. This practice is vital for several reasons:
- Prevents Lipohypertrophy: Repeated injections into the exact same spot can lead to lipohypertrophy—the development of fatty lumps or scar tissue under the skin. These lumps can affect how the medication is absorbed, potentially making your Ozempic less effective.
- Ensures Consistent Absorption: By rotating sites, you give the tissue time to recover, which helps ensure consistent and predictable medication absorption with each dose. This is essential for maintaining steady levels of Ozempic in your system.
- Minimizes Discomfort: Injecting into healthy, untraumatized skin is generally less painful and reduces the risk of irritation, bruising, or soreness.
Simple Site Rotation Strategies
Developing a simple strategy for rotation can make this practice easier to remember and implement:
- Keep a Log: A small notebook or a simple note on your phone can help you track where you injected each week.
- Divide and Conquer: Mentally (or physically) divide your chosen body area (e.g., abdomen) into quadrants. Inject into a different quadrant each week.
- Alternating Body Areas: You could alternate between the abdomen, thigh, and upper arm. For example:
- Week 1: Right side of abdomen
- Week 2: Left side of abdomen
- Week 3: Right thigh
- Week 4: Left thigh
- Week 5: Right upper arm (if comfortable)
- Week 6: Left upper arm (if comfortable)
- Then, restart the cycle.
- Move at Least an Inch: Even if you stick to the same general body area (like the abdomen), always move at least one to two inches from your last injection spot.
Pay close attention to your body. If you notice any hard lumps, redness, bruising, or tenderness at a previous injection site, avoid that area for future injections until it has completely healed. If you have any concerns about skin reactions, always consult your healthcare provider. This mindful approach to site rotation is a proactive way to support the ongoing effectiveness of your treatment and demonstrates our commitment to your holistic well-being.
The Injection Process: From Prep to Post-Injection Care
Now that you understand the importance of preparing your pen and selecting the right site, we’ll walk through the actual injection process. While it might seem daunting at first, with practice, it becomes a quick and simple part of your routine, often taking less than a minute. Our goal at TrimRx is to provide clear, actionable guidance that empowers you to administer your medication with confidence and ease.
Cleaning Your Selected Site
Before inserting your Ozempic pen, proper hygiene at the injection site is crucial to prevent infection.
- Wipe with Alcohol Swab: Take an alcohol swab and firmly wipe the skin where you intend to inject.
- Allow to Air Dry: Let the alcohol dry completely on your skin before injecting. Injecting into wet alcohol can cause a stinging sensation. Do not touch the cleaned area again before injection.
Administering the Dose: Step-by-Step
This is the moment of injection. Approach it calmly, remembering the thinness of the needle and the simplicity of the steps.
- Pinch a Skin Fold (Optional, but Recommended): Gently pinch a fold of skin at the cleaned site. For many, especially those new to injections, this helps ensure you inject into the fatty subcutaneous tissue and not into muscle.
- Insert the Needle: With a steady hand, insert the needle straight into the skin fold at a 90-degree angle. The fine gauge of Ozempic pen needles means this should be a quick, relatively painless motion.
- Press and Hold the Dose Button: Once the needle is in, press the dose button all the way in and hold it down firmly. You should see the dose counter begin to move back towards “0”.
- Count Slowly to Six: While keeping the dose button pressed, count slowly to six (1-2-3-4-5-6). This ensures that the entire dose of medication is delivered from the pen. Do not release the button until the count is complete and the dose counter shows “0”.
- Remove the Needle: After the dose counter shows “0” and you’ve counted to six, continue to hold the dose button down and carefully pull the needle straight out of your skin. Releasing the button too early can result in medication leaking out and not receiving your full dose.
- Gentle Pressure (Optional): If there is a small drop of blood or medication, you can gently press a cotton ball or tissue on the site for a few seconds. Do not rub the injection site vigorously.
This precise sequence ensures that you receive your full prescribed dose effectively, maximizing the therapeutic benefits of your Ozempic treatment.
Confirmation of Full Dose
How do you know you’ve administered the full dose of Ozempic?
- Dose Counter at Zero: The most definitive indicator is that the dose counter on your pen has returned to “0” and aligns perfectly with the dose pointer.
- Counting to Six: Holding the dose button down for a slow count to six after the dose counter reaches “0” further confirms that the medication has been fully delivered.
- No Stream of Liquid: If you remove the pen too early and see a stream of medication coming out of the needle, it means you did not deliver the full dose. Do not attempt to reinsert the needle. Simply wait until your next scheduled dose, and ensure you hold the button down for the full count next time.
- Dose Counter Doesn’t Reach Zero: If the dose counter doesn’t reach “0”, your needle might be blocked or damaged. Remove the needle, attach a new one, perform another flow check, and then attempt the injection again. You have not received your dose if the counter didn’t hit 0.
If something feels wrong, or you are unsure if you received your full dose, it is always best to consult your healthcare provider rather than attempting to self-correct in a way that could lead to an incorrect dose.
After Your Injection: Safe Disposal and Storage
Completing your Ozempic injection is a significant step, but your responsibilities don’t end there. Proper disposal of used needles and correct storage of your pen are crucial for safety, environmental protection, and maintaining medication efficacy. At TrimRx, we emphasize that every aspect of your weight loss journey, including safe medication handling, contributes to your overall well-being.
Safe Disposal of Needles and Pens
Used needles and empty Ozempic pens must be disposed of correctly to prevent accidental needle sticks and protect others.
- Immediate Sharps Disposal: Immediately after each injection, place the used needle into an FDA-cleared sharps disposal container. If you don’t have a sharps container, you can use a heavy-duty plastic household container, such as a laundry detergent bottle or a hard-plastic bottle, ensuring it has a tight-fitting, puncture-resistant lid.
- Never recap a used needle: This significantly increases the risk of an accidental needle stick injury.
- Never throw loose needles or pens into household trash: This poses a hazard to waste handlers and others.
- Full Sharps Container: When your sharps container is about three-quarters full, seal it securely and follow your community guidelines for sharps disposal. Many communities have specific collection programs, drop-off sites, or mail-back programs for sharps. Do not recycle your sharps container.
- Empty Ozempic Pens: Once an Ozempic pen is empty (or after 56 days of use, even if some medication remains), dispose of it in your sharps container as well, if it fits, or according to your local regulations for medical waste.
Our partnership with FDA-registered and inspected pharmacies not only ensures the quality of your medication but also implicitly supports these safe disposal practices by providing products that adhere to strict regulatory standards.
Storing Your Ozempic Pen
Correct storage is essential to maintain the stability and effectiveness of your Ozempic medication.
- Before First Use: Unused Ozempic pens should be stored in the refrigerator, between 36°F to 46°F (2°C to 8°C). Keep them away from the freezer compartment and do not freeze Ozempic. If Ozempic has been frozen, do not use it, as freezing can damage the medication. Unused pens can be used until the expiration date printed on the label if kept refrigerated.
- After First Use: Once you begin using an Ozempic pen, it can be stored either at room temperature (between 59°F to 86°F / 15°C to 30°C) or in the refrigerator (36°F to 46°F / 2°C to 8°C) for up to 56 days. After 56 days, the pen should be discarded, even if there is still medication left in it.
- General Storage Rules: Always keep Ozempic away from direct heat and light. Ensure all medications, including Ozempic, are kept out of the reach of children and pets.
Adhering to these storage guidelines helps ensure that your medication remains potent and safe to use throughout its intended period, further reflecting our commitment to safe and effective solutions.
Navigating Your Weight Loss Journey with TrimRx
At TrimRx, we understand that effective weight loss is a deeply personal journey, one that benefits immensely from support, innovation, and a scientific approach. Our dedication stems from a shared vision to help individuals achieve healthier lifestyles by merging cutting-edge telehealth innovations with effective, personalized weight loss solutions. We believe that sustainable weight loss should be achieved through science, empathy, and a transparent approach, guiding you every step of the way.
Our brand personality is built on being empathetic, innovative, trustworthy, supportive, results-oriented, and personalized. We offer compassionate care that respects every individual’s unique journey, combining advanced medical science with modern technology. This means that when you partner with us, you’re not just getting medication; you’re gaining access to a comprehensive service that includes essential elements like doctor consultations, necessary lab work, the medication itself, unlimited support, and convenient shipping—all with no hidden fees. We are committed to transparent service, ensuring our approach remains consistent regardless of dosage changes, and we prioritize your safety by working exclusively with FDA-registered and inspected pharmacies. It’s important to remember that while we facilitate access to medication from these trusted pharmacies, TrimRx partners with them for shipping and does not provide actual medical supervision.
Personalized Weight Loss Programs: Our Quiz-Required Offerings
For those seeking a medically supervised and highly individualized approach to weight management, our personalized programs offer a suite of clinically proven prescription medications. These solutions are tailored to your specific needs and eligibility, ensuring you receive the most appropriate and effective treatment plan.
Our prescription offerings include:
- Compounded Semaglutide: A custom-formulated version of semaglutide designed to meet individual patient needs.
- Oral Semaglutide: A convenient oral form of semaglutide.
- Ozempic®: The branded, FDA-approved injectable semaglutide for type 2 diabetes, often prescribed off-label for weight management.
- Compounded Tirzepatide: A personalized formulation of tirzepatide, a dual GLP-1/GIP receptor agonist.
- Oral Tirzepatide: An innovative oral option for tirzepatide.
- Mounjaro®: The branded, FDA-approved injectable tirzepatide for type 2 diabetes.
- Zepbound®: The branded, FDA-approved injectable tirzepatide specifically for weight management.
- Wegovy®: The branded, FDA-approved injectable semaglutide specifically for chronic weight management.
To determine your eligibility and receive a personalized treatment plan for any of these prescription medications, we invite you to take our free assessment quiz. This assessment helps our medical team understand your health profile and recommend the best path forward, aligning with our commitment to individualized care.
Quick-Access Supplements for Holistic Support
Beyond prescription medications, we recognize that a holistic approach to weight loss often benefits from supplemental support. For those looking for immediate ways to support their overall wellness during their weight loss journey, we offer a range of quick-access supplements that do not require a quiz or prescription.
Explore our immediate support options:
- GLP-1 Daily Support: Designed to complement your body’s natural processes, you can learn more about and purchase GLP-1 Daily Support to aid your wellness journey.
- Weight Loss Boost: A supplement formulated to provide additional support for your weight management efforts. Discover more and purchase your Weight Loss Boost today.
These supplements are readily available to help you achieve your health goals, providing accessible support that aligns with our mission to offer comprehensive and safe solutions.
Addressing Common Concerns and Side Effects
Even with perfect technique for where to insert your Ozempic pen and careful preparation, some common side effects are associated with Ozempic, primarily gastrointestinal in nature. These may include nausea, vomiting, diarrhea, and constipation. Many individuals experience these more intensely during the initial weeks of treatment or when their dose is increased. It’s reassuring to know that for many, these symptoms tend to improve over time as your body adjusts to the medication.
Our brand is built on being supportive and results-oriented, and this extends to helping you understand and manage potential side effects. While we don’t provide medical supervision directly, our comprehensive service ensures you have access to professional guidance through doctor consultations. Your prescribing physician can offer strategies for managing side effects, such as dietary adjustments or timing your meals differently. For example, eating smaller, more frequent meals, avoiding fatty or rich foods, and staying well-hydrated can often help alleviate nausea. If you experience persistent or severe side effects, it is crucial to communicate with your healthcare provider promptly, as they can offer personalized advice and adjust your treatment plan if necessary. We are dedicated to providing compassionate care that respects every individual’s unique journey, ensuring you feel supported throughout your experience.
Conclusion
Embarking on a weight management journey with medications like Ozempic can be a transformative experience, and understanding the precise mechanics of your treatment, including where to insert your Ozempic pen, is a cornerstone of that success. We’ve explored the essential steps from thorough pen preparation and effective dose selection to the critical practice of rotating your injection sites to maximize medication absorption and minimize discomfort. By mastering these techniques, you’re not just administering a dose; you’re actively engaging in your health, building confidence, and empowering yourself on the path to a healthier lifestyle.
At TrimRx, we are more than just a provider of weight loss solutions; we are your dedicated partner. Our commitment to merging cutting-edge telehealth innovations with personalized, medically supervised care is unwavering. We believe in achieving sustainable weight loss through science, empathy, and a transparent approach, offering comprehensive support that includes doctor consultations, necessary lab work, effective medications, unlimited support, and seamless shipping, all without hidden fees.
If you’re ready to take the next step towards a healthier you and explore personalized prescription weight loss solutions like Ozempic, we encourage you to take our free assessment quiz today. Discover if you qualify for a tailored treatment plan designed with your unique needs in mind. For immediate support and to enhance your wellness journey, consider our quick-access supplements. Explore our GLP-1 Daily Support and Weight Loss Boost products, readily available to complement your efforts. We are here to support you with trustworthy, results-oriented, and personalized care, ensuring your journey is as safe and effective as possible.
Frequently Asked Questions
Q1: Can I reuse my Ozempic pen needle?
No, absolutely not. You must always use a new, sterile needle for each injection. Reusing needles significantly increases the risk of infection, can cause the needle to become dull and painful, and may lead to blockages that prevent you from receiving your full dose of medication. Always dispose of used needles immediately in an FDA-cleared sharps container.
Q2: What happens if I accidentally inject Ozempic into a muscle or vein?
Ozempic is designed for subcutaneous injection, meaning it should go into the fatty tissue just under the skin. Accidentally injecting into a muscle can lead to faster, less predictable absorption, and may cause more pain or bruising. Injecting into a vein is dangerous and should be avoided at all costs. While the needle is typically too short to reach muscle if you’re pinching a fold of skin, if you suspect you’ve injected incorrectly or have any concerns, contact your healthcare provider immediately for guidance.
Q3: How do I know if my Ozempic pen is empty or if there’s enough medication for my dose?
Your Ozempic pen has a dose counter that displays the dose you’ve selected and counts down to zero during injection. If the dose counter stops before reaching your prescribed dose, it indicates that there is not enough medication left in the pen for a full dose. In such cases, you should not attempt to inject a partial dose. Instead, you will need to start a new Ozempic pen for your next scheduled injection to ensure you receive your full prescribed amount.
Q4: My injection site is a little sore or red after my Ozempic injection. Is this normal?
It’s common to experience some mild soreness, redness, or a small bump at the injection site, especially right after the injection. This is usually temporary and should resolve quickly. However, it’s crucial to differentiate between minor irritation and a more serious reaction. If you notice persistent pain, significant swelling, warmth, spreading redness, pus, or if the area becomes hard and lumpy, these could be signs of a local infection or a more severe reaction. If any of these symptoms occur, or if you have any concerns about your injection site, contact your healthcare provider promptly. Remember to always rotate your injection sites to help prevent tissue damage and reduce the likelihood of irritation.
Transforming Lives, One Step at a Time
Keep reading

Ozempic Face: What It Is and How to Prevent It
“Ozempic face” refers to the facial volume loss, sagging skin, and aged appearance that can occur after rapid weight loss on GLP-1 medications like…

Ozempic 1 Month Weight Loss: What to Realistically Expect
During your first month on Ozempic (semaglutide), expect modest weight loss. Clinical trial data from the STEP studies shows that participants lost approximately 2%…

Ozempic 3 Month Weight Loss Results: What to Expect
After three months on Ozempic (semaglutide), most people lose around 5% to 6% of their starting body weight. A real-world study published in JAMA…

