Navigating Your Journey: A Detailed Guide on How to Set Up Your Ozempic Pen for Effective Weight Management

Introduction
Embarking on a weight loss journey can often feel like navigating a complex maze, especially when it involves integrating new medical treatments into your routine. Many individuals grapple with the nuances of managing chronic weight-related conditions, constantly seeking safe, effective, and sustainable solutions. The rise of innovative medications, alongside advancements in telehealth, offers a promising pathway forward, transforming how we approach health and wellness. This blend of medical science and accessible care is at the heart of what we do at TrimRx.
At TrimRx, our journey began with a shared vision: to empower individuals to embrace healthier lifestyles. We achieve this by seamlessly merging cutting-edge telehealth innovations with effective weight loss solutions. Our platform is designed as a user-friendly and profoundly supportive space where you receive personalized, medically supervised care. We understand that the path to sustainable weight loss is deeply individual, and our programs are specifically tailored to meet those unique needs. We firmly believe that achieving sustainable weight loss should be underpinned by science, empathy, and a transparent approach, ensuring that every step you take with us is informed, supported, and leads to tangible results.
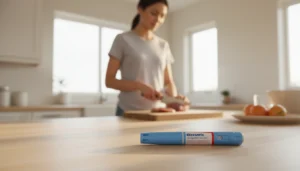
One such powerful tool in modern weight management is Ozempic (semaglutide), a prescription medication that requires careful and correct administration to ensure its effectiveness and your safety. However, the prospect of self-injecting, even with a user-friendly device like the Ozempic pen, can initially seem daunting. You might find yourself asking a multitude of questions: How do I correctly prepare the pen? What are the right steps for injection? Where should I inject? And how do I ensure I’m getting the full, prescribed dose? These are natural concerns, and understanding the proper procedure is paramount to maximizing the benefits of your treatment.
This comprehensive guide is crafted to demystify the process of how to set up your Ozempic pen and administer your dose, transforming what might seem like a complex medical task into a straightforward part of your weekly health routine. We will walk you through every critical step, from initial preparation and understanding your medication to mastering the injection technique, troubleshooting potential issues, and ensuring proper aftercare and storage. Beyond the mechanics, we’ll also touch upon the broader aspects of a holistic weight loss journey, demonstrating how TrimRx’s personalized support, alongside effective medication, can lead to truly transformative outcomes. Our aim is to provide you with the knowledge and confidence to manage your medication effectively, empowering you to take an active, informed role in your weight loss journey. By the end of this post, you will possess a clear understanding of the procedure, bolstered by the empathetic, innovative, and trustworthy support that defines the TrimRx experience.
Understanding Your Journey with Medications
The landscape of weight management has evolved significantly, with groundbreaking medications offering new hope for individuals seeking effective solutions. Among these, GLP-1 receptor agonists like semaglutide, the active ingredient in Ozempic, represent a significant advancement. At TrimRx, we recognize the profound impact these clinically proven solutions can have when integrated into a personalized care plan.
What is Ozempic and How Does it Work?
Ozempic (semaglutide) is a once-weekly injectable medication primarily FDA-approved for adults with type 2 diabetes to improve blood sugar control. Importantly, many individuals also experience significant weight loss as a beneficial side effect, which has led to its broader discussion in the context of weight management. Semaglutide mimics a natural hormone in your body called glucagon-like peptide-1 (GLP-1). This hormone plays a crucial role in regulating both blood sugar and appetite.
When you take Ozempic, it works in several key ways:
- Stimulating Insulin Release: When blood sugar levels are high, semaglutide prompts the pancreas to release more insulin, which helps lower blood sugar.
- Suppressing Glucagon Secretion: It reduces the release of glucagon, a hormone that raises blood sugar, further contributing to better glucose control.
- Slowing Gastric Emptying: Semaglutide slows down how quickly food leaves your stomach. This can make you feel fuller for longer, reduce overall food intake, and help manage cravings.
- Impacting Brain Signals: It acts on areas of the brain that regulate appetite, leading to reduced hunger and increased satiety.
The convenience of a once-weekly injection is due to semaglutide’s extended half-life, meaning it stays active in your system for approximately seven days. This consistency helps maintain therapeutic levels and supports a more predictable routine.
The Importance of Personalized, Medically Supervised Care
While the benefits of medications like Ozempic are clear, it’s crucial to understand that they are most effective and safest when part of a comprehensive, medically supervised program. At TrimRx, we emphasize that weight loss is not a one-size-fits-all endeavor. Our approach is deeply rooted in providing personalized care that respects every individual’s unique journey.
We offer compassionate care that combines advanced medical science with modern technology. This means that before starting any prescription medication, you’ll undergo a thorough evaluation. We believe in transparency and ensure our service remains consistent, focusing on your well-being regardless of dosage changes. Our commitment to safety is paramount; we work exclusively with FDA-registered and inspected pharmacies for the shipping of weight loss medications.
To discover if prescription medications such as Ozempic, compounded Semaglutide, Oral Semaglutide, Mounjaro®, Zepbound®, Wegovy®, Compounded Tirzepatide, or Oral Tirzepatide are right for you, we encourage you to take our free assessment quiz. This personalized assessment helps determine your eligibility and guides us in creating a treatment plan tailored specifically for your health needs and weight loss goals.
Beyond prescription options, we also offer immediate support supplements designed to complement your overall wellness journey. Our GLP-1 Daily Support and Weight Loss Boost are available for immediate purchase, providing additional tools to aid your progress.
Preparing for Your Ozempic Injection: The Essentials
Administering your Ozempic dose correctly begins long before the actual injection. Proper preparation is key to ensuring safety, efficacy, and peace of mind. Let’s walk through the vital steps to gather your supplies and inspect your medication.
Gathering Your Supplies
Before each weekly injection, it’s helpful to have all necessary items within reach. This minimizes interruption and ensures a smooth process. You will need:
- Your Ozempic Pen: Ensure it’s the correct pen for your prescribed dose (0.25 mg, 0.5 mg, 1 mg, or 2 mg).
- A New Pen Needle: Always use a new, sterile needle for each injection to reduce the risk of contamination, infection, leakage, and blocked needles.
- Alcohol Swabs: For cleaning the injection site.
- Sharps Disposal Container: An FDA-cleared container or a heavy-duty plastic household container (like a laundry detergent bottle) with a secure lid for safe disposal of used needles and empty pens. Never dispose of sharps in regular household trash.
- Cotton Ball or Tissue (Optional): For gently pressing the injection site after removal, if needed.
Consider setting a weekly reminder on your phone for your injection day and time. Consistency is vital for building a habit and ensuring you don’t miss a dose, which can impact your treatment effectiveness.
Checking Your Ozempic Pen and Medication
Before attaching a needle or dialing a dose, take a moment to inspect your Ozempic pen and the medication itself.
Inspecting the Pen Label and Liquid
- Verify Medication: Double-check the label on your Ozempic pen to ensure it matches the medication and dosage your healthcare provider prescribed.
- Check Clarity and Color: Look at the liquid inside the pen. It should be clear, colorless, and free of any particles. If the liquid appears cloudy, discolored, or contains any solid particles, do not use the pen. Contact your pharmacy or healthcare provider immediately for guidance.
- Confirm Expiration Date: Locate the expiration date printed on the pen or label. Never use medication that has expired.
Temperature Considerations
If your Ozempic pen is new and has been stored in the refrigerator, it’s often recommended to let it warm to room temperature for about 15-20 minutes before injection. Injecting cold medication can sometimes cause more stinging or discomfort.
Understanding Pen Dosing and Contents
Each Ozempic pen contains multiple doses, designed to deliver your medication over several weeks. The number of doses can vary depending on the pen type and your prescribed dosage:
- 0.25 mg / 0.5 mg pen: Can contain four doses of 0.25 mg and two doses of 0.5 mg, or four doses of 0.5 mg.
- 1 mg pen: Typically contains four doses of 1 mg.
- 2 mg pen: Typically contains four doses of 2 mg.
It is critical to remember that if the dose counter stops before reaching your prescribed dose, there is not enough medication left in the pen for a full dose. In such cases, you should not attempt to inject a partial dose. Instead, you will need to start with a new Ozempic pen for your next scheduled injection.
The Critical Importance of New Needles
We cannot overstate the importance of using a new, sterile needle for every single injection. Reusing needles carries significant risks:
- Increased Risk of Infection: Needles become contaminated after use, even if they appear clean. Reusing them introduces bacteria and other pathogens into your body, potentially leading to serious infections.
- Reduced Sterility: The needle tip can become dull or bent after one use, making injections more painful and potentially causing tissue damage.
- Blocked Needles: Used needles can become blocked, preventing the full dose of medication from being administered.
- Medication Leakage: A compromised needle can lead to medication leaking from the injection site, meaning you might not receive your full prescribed dose.
Furthermore, never share your Ozempic pen or needles with anyone else, even if the needle has been changed. Sharing pens or needles can transmit serious infections. Our commitment to safety extends to these crucial practices, ensuring your health and the integrity of your treatment.
Step-by-Step Guide: How to Set Up Your Ozempic Pen and Inject
Now that you’ve prepared your supplies and inspected your pen, let’s delve into the precise steps for how to set up your Ozempic pen and perform the injection. Following these guidelines carefully is essential for accurate dosing and a comfortable experience.
Step 1: Wash Your Hands Thoroughly
Before handling your pen or needle, wash your hands thoroughly with soap and water. This is a fundamental step to prevent the introduction of germs and potential infection.
Step 2: Prepare the Pen and Attach a New Needle
- Remove Pen Cap: Take off the pen cap from your Ozempic pen.
- Attach the New Needle:
- Pull off the paper tab from a new, sterile pen needle.
- Push the needle straight onto the pen and turn it until it is on tight. You should feel it secure.
- Carefully pull off the outer needle cap, and then the inner needle cap. You will now see the needle exposed. Dispose of the caps responsibly.
Step 3: Check the Flow (Priming) – Essential for New Pens
This step is crucial for new pens to ensure the medication flows correctly and to remove any air from the needle and cartridge. You only need to perform a flow check before your first injection with each new Ozempic pen.
- Turn to Flow Check Symbol: Turn the dose selector on your pen until the flow check symbol (often two dots or a small line) appears in the dose counter window.
- Press and Hold Dose Button: Hold the pen with the needle pointing upwards. Press and hold the dose button down until the dose counter shows “0”. Ensure the “0” lines up precisely with the dose pointer.
- Observe Drop: A small drop of Ozempic should appear at the needle tip. This confirms that the flow is clear.
- Troubleshooting Flow Check:
- If no drop appears, repeat the flow check procedure up to 6 times.
- If there is still no drop after multiple attempts, change the needle and repeat the flow check one more time.
- If a drop of Ozempic still does not appear, do not use the pen. Contact your pharmacy or the manufacturer’s support line for assistance.
Step 4: Select Your Prescribed Dose
Once the flow check is complete (for new pens) or if you’re using an existing pen, you will now dial your prescribed dose.
- Turn Dose Selector: Turn the dose selector until the exact dose your doctor prescribed (e.g., 0.25 mg, 0.5 mg, 1 mg, 2 mg) appears in the dose counter window.
- Verify Dose Alignment: Ensure that your prescribed dose number lines up perfectly with the dose pointer.
- Insufficient Medication: If the dose counter stops before reaching your full prescribed dose, it indicates that there is not enough Ozempic left in the pen for a complete injection. In this situation, you must not attempt to inject a partial dose. You will need to use a new Ozempic pen for your full dose. This highlights why taking our free assessment quiz is so vital—it ensures you always have the right plan and support, including proper medication management.
Step 5: Choose and Clean Your Injection Site
Ozempic is designed for subcutaneous injection, meaning it must be injected into the fatty tissue just under the skin, not into a muscle or vein.
Recommended Injection Sites
The three recommended areas for Ozempic injection are:
- Abdomen (Stomach Area): This is often the easiest and most common site. Choose an area at least two inches away from your belly button. Avoid the waistline.
- Thigh: The top and outer areas of your thighs are suitable.
- Upper Arm: The back of your upper arm has sufficient fatty tissue, though some individuals may find it harder to reach comfortably for self-injection.
Site Rotation Strategy
It is crucial to rotate your injection sites with each injection. Using the same spot repeatedly can lead to a condition called lipohypertrophy, which manifests as fatty lumps or thickened skin under the surface. This can affect how well the medication is absorbed, potentially impacting its effectiveness.
A simple rotation approach could be:
- Week 1: Right side of abdomen
- Week 2: Left side of abdomen
- Week 3: Right thigh
- Week 4: Left thigh
- Week 5: Consider the upper arm or start over with a new spot on the right abdomen.
Alternatively, if you prefer to stick to one general area (like the abdomen), ensure you move at least an inch or two from your last injection spot each time. Keep a simple log or mental note of where you injected to assist with rotation. If you notice any redness, bruising, or hard lumps at previous sites, avoid those areas until they heal.
Cleaning the Site
Once you’ve chosen your injection spot, thoroughly clean the area with an alcohol swab. Allow the skin to air dry completely before injecting. Injecting into skin that is still wet with alcohol can cause stinging.
Step 6: Inject the Medication
This is the final step where you administer your dose. It might feel intimidating at first, but with practice, it becomes a routine.
- Pinch a Skin Fold (Optional but Helpful): Gently pinch a fold of skin at the cleaned injection site. This helps ensure the medication goes into the fatty tissue and avoids muscle.
- Insert the Needle: Insert the needle straight into the pinched skin fold at a 90-degree angle. The needles designed for Ozempic pens are very thin and short, minimizing discomfort and typically preventing muscle penetration.
- Press and Hold Dose Button: Once the needle is in, press the dose button all the way in and hold it down.
- Watch the Dose Counter and Count: Keep watching the dose counter. It will move down to “0”. Continue to hold the dose button down until the counter shows “0” and then slowly count to 6. This ensures the full dose has been delivered and absorbed. You may hear or feel a click when the dose counter returns to zero.
- Remove the Needle: With the dose button still pressed down, carefully remove the needle straight out of your skin.
Step 7: After Injection Care and Disposal
Proper aftercare is just as important as the injection itself.
- Dispose of Needle Immediately: Immediately after removing the needle, place the used needle into your FDA-cleared sharps disposal container. Never try to recap a used needle, as this is a common cause of accidental needle sticks.
- Store Your Pen: After removing the needle, replace the pen cap on your Ozempic pen. Store it according to the manufacturer’s instructions (typically at room temperature for up to 56 days after first use, or in the refrigerator). We will discuss storage in more detail shortly.
- Mark Your Calendar: Make a note of the date and time of your injection. This helps you maintain your weekly schedule.
Congratulations! You have successfully administered your Ozempic dose. While the first few times might feel a little nerve-wracking, most individuals quickly become comfortable with the process. Remember, our commitment to transparent service means we are always here to support you. If you have any questions or concerns about your injection technique, our unlimited support is just a message or call away.
Ensuring a Full Dose and Troubleshooting Common Issues
Even with careful preparation, situations can arise during or after your injection that might cause concern. Knowing how to identify and address these issues is crucial for maintaining the effectiveness of your treatment.
How to Confirm a Full Dose Has Been Administered
The primary indicator that you have received your complete Ozempic dose is observing the dose counter.
- Dose Counter at Zero: After inserting the needle and pressing the dose button, you must hold the button down until the dose counter visibly returns to “0”. This “0” should align perfectly with the dose pointer on the pen.
- Slow Count to Six: To further ensure the full dose has been delivered and properly absorbed, continue to hold the dose button down and keep the needle in your skin for a slow count of six seconds after the dose counter reaches “0”.
- No Stream of Liquid: When you remove the needle, you should not see a stream of medication coming out of the needle or the injection site.
If these conditions are met, you can be confident that you have administered your full prescribed dose.
Troubleshooting Common Injection Scenarios
Sometimes, things might not go exactly as planned. Here’s what to do if you encounter common issues:
If the Dose Counter Doesn’t Reach “0”
- Possible Cause: A blocked or damaged needle, or incorrect technique.
- Action: If the dose counter did not reach “0” even after holding the button down, you have likely not received your full dose. Do not re-inject with the same needle or attempt to force the medication. Carefully remove the needle, dispose of it properly, attach a new needle, perform a flow check (if it’s a new pen), dial your dose, and attempt the injection again in a new spot. If the issue persists with a new needle, contact your healthcare provider or pharmacy.
If You See Liquid Streaming from the Needle After Removal
- Possible Cause: You may have removed the needle from your skin too soon, before the full dose had time to be delivered or absorbed.
- Action: If you see medication stream out, you may not have received your full dose. Do not re-inject immediately or try to compensate with another injection. Wait until your next scheduled injection day and administer your regular dose then. Attempting an immediate re-injection could lead to an overdose. Monitor for any unusual symptoms and contact your healthcare provider if you are concerned.
If You Can’t Dial Your Full Prescribed Dose
- Possible Cause: There isn’t enough medication left in the current Ozempic pen to deliver your complete dose.
- Action: If the dose selector stops before your prescribed dose appears in the counter, the pen is nearing empty. Do not inject the partial dose. You will need to start a new Ozempic pen for your next scheduled injection. It’s always a good idea to have a backup pen ready, especially as you near the end of a current one.
If the Medication Looks Cloudy or Has Particles
- Possible Cause: The medication may be compromised due to improper storage, exposure to extreme temperatures, or being past its expiration date.
- Action: Do not use the pen. Using compromised medication can be ineffective or potentially harmful. Contact your pharmacy or healthcare provider for a replacement pen and guidance on proper disposal.
These troubleshooting tips are designed to empower you with immediate solutions. However, if you are ever unsure or experience persistent problems, remember that TrimRx offers unlimited support. We are here to provide the guidance and reassurance you need throughout your treatment journey. Our goal is to make your experience as safe and effective as possible, complementing your personalized weight loss program obtained through our free assessment quiz.
Proper Storage of Your Ozempic Pen
Correct storage of your Ozempic pen is essential for maintaining the medication’s potency and ensuring its safety. Improper storage can degrade the medication, rendering it ineffective or potentially harmful.
Before First Use (Unused Pens)
- Refrigeration is Key: New, unused Ozempic pens must be stored in the refrigerator at a temperature between 36°F to 46°F (2°C to 8°C).
- Avoid Freezing: Never freeze Ozempic. If the medication has been frozen, do not use it, even if it has thawed. Freezing can alter the medication’s composition and effectiveness.
- Separate from Freezer Compartment: Ensure pens are not stored near the freezer compartment of your refrigerator, where they might accidentally freeze.
- Expiration Date: Unused pens, when kept continuously refrigerated, can be used until the expiration date printed on the label.
After First Use (Pen in Use)
Once you begin using an Ozempic pen, its storage requirements change slightly:
- Room Temperature or Refrigerated: The pen you are currently using can be stored either at room temperature (between 59°F to 86°F or 15°C to 30°C) or continue to be stored in the refrigerator (36°F to 46°F or 2°C to 8°C). Choose the option that is most convenient for you, as long as it adheres to the temperature guidelines.
- Duration of Use: An Ozempic pen, once opened and in use, must be discarded after 56 days (8 weeks), even if there is still medication left in it. This is to ensure sterility and medication stability. It’s helpful to write the date you first used the pen on the box or on the pen itself to keep track.
- Protection from Elements: Always keep the pen cap on when not in use. Store your pen away from direct heat and sunlight. Do not leave it in a car or other places where it might be exposed to extreme temperatures.
- Keep Out of Reach: As with all medications, keep Ozempic pens out of the reach of children and pets.
Adhering to these storage guidelines is a crucial aspect of responsible medication management, contributing directly to the safety and success of your personalized weight loss program with TrimRx. Our commitment to your well-being extends to providing comprehensive information on all aspects of your treatment.
Beyond the Injection: Holistic Support for Your Weight Loss Journey
While mastering how to set up your Ozempic pen and administer your dose is a vital practical skill, it’s just one component of a successful weight loss journey. At TrimRx, we firmly believe that sustainable weight loss is achieved through a holistic, personalized approach that extends far beyond medication alone. Our brand is built on being empathetic, innovative, trustworthy, supportive, results-oriented, and profoundly personalized. We understand that your journey is unique, and we are dedicated to providing comprehensive support every step of the way.
Managing Common Side Effects of Ozempic
Like all medications, Ozempic can have side effects. The most common ones are gastrointestinal and typically include:
- Nausea: This is often reported, especially when starting the medication or increasing the dose.
- Vomiting
- Diarrhea
- Constipation
- Decreased Appetite and Satiety: While a goal for weight loss, the intensity can sometimes be challenging.
These side effects often improve over time as your body adjusts to the medication. Our supportive care team is available to help you navigate these experiences, offering guidance and strategies to manage discomfort. For instance, eating smaller, more frequent meals, avoiding fatty foods, and staying well-hydrated can often mitigate nausea. We encourage open communication about any side effects that bother you or don’t go away, ensuring your comfort and adherence to the program.
The Role of Nutrition and Lifestyle in Conjunction with Medication
Medication like Ozempic works synergistically with healthy lifestyle choices. It provides a powerful tool to help regulate hunger and blood sugar, but lasting success also depends on nurturing sustainable habits. This is where TrimRx’s comprehensive approach shines.
We believe in empowering you with the knowledge and resources to make informed choices about your nutrition and physical activity. Our personalized weight loss programs don’t just stop at prescribing medication; they integrate a broader understanding of your health. While we don’t provide direct medical supervision, our platform facilitates access to personalized, medically supervised care, ensuring that you receive a holistic plan tailored to your body’s needs and your lifestyle goals.
For those looking for immediate nutritional and wellness support, we offer carefully selected supplements:
- Our GLP-1 Daily Support is designed to complement your body’s natural processes, aiding in digestive health and metabolism support.
- The Weight Loss Boost provides an extra layer of assistance, targeting common challenges in weight management.
These quick-access supplements are available for immediate purchase, providing additional tools to support your overall wellness during your weight loss journey.
Continuous Support and Personalized Care from TrimRx
Our commitment to you is unwavering. From the moment you begin your journey with us by taking our free assessment quiz to determine your eligibility for prescription medications like Ozempic, compounded Semaglutide, Oral Semaglutide, Mounjaro®, Zepbound®, Wegovy®, Compounded Tirzepatide, or Oral Tirzepatide, we are dedicated to your success.
Our comprehensive service includes doctor consultations, necessary lab work, the medication itself (shipped from FDA-registered and inspected pharmacies), unlimited support, and transparent shipping—all with no hidden fees. We partner with FDA-registered and inspected pharmacies to ensure that your medication is delivered safely and reliably.
We understand that questions and challenges may arise, and our empathetic and supportive team is always ready to provide answers and guidance. Our platform is designed to make sustainable weight loss attainable and tailored to you, emphasizing science, empathy, and transparency. By providing robust support, we ensure that you are not alone in this journey. We are here to help you understand every aspect of your treatment, reinforce healthy habits, and celebrate your milestones towards a healthier, more vibrant life.
Conclusion
Embarking on a weight loss journey with medications like Ozempic represents a significant step towards improved health and well-being. By thoroughly understanding how to set up your Ozempic pen, perform precise injections, manage potential issues, and store your medication correctly, you gain invaluable confidence and control over your treatment. This detailed guide has provided you with the foundational knowledge to integrate Ozempic safely and effectively into your weekly routine, transforming what might initially seem complex into a manageable, empowering practice.
At TrimRx, our core philosophy centers on empowering individuals through personalized, medically supervised care that is both innovative and deeply empathetic. We merge cutting-edge telehealth with proven weight loss solutions, creating a supportive and transparent environment where your unique needs are always prioritized. Our journey began with a vision to make sustainable weight loss attainable for everyone, built on the pillars of science, empathy, and transparent processes. We partner with FDA-registered and inspected pharmacies to ensure the highest standards for your medication delivery, providing peace of mind as you focus on your health.
Remember, effective weight management is a holistic endeavor. While medications like Ozempic are powerful tools, they are most impactful when combined with a supportive framework that addresses your overall well-being. This includes understanding and managing potential side effects, adopting sustainable nutritional habits, and benefiting from continuous guidance. Our comprehensive service ensures you receive doctor consultations, necessary lab work, medication, unlimited support, and straightforward shipping—all designed to seamlessly integrate into your life.
We encourage you to embrace this journey with confidence, knowing that you are not alone. Our commitment is to provide trustworthy, results-oriented care that celebrates every step of your progress. If you’re ready to explore how a personalized, medically supervised weight loss program can transform your life, we invite you to take our free assessment quiz. This is the first step towards a tailored plan that could include prescription medications such as Ozempic, compounded Semaglutide, Oral Semaglutide, Mounjaro®, Zepbound®, Wegovy®, Compounded Tirzepatide, or Oral Tirzepatide. For immediate support for your overall wellness, consider our GLP-1 Daily Support or Weight Loss Boost. Let us be your partner in achieving lasting health and vitality.
FAQ
Q1: How do I know if I’ve injected my full Ozempic dose?
A1: To confirm you’ve administered your full dose, ensure the dose counter on your Ozempic pen returns completely to “0” after pressing the injection button. Additionally, after the counter reaches zero, keep the needle in your skin and the button pressed for a slow count of six seconds. This allows sufficient time for the medication to be fully delivered and absorbed. You should not see any liquid streaming from the needle when you remove it. If the counter does not reach zero, or if you see medication leak, you may not have received your full dose, and you should not attempt to re-inject. Instead, wait for your next scheduled dose and contact your healthcare provider or TrimRx support for guidance.
Q2: What should I do if my Ozempic pen medication looks cloudy or discolored?
A2: If the liquid in your Ozempic pen appears cloudy, discolored, or contains any particles, do not use the pen. Ozempic solution should be clear and colorless. Such changes can indicate that the medication has been compromised, potentially affecting its safety and effectiveness. Immediately dispose of the pen in a sharps container if it has been opened, or return it to your pharmacy if it is still sealed. Then, contact your pharmacy or healthcare provider for a replacement and further instructions.
Q3: Why is it important to rotate injection sites each week?
A3: Rotating your injection sites (abdomen, thigh, or upper arm) each week is crucial to prevent a condition called lipohypertrophy, which causes fatty lumps or thickened tissue under the skin. Injecting repeatedly into the same spot can lead to these lumps, which can affect how consistently and effectively the Ozempic medication is absorbed into your body. By rotating sites, you help maintain healthy tissue, ensure consistent medication absorption, and minimize discomfort. Keeping a simple log or mental note of your previous injection sites can aid in effective rotation.
Q4: How long can an opened Ozempic pen be stored, and at what temperature?
A4: Once you begin using an Ozempic pen (after its first injection), it can be stored for a maximum of 56 days (8 weeks). This applies even if there is still medication left in the pen. During these 56 days, the pen can be stored either at room temperature (between 59°F to 86°F or 15°C to 30°C) or in the refrigerator (between 36°F to 46°F or 2°C to 8°C). Always ensure the pen is kept away from direct heat, sunlight, and extreme temperatures, and never allow it to freeze. Unused pens, however, must always be stored in the refrigerator until their first use.
Transforming Lives, One Step at a Time
Keep reading
Ozempic and Bloating: Why It Happens and How to Reduce It
Bloating is one of the most consistently reported GI side effects of Ozempic, and it’s one that tends to linger longer than nausea for…

Ozempic and Muscle Cramps: Causes and Solutions
Muscle cramps don’t get as much attention as nausea or fatigue in conversations about Ozempic side effects, but they’re a real and often frustrating…

Ozempic and Dizziness: Causes and When to Call Your Doctor
Dizziness is one of those Ozempic side effects that tends to catch people off guard. Unlike nausea, which most patients expect going in, dizziness…

