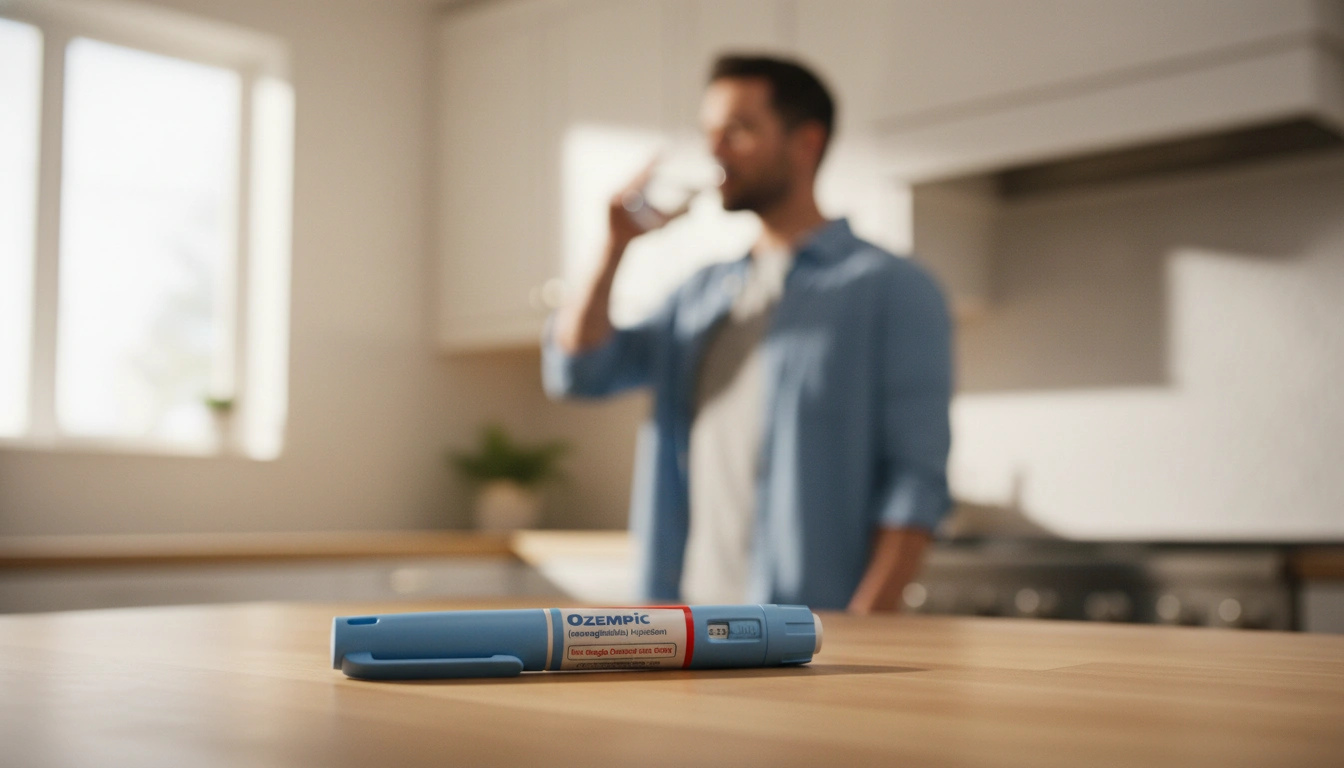
Navigating Your Path to Wellness: A Detailed Guide on How to Test Your Ozempic® Pen
Embarking on a new health journey, especially one that involves medication, can often feel like navigating unfamiliar territory. The initial steps, particularly concerning proper medication use, are foundational for both safety and effectiveness. Many individuals find themselves seeking clarity on the specifics of their treatment, from understanding dosages to ensuring their tools are functioning correctly. This quest for precise information is entirely natural, reflecting a commitment to one’s well-being.
At TrimRx, we understand these concerns deeply. Our journey began with a shared vision to help individuals embrace healthier lifestyles by merging cutting-edge telehealth innovations with effective weight loss solutions. We believe that sustainable weight loss should be achieved through science, empathy, and a transparent approach. This dedication extends to ensuring you feel confident and informed about every aspect of your personalized plan, especially when it involves medications like Ozempic®. This powerful FDA-approved medication, prescribed for type 2 diabetes and often utilized as part of a comprehensive weight management strategy, requires careful handling and understanding to yield its full benefits.
This comprehensive guide is designed to empower you with the knowledge needed to confidently use your Ozempic® pen. We will walk you through each critical step, from initial preparation and essential safety checks to accurate dosing and proper storage. Our aim is to demystify the process, addressing common questions and providing clarity on crucial procedures like how to test your Ozempic® pen. By the end of this post, you will have a thorough understanding of your pen’s functionality, ensuring you are well-equipped to integrate it seamlessly into your personalized health routine. We will cover everything from performing the vital one-time flow check to understanding the pen’s unique “overfill” design, ensuring your journey with Ozempic® is as safe and effective as possible.
Understanding Your Ozempic® Pen: A Foundation for Safe Use
Ozempic® (semaglutide) is an injectable medication primarily approved by the FDA for improving blood sugar control in adults with type 2 diabetes. It is also a valuable tool that healthcare providers may prescribe to support weight management, when appropriate. Understanding how to use the pen correctly is paramount, not just for the medication’s efficacy but also for your safety. Each Ozempic® pen is a precisely engineered device, designed to deliver accurate doses, and familiarizing yourself with its features is the first step toward confident self-administration.
Our commitment at TrimRx is to provide personalized, medically supervised care. This means guiding you through every aspect of your weight loss journey, including clear instructions and ongoing support for any prescribed medications. Our comprehensive service includes essential doctor consultations, necessary lab work, and unlimited support to ensure you feel informed and empowered at every turn.
Key Components of the Ozempic® Pen
Before we delve into the step-by-step process of preparation and administration, let’s briefly review the key parts of your Ozempic® pen:
- Pen Cap: Protects the pen and needle.
- Pen Label: Contains vital information about the medication, dosage, and expiration date.
- Viewing Window: Allows you to visually inspect the medication inside the pen.
- Dose Counter: Displays the dose you are selecting and confirms the amount injected.
- Dose Selector: Used to dial the correct prescribed dose.
- Dose Button: Pressed to deliver the medication.
- Needle Attachment Area: Where the disposable needle is securely fastened.
Each of these components plays a crucial role in ensuring a safe and accurate injection.
The Crucial First Steps: Preparing Your New Ozempic® Pen
Proper preparation is the cornerstone of safe and effective medication administration. When you receive a new Ozempic® pen, there are several vital checks and steps to perform before your first injection. These steps are designed to prevent errors and ensure the medication is ready for use.
Visual Inspection: Verifying Your Medication
Before you do anything else, take a moment to perform a thorough visual inspection of your new pen:
- Check the Label: Always confirm that the label on your Ozempic® pen precisely matches the medicine and dosage your healthcare provider has prescribed. This simple verification step helps prevent medication errors.
- Inspect the Liquid: Look at the viewing window. The liquid inside the pen should be clear and colorless. It should not appear cloudy, discolored, or contain any visible particles. If you notice any of these abnormalities, do not use the pen. Instead, safely dispose of it and use a new one. This clarity check is fundamental to ensuring the medication’s integrity.
Attaching a New Needle: A Critical Safety Measure
Using a new, sterile needle for every injection is not just a recommendation; it is a critical safety measure. Reusing needles or sharing pens can lead to serious risks, including contamination, infection, medication leakage, and blocked needles, which can prevent you from receiving your full dose. Our commitment to your safety means emphasizing these practices.
Here’s how to attach a new needle:
- Remove Paper Tab: Take a new disposable needle and carefully peel off the protective paper tab.
- Push and Turn: Push the needle straight onto the pen and turn it until it is on tight. A secure fit is essential to prevent leakage.
- Remove Caps: Gently pull off the outer needle cap, then the inner needle cap. Be careful not to bend or damage the needle. Dispose of the inner cap immediately.
Remember, needles should never be shared with others, even if they appear clean or if the needle has been changed. This practice significantly increases the risk of spreading infections.
Verifying Medication Flow: The One-Time Flow Check
Once your needle is securely attached, if you are using a brand new pen for the very first time, a crucial step is to perform a one-time “flow check.” This is how to test your Ozempic® pen’s ability to dispense medication. This procedure serves two important purposes: it helps to remove any air bubbles from the needle and confirms that the medication can flow correctly through it. This check is only necessary before the first injection from each new pen, not before every subsequent dose.
Step-by-Step Flow Check Instructions: How to Test Your Ozempic® Pen
To perform the flow check:
- Turn to Flow Check Symbol: Turn the dose selector until the dose counter shows the flow check symbol (usually two dots). For some pens, this might be a specific small dose (e.g., 0.25 mg or 0.5 mg) depending on the pen’s design; always refer to the specific instructions provided with your pen for the correct symbol or initial dose for the flow check.
- Press and Hold Dose Button: Hold the pen with the needle pointing upwards. Press and hold the dose button until the dose counter shows “0” and aligns with the dose pointer.
- Observe for a Drop: As you hold the button, a drop of Ozempic® should appear at the needle tip. This indicates that the medication is flowing correctly.
Troubleshooting the Flow Check
What should you do if no drop appears at the needle tip?
- Repeat the Check: You can repeat the flow check up to six times with the same needle.
- Change the Needle: If, after repeating, there is still no drop, remove the current needle, attach a new needle, and repeat the flow check one more time.
- Do Not Use the Pen: If a drop of Ozempic® still does not appear after changing the needle and repeating the flow check, do not use that pen. It’s crucial to contact the manufacturer or your healthcare provider, as the pen may be faulty. TrimRx emphasizes reaching out to your medical team for any concerns regarding your medication or device.
This flow check is a vital safety measure, confirming your pen is ready to deliver an accurate dose.
Accurate Dosing: Selecting Your Prescribed Amount
After successfully performing the flow check (for a new pen) or simply attaching a new needle (for subsequent injections from the same pen), the next step is to accurately select your prescribed dose. This is done using the dose selector and observing the dose counter.
Dialing Your Dose
- Turn the Dose Selector: Turn the dose selector until the exact dose prescribed by your doctor appears in the dose counter. For example, if your doctor prescribed 0.5 mg, turn the selector until “0.5” is displayed.
- Confirm the Dose: Double-check that the number in the dose counter precisely matches your prescribed dose.
It’s helpful to know that Ozempic® pens come in different dose strengths, often indicated by specific color codes and labels:
- Red Label: Typically for pens delivering 0.25 mg or 0.5 mg doses. These pens contain a total of 2 mg of medication.
- Blue Label: For pens delivering 1 mg doses. These pens contain 4 mg of medication.
- Yellow Label: For pens delivering 2 mg doses. These pens contain 8 mg of medication.
Your healthcare provider will always prescribe the appropriate pen size and dose for your individual needs. If you are exploring options for prescription weight loss medication, we invite you to [take our free assessment quiz] to see if you qualify for a personalized treatment plan, which may include options like Ozempic®, Compounded Semaglutide, Oral Semaglutide, Compounded Tirzepatide, Oral Tirzepatide, Mounjaro®, Zepbound®, or Wegovy®.
What if There Isn’t Enough for a Full Dose?
A common question arises when an Ozempic® pen approaches empty: “What if there isn’t enough medication left for my full prescribed dose?”
The dose counter is your definitive guide here. If you turn the dose selector to your prescribed dose (e.g., 1 mg), but the dose counter stops before reaching that full number (e.g., it only shows 0.75 mg), it means there isn’t enough medication left in that pen for a complete dose.
In such a situation, do not attempt to inject a partial dose or combine leftover liquid from multiple pens. This can lead to inaccurate dosing and compromise the effectiveness of your treatment. The correct procedure is to:
- Use a New Pen: Dispose of the nearly empty pen safely and use a new, full Ozempic® pen to administer your complete prescribed dose.
- Never “Stretch” a Pen: It’s crucial to understand that Ozempic® pens are designed to deliver a precise number of full doses. Trying to extract or combine partial amounts can result in either under-dosing or over-dosing, both of which can be detrimental to your health.
Our patient-focused approach at TrimRx emphasizes precise and safe medication use, always aligned with medical guidance.
Administering Your Dose: The Injection Process
Once your pen is prepped, the needle is attached, the flow check is complete (if it’s a new pen), and your dose is selected, it’s time for the injection. This process is straightforward, but careful attention to technique ensures proper medication delivery.
Choosing and Rotating Injection Sites
Ozempic® is administered as a subcutaneous injection, meaning it goes just under the skin. The recommended injection sites are:
- Abdomen: At least two inches away from your belly button.
- Thigh: The front of your thigh.
- Upper Arm: The outer area of your upper arm.
It is vital to change (rotate) your injection site with each injection. While you can use the same general area (e.g., your abdomen), always choose a different spot within that area for each dose. This practice helps prevent skin irritation, bruising, and the development of thickened skin (lipohypertrophy), which can affect medication absorption.
Injection Technique
- Clean the Site: Before injecting, wipe the chosen skin area with an alcohol swab and allow it to air dry. This helps reduce the risk of infection.
- Insert the Needle: Gently pinch a fold of skin at your chosen site. Insert the needle straight into the pinched skin. Remember, Ozempic® should be injected under the skin, not into a vein or muscle. The needles are very fine, often making the process less intimidating than anticipated.
- Inject the Dose: Once the needle is in place, press and hold the dose button firmly. Keep your thumb on the dose button until the dose counter shows “0.”
- Count Slowly: After the dose counter returns to “0,” keep the needle in your skin and continue to hold the dose button down. Slowly count to six (1-2-3-4-5-6). This ensures that the entire dose has been delivered and prevents medication leakage when the needle is withdrawn.
- Remove the Needle: Carefully remove the needle straight out of your skin. Do not recap the needle at this point.
If you ever have questions or need a refresher on injection technique, remember that TrimRx provides unlimited support. Our compassionate care respects every individual’s unique journey, combining advanced medical science with modern technology to ensure you have the resources you need.
Post-Injection Care and Safe Disposal
Proper disposal of used needles and pens is just as important as correct administration for safety and environmental reasons.
Needle Removal and Disposal
After injecting and removing the needle from your skin:
- Do NOT Recap the Needle: Attempting to recap the needle can lead to accidental needle sticks, posing a risk of injury and infection.
- Immediate Disposal: Immediately dispose of the used needle into an appropriate sharps disposal container.
Sharps Disposal
Used needles and empty Ozempic® pens must be disposed of in an FDA-cleared sharps disposal container. If you don’t have a sharps container, a heavy-duty plastic household container with a tight-fitting, puncture-resistant lid (like a laundry detergent bottle) can be used as a temporary measure.
- Seal and Label: Once your sharps container is about three-quarters full, securely seal it and label it clearly.
- Proper Disposal Methods: Do not throw sharps containers in household trash or recycling. Check with your local waste management services for guidelines on how to dispose of full sharps containers in your community.
The Ozempic® pen itself, even if it contains a small amount of leftover medication, should also be disposed of in a sharps container once it’s empty or after it has been in use for 8 weeks, whichever comes first.
Beyond the Injection: Storage and Longevity
The effectiveness of Ozempic® also depends on proper storage, ensuring the medication remains stable and potent.
Storage for New, Unused Pens
New, unused Ozempic® pens should be stored in the refrigerator at a temperature between 36°F and 46°F (2°C to 8°C). When stored correctly, these pens can be used until the expiration date printed on the label.
Storage for Pens in Use
Once you start using an Ozempic® pen, its storage guidelines change:
- Duration: A pen in use can be stored for up to 8 weeks. After 8 weeks, it must be discarded, even if there is still medication left inside.
- Temperature: During these 8 weeks, the pen can be stored either at controlled room temperature, between 59°F to 86°F (15°C to 30°C), or in a refrigerator at 36°F to 46°F (2°C to 8°C). Keep it away from direct heat and light.
Critical Warnings for All Pens
- Do Not Freeze: Never freeze Ozempic®. If the medication has been frozen, do not use it, as freezing can damage the medication’s integrity.
- Keep Out of Reach: Always keep Ozempic® and all other medicines out of the reach of children and pets.
Adhering to these storage guidelines is crucial for maintaining the medication’s quality and ensuring its safe and effective use throughout your treatment.
Understanding “Overfill”: Why Your Pen Might Look Full
A common source of confusion for users of Ozempic® pens is the phenomenon of “overfill.” Many individuals notice that their pen still appears to contain liquid, even after they have administered all the prescribed doses and the dose counter confirms it’s empty. This observation often leads to questions about how to test your Ozempic® pen to see if it’s truly empty or if there’s usable medication remaining.
The simple answer is that this visible “leftover” liquid is an intentional part of the pen’s design, known as overfill.
The Purpose of Overfill
Manufacturers include overfill in injection pens for several important reasons:
- Ensuring Full Doses: The primary purpose of overfill is to guarantee that you receive every single one of your prescribed full doses accurately. The pen mechanism, including the internal plunger and cartridge design, might retain a small amount of liquid that cannot be fully expelled with each dose. The overfill ensures that even with this retention, there is always enough medication to complete the exact number of intended full doses.
- Clearing Air Bubbles: During the manufacturing and initial priming (flow check) process, a small amount of liquid is used to clear any air bubbles from the pen, ensuring an even flow. The overfill accounts for this.
- Manufacturing Tolerance: Slight variations in the filling process or pen mechanics are compensated for by the overfill, ensuring consistency across all pens.
The Dose Counter Is Your True Guide
It’s critical to understand that the visual appearance of liquid in the viewing window after the pen is “empty” (as indicated by the dose counter stopping before a full dose can be selected) does not mean there is usable medication remaining for another full dose.
- Rely on the Dose Counter: The dose counter on your Ozempic® pen is the only reliable indicator of how much medication is available for injection. If the dose counter stops before your prescribed dose, the pen is functionally empty, regardless of what you see in the viewing window.
- Do Not Attempt to Extract: Never try to draw out this overfill liquid with a syringe or attempt to combine it with other pens. Doing so can lead to inaccurate dosing, potential contamination, and is not recommended by healthcare professionals. The manufacturer has designed the pen to deliver the precise number of safe, accurate doses, and the overfill is not meant for use.
By understanding the concept of overfill, you can confidently dispose of your Ozempic® pen when the dose counter signals its emptiness, trusting that you have received all your prescribed medication. This transparency in service is something we deeply value at TrimRx, ensuring our approach remains consistent and clear, from medication management to your overall personalized plan.
Ensuring Continuous Support for Your Weight Loss Journey
Navigating the intricacies of medication use, like understanding how to test your Ozempic® pen, is just one aspect of a successful weight loss journey. At TrimRx, we recognize that sustainable weight loss is a multifaceted endeavor, requiring personalized care, expert guidance, and continuous support. Our platform is a user-friendly and supportive space where individuals receive personalized, medically supervised care—all designed to make sustainable weight loss attainable and tailored to the individual.
We are dedicated to providing safe, effective weight loss solutions, encompassing a range of options to suit diverse needs. For those who may qualify, we offer prescription medications that have shown significant promise in aiding weight management. These include:
- Compounded Semaglutide
- Oral Semaglutide
- Ozempic®
- Compounded Tirzepatide
- Oral Tirzepatide
- Mounjaro®
- Zepbound®
- Wegovy®
It’s important to reiterate that while branded medications like Ozempic®, Mounjaro®, Zepbound®, and Wegovy® are FDA-approved, compounded medications are not FDA-approved. However, all our prescription medications are provided through FDA-registered and inspected pharmacies, ensuring adherence to rigorous safety and quality standards. Our transparent approach means you’ll always know you’re receiving medication from trusted sources.
To explore if these personalized prescription solutions are right for you, we encourage you to [take our free assessment quiz]. This quiz is designed to help us understand your unique health profile and determine your eligibility, paving the way for a customized treatment plan developed in consultation with our medical professionals. Our comprehensive service includes not only the medication but also doctor consultations, essential lab work, unlimited support, and convenient shipping, all with no hidden fees.
Beyond prescription options, we also offer immediate support supplements designed to complement your wellness journey and can be purchased without a quiz:
- GLP-1 Daily Support: For those looking for immediate wellness support, our [GLP-1 Daily Support] supplement can be a valuable addition.
- Weight Loss Boost: To further enhance your journey, consider our [Weight Loss Boost] supplement, formulated to assist your efforts without delay.
These quick-access supplements are crafted to provide additional assistance as you work towards your health goals.
The TrimRx Difference: Partnering in Your Health
At TrimRx, our brand personality is deeply rooted in empathy, innovation, trustworthiness, support, results-orientation, and personalization. We combine advanced medical science with modern technology to deliver compassionate care that respects every individual’s unique journey. We believe that sustainable weight loss is not just about numbers on a scale; it’s about fostering healthier lifestyles through informed choices and unwavering support.
Our commitment to transparency ensures that you understand every aspect of your program, including how medications are sourced and the consistency of our approach, regardless of dosage changes. We are your partners in health, providing the tools, knowledge, and encouragement you need to achieve lasting results and embrace a healthier, more vibrant life.
Conclusion
Understanding how to test your Ozempic® pen, along with proper usage and storage, is an essential part of a safe and effective weight loss journey. By following the steps outlined in this guide – from careful preparation and the crucial one-time flow check to accurate dose selection, correct injection technique, and responsible disposal – you can confidently manage your medication. Remember that the dose counter is your definitive guide to knowing when your pen is truly empty, not the visible “overfill” liquid.
At TrimRx, we are committed to empowering you with knowledge and providing a supportive, medically supervised path to sustainable weight loss. We believe that clarity and comprehensive care are key to achieving your health aspirations. Whether you are considering prescription weight loss medications like Ozempic® or seeking immediate support through our specialized supplements, we are here to guide you every step of the way.
Your journey towards a healthier lifestyle is a partnership, and we are honored to be a part of it. If you’re ready to explore personalized, clinically proven solutions tailored to your unique needs, we invite you to [take our free assessment quiz] today. For immediate wellness support, explore our [GLP-1 Daily Support] and [Weight Loss Boost] supplements. Together, let’s embrace a future where safe, effective, and sustainable weight loss is within your reach.
Frequently Asked Questions
How do I know if my Ozempic® pen is truly empty?
The most reliable way to determine if your Ozempic® pen is empty is by checking the dose counter. If you try to dial your prescribed dose, and the dose counter stops before reaching that full number (e.g., it only shows 0.75 mg when you need 1 mg), then the pen does not contain enough medication for a complete dose and should be considered empty. The visual appearance of liquid in the viewing window after this point is simply “overfill” and not usable medication.
Why does my Ozempic® pen still look full even after I’ve used all my doses?
Your Ozempic® pen may appear to have liquid remaining even after all full doses have been administered due to a built-in “overfill.” This is an intentional design feature by the manufacturer to ensure you receive every complete dose accurately, accounting for factors like air bubbles and internal pen mechanisms. The liquid you see is not meant to be used.
How often do I need to perform the flow check on my Ozempic® pen?
The flow check, which verifies that medication can flow through the needle and clears air bubbles, is a one-time procedure. You only need to perform it before your very first injection with each new Ozempic® pen. It is not necessary to perform the flow check before every subsequent injection from the same pen.
Can I reuse needles or share my Ozempic® pen with someone else?
No, for safety and hygiene reasons, you must never reuse needles or share your Ozempic® pen with other people, even if the needle has been changed. Reusing needles increases the risk of infection, needle blockage, and inaccurate dosing. Sharing pens or needles can transmit serious infections and bloodborne pathogens. Always use a new, sterile needle for each injection and dispose of it properly after use.
Transforming Lives, One Step at a Time
Keep reading
Ozempic and Bloating: Why It Happens and How to Reduce It
Bloating is one of the most consistently reported GI side effects of Ozempic, and it’s one that tends to linger longer than nausea for…

Ozempic and Muscle Cramps: Causes and Solutions
Muscle cramps don’t get as much attention as nausea or fatigue in conversations about Ozempic side effects, but they’re a real and often frustrating…

Ozempic and Dizziness: Causes and When to Call Your Doctor
Dizziness is one of those Ozempic side effects that tends to catch people off guard. Unlike nausea, which most patients expect going in, dizziness…

