The Best Injection Sites for Ozempic for Comfort and Results
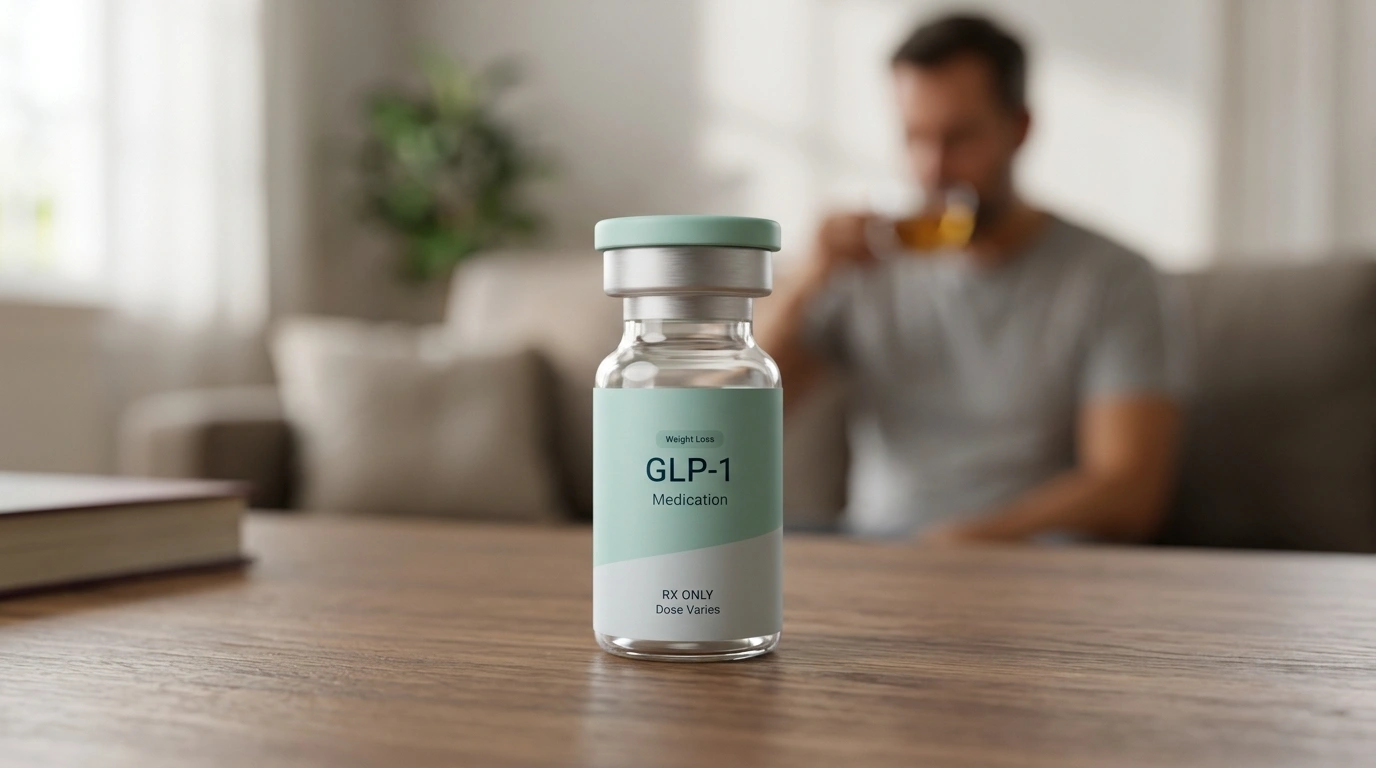
Table of Contents
- Introduction
- Understanding Subcutaneous Injections
- Recommended Injection Sites for Ozempic
- Why Rotating Injection Sites Matters
- Can the Injection Site Affect Side Effects?
- Step-by-Step Guide to Your Weekly Injection
- Managing Common Injection Site Reactions
- Tips for a More Comfortable Experience
- Personalizing Your Weight Loss Journey with TrimRx
- Conclusion
- FAQ
Introduction
Taking the first step toward a healthier version of yourself often involves navigating new territory, and for many, that includes the transition to injectable medication. If you have been prescribed Ozempic® (semaglutide) or a similar GLP-1 receptor agonist—a class of drugs that mimics a natural hormone to regulate appetite and blood sugar—the prospect of self-injection can feel overwhelming. You might find yourself staring at the pen, wondering exactly where it should go to ensure it works effectively while minimizing discomfort.
At TrimRx, we believe that clarity is the foundation of confidence in any weight loss journey. Knowing the correct injection sites for ozempic and how to manage your weekly routine can transform a moment of anxiety into a simple, stress-free habit. If you are still deciding whether prescription GLP-1 treatment is a fit for you, you can complete the free assessment quiz to take the next step.
This article will cover the recommended areas for injection, the importance of site rotation, and practical tips for managing potential side effects to help you stay consistent with your personalized program. For a broader overview of how GLP-1 injections work, see our guide on GLP-1 injections explained.
Understanding Subcutaneous Injections
Before diving into specific locations, it is helpful to understand the type of injection required for GLP-1 medications. Ozempic® is administered as a subcutaneous injection. This means the medication is delivered into the fatty tissue layer located just beneath the skin but above the muscle.
The human body absorbs medication differently depending on where it is placed. Subcutaneous tissue has fewer blood vessels than muscle, which allows the medication to be absorbed slowly and steadily over the course of a week. This slow release is essential for maintaining consistent levels of semaglutide in your system, which helps manage hunger signals and blood sugar throughout the day and night. Because the needles used for these pens are very short and thin, they are specifically designed to reach this fatty layer without hitting the muscle, making the process much less painful than many people anticipate.
If you are comparing treatment options and trying to understand the practical side of GLP-1 care, our article on where to get GLP-1 is a useful next read.
Recommended Injection Sites for Ozempic
There are three primary areas of the body recommended for subcutaneous injections. These areas are chosen because they typically have a sufficient layer of fat and are easily accessible for self-administration.
The Abdomen (Stomach Area)
The abdomen is perhaps the most common site for GLP-1 injections because it is easy to see and reach. When using the stomach, you should aim for the area at least two inches away from your belly button (navel). You can inject anywhere in the lower or upper quadrants of the abdomen, provided you stay within the fatty area.
Many people prefer the abdomen because it offers a large surface area, making it easier to find a fresh spot each week. However, if you have any scarring or skin irritation in this area, you should avoid those specific spots. The skin on the abdomen is generally soft, which can make the needle insertion feel almost unnoticeable for most individuals.
The Front of the Thigh
The front of the thighs is another excellent option, especially for those who may feel squeamish about injecting into the stomach. The target area is the front and outer part of the thigh, midway between the knee and the hip. This area is usually firm and easy to stabilize during the injection.
When injecting into the thigh, ensure you are sitting or standing comfortably so the muscle is relaxed. Injecting into a tensed muscle can increase discomfort, so finding a posture that allows the leg to rest is key. The thigh is often cited by individuals who experience certain side effects as a preferred alternative to the abdomen.
The Outer Upper Arm
The back or outer part of the upper arm is the third recommended site. This area can be slightly more challenging for self-injection because it requires a bit of reaching or the assistance of a partner or caregiver. To find the correct spot, look for the fleshier part of the back of the arm, roughly halfway between the shoulder and the elbow.
Because of the angle required, the upper arm is frequently used by those who have been on the medication for a while and have become comfortable with the mechanics of the pen. If you are just starting your journey, you may find the abdomen or thigh more manageable until you gain confidence in your technique.
Key Takeaway: The three approved sites—abdomen, thigh, and upper arm—are equally effective for medication absorption, but personal comfort and ease of access should guide your choice.
Why Rotating Injection Sites Matters
One of the most important aspects of your weekly routine is site rotation. This means you should not use the exact same spot for every injection. If you prefer the abdomen, you can still rotate by moving the injection site at least one inch away from the spot you used the previous week.
Failure to rotate sites can lead to a condition called lipohypertrophy. This is a localized buildup of fat or hardened tissue under the skin caused by repeated trauma and the effects of insulin-like growth factors in certain medications. If you inject into a site with lipohypertrophy, the medication may not be absorbed correctly, leading to fluctuating blood sugar levels or reduced effectiveness in appetite suppression.
A simple way to manage this is the “clock method.” If you are injecting into your abdomen, imagine a clock face centered on your navel. On week one, inject at the 12 o’clock position. On week two, move to 3 o’clock, and so on. This ensures that each area has several weeks to fully heal and recover before it is used again.
Can the Injection Site Affect Side Effects?
A common question among those starting GLP-1 therapy is whether the injection site influences the severity of side effects, particularly nausea and vomiting. While clinical studies from the manufacturers generally state that the three sites are pharmacologically equivalent—meaning the drug reaches your bloodstream in similar amounts regardless of the site—many patients report a different lived experience.
Anecdotal evidence from a significant number of individuals suggests that injecting in the thigh may lead to fewer or less intense gastrointestinal side effects compared to the abdomen. The theory behind this is that absorption may be slightly slower in the thigh, leading to a more gradual rise in the medication’s concentration in the blood. If you want a deeper look at common reactions and how to handle them, read our guide to common GLP-1 side effects.
If you find that you are struggling with significant nausea after injecting in the stomach, it is a reasonable strategy to try the thigh for your next dose. Always discuss these adjustments with your healthcare provider, but changing locations within the approved sites is a common and safe practice to improve your comfort.
Bottom line: While the effectiveness remains consistent across all sites, the thigh may be a better option for individuals sensitive to the gastrointestinal side effects often associated with GLP-1 medications.
Step-by-Step Guide to Your Weekly Injection
Success with your medication starts with a consistent and sanitary process. Following a set routine helps ensure you receive the full dose and reduces the risk of skin infections.
Step 1: Preparation and Inspection.
Wash your hands thoroughly with soap and water. Check the medication in the pen; it should be clear and colorless. If it looks cloudy, contains particles, or has changed color, do not use it. Check the expiration date on the label to ensure it is still valid.
Step 2: Attach the Needle.
Take a new, sterile needle and remove the paper tab. Push the needle straight onto the pen and turn it until it is tight. Pull off the outer needle cap and the inner needle cap. Save the outer cap for later disposal, but the inner cap can be discarded.
Step 3: Prime the Pen (If Necessary).
If it is a new pen, you may need to check the flow. Turn the dose selector to the flow check symbol. Hold the pen with the needle pointing up and press the dose button until a drop of medication appears at the needle tip. This ensures the pen is working and any air bubbles are removed.
Step 4: Select Your Dose.
Turn the dose selector until the counter shows the dose prescribed by your provider (e.g., 0.25 mg, 0.5 mg, or 1.0 mg). Ensure the window clearly displays the correct number before proceeding.
Step 5: Clean the Site.
Use an alcohol swab to clean the chosen injection site on your abdomen, thigh, or upper arm. Allow the skin to air dry completely. This prevents a stinging sensation when the needle enters the skin.
Step 6: Inject the Medication.
Insert the needle into your skin. Press and hold down the dose button. You will see the dose counter return to zero. After the counter hits zero, hold the needle in the skin for at least six seconds. This ensures that the full volume of the medication has been delivered.
Step 7: Remove and Dispose.
Pull the needle out of your skin. Carefully place the outer needle cap back onto the needle and unscrew it from the pen. Dispose of the used needle in a puncture-resistant sharps container. Never store the pen with the needle attached, as this can lead to contamination or medication leakage.
Managing Common Injection Site Reactions
It is not uncommon to experience a mild reaction at the spot where you injected. Most of these are temporary and do not require stopping the medication, but knowing what to look for can provide peace of mind.
- Redness or Itching: Some people experience a small red bump or slight itching immediately after injection. This is often a localized reaction to the needle or the preservative in the medication. A cold compress can help soothe the area.
- Bruising: If the needle hits a tiny blood vessel, you may notice a small bruise. This is harmless and will fade like any other bruise. To minimize bruising, avoid rubbing the site immediately after injecting.
- Minor Bleeding: A tiny drop of blood at the site is normal. Simply press a clean cotton ball or gauze pad against the spot for a few seconds.
Important: If you experience signs of a severe allergic reaction, such as a widespread rash, swelling of the face or throat, or difficulty breathing, seek emergency medical attention immediately.
While minor reactions are normal, you should contact your healthcare provider if a site reaction becomes increasingly painful, feels hot to the touch, or shows signs of infection like pus or spreading redness.
Tips for a More Comfortable Experience
If you are nervous about the sensation of the injection, there are several ways to make the experience more comfortable.
- Temperature Matters: Injecting cold medication can sometimes cause a stinging sensation. You can take your pen out of the refrigerator about 15 to 30 minutes before your injection to let it reach room temperature. However, ensure the pen is not exposed to direct sunlight or extreme heat.
- Relax the Muscle: As mentioned earlier, injecting into a tensed muscle can be more painful. If you are using your thigh, sit down and let your leg go limp. If you are using your abdomen, take a deep breath and exhale as you insert the needle to help your body relax.
- Vary the Depth: You do not need to press the pen forcefully into your skin. A firm but gentle pressure is enough to ensure the needle enters the subcutaneous layer.
- Consistency is Key: Try to perform your injection on the same day each week. This helps maintain steady levels of the medication in your body and makes it easier to remember your site rotation schedule.
Personalizing Your Weight Loss Journey with TrimRx
At TrimRx, we recognize that a successful weight loss journey is about more than just a weekly injection. It is about having a dedicated team to support you through every stage of the process, from the initial consultation to reaching your long-term health goals. Our platform connects you with licensed healthcare providers who specialize in metabolic health and can help determine the most appropriate treatment for your specific needs.
If reduced appetite makes it harder to meet your nutritional needs, our GLP-1 Daily Support supplement is designed to provide additional support alongside treatment. Our approach is telehealth-first, meaning you get the medical supervision and support you need without the inconvenience of waiting rooms or in-person visits.
For days when fatigue or low energy gets in the way of your routine, the Weight Loss Boost supplement can offer extra support during your weight loss journey. By combining clinical expertise with a focus on your personal health profile, we help you navigate the complexities of modern weight loss treatments with clarity and ease.
Myth: You must inject Ozempic® in the stomach for it to work.
Fact: The thigh and upper arm are equally effective sites for medication absorption and are approved by clinical guidelines.
Conclusion
Mastering the use of your medication is a vital part of your transformation. By understanding the correct injection sites for ozempic—the abdomen, thigh, and upper arm—and committing to a regular rotation schedule, you can ensure that your treatment is as comfortable and effective as possible. While the process may seem daunting at first, it quickly becomes a routine part of a healthier lifestyle.
Remember that every individual’s body responds differently. If you experience side effects or have concerns about your injection technique, your healthcare provider is your best resource for personalized guidance. We are here to provide the science-backed support and resources necessary for you to feel empowered on your path to sustainable weight loss and improved metabolic health.
Key Takeaway: Proper injection technique and site rotation are simple but powerful ways to maximize the benefits of your medication while minimizing discomfort and skin issues.
To see if a personalized, medically supervised program is the right fit for your health goals, your next step is to complete our free online assessment. This quiz helps our partner providers understand your medical history and objectives to tailor a program specifically for you.
FAQ
Does the injection site affect weight loss?
Current clinical data suggests that weight loss outcomes are similar regardless of whether you inject into the abdomen, thigh, or upper arm. The medication is absorbed into the bloodstream and works systemically on the brain and digestive system, so the specific entry point does not change its ultimate effectiveness. Some individuals may prefer one site over another due to comfort or a perceived reduction in side effects, which can help with long-term consistency.
Where is the least painful place to inject Ozempic®?
Most users find the abdomen to be the least painful site because it typically contains a more significant layer of subcutaneous fat and has fewer nerve endings near the surface compared to the extremities. However, pain perception is highly individual; some people find the thigh more comfortable because the skin feels less sensitive. Using a room-temperature pen and ensuring your skin is dry after using an alcohol swab can also significantly reduce any stinging or discomfort.
Can I inject in the same spot every week?
It is strongly recommended that you do not inject in the exact same spot every week. Repeatedly using the same location can lead to skin irritation and the development of hardened tissue or fatty lumps called lipohypertrophy, which can interfere with how the medication is absorbed. You should rotate between the abdomen, thigh, and upper arm, or at least move the injection site an inch away from the previous spot if you prefer to stay in the same general area.
What should I do if I see a drop of liquid after injecting?
Seeing a small drop of liquid on the needle tip or your skin after an injection is normal and usually does not mean you missed your dose. To minimize this, ensure you hold the needle in your skin for at least six seconds after the dose counter reaches zero. If a significant amount of liquid leaks out, do not take another dose; simply wait until your next scheduled injection day and ensure your technique follows the manufacturer’s timing instructions more closely.
Disclaimer: This content is for informational purposes only and does not constitute medical advice. It is not intended to diagnose, treat, cure, or prevent any disease or condition. Individual results may vary. Always consult a qualified healthcare professional before starting any weight loss program or medication.
Transforming Lives, One Step at a Time
Keep reading

Semaglutide Molecule Explained: Why It Lasts a Week
Introduction Semaglutide lasts about a week in the body because it is engineered to cling to a blood protein called albumin and to resist…

Semaglutide MASH Approval: What ESSENCE Data Means
The 2026 FDA approval of semaglutide for MASH is a genuine milestone in liver medicine, and the ESSENCE trial is the data behind it.

Mazdutide vs Semaglutide: Head-to-Head Trial Data
Introduction Mazdutide adds a glucagon target to the GLP-1 mechanism that semaglutide uses alone, which in theory should drive more fat loss and better…

