Where Do You Give Your Ozempic Shot for Best Results
Introduction
Starting a weight management journey with a medication like Ozempic® can feel like a major milestone. It is a moment of hope, but it is also natural to feel a bit of hesitation or even anxiety about the injection itself. Many people have never self-administered a medication before and are unsure where to start. You might be asking yourself exactly where the needle should go, if certain spots are more effective than others, or how to ensure the process is as painless as possible.
At TrimRx, we understand that the clinical side of weight loss should be accessible and stress-free. This article will provide a clear, step-by-step walkthrough of the recommended injection sites, the proper technique for a comfortable experience, and how to troubleshoot common concerns. Our goal is to empower you with the knowledge needed to handle your weekly routine with confidence. By the end of this guide, you will know exactly how to manage your medication safely while focusing on your long-term health goals. If you are considering prescription GLP-1 treatment, you can see if you qualify for a personalized program.
The Three Primary Injection Sites
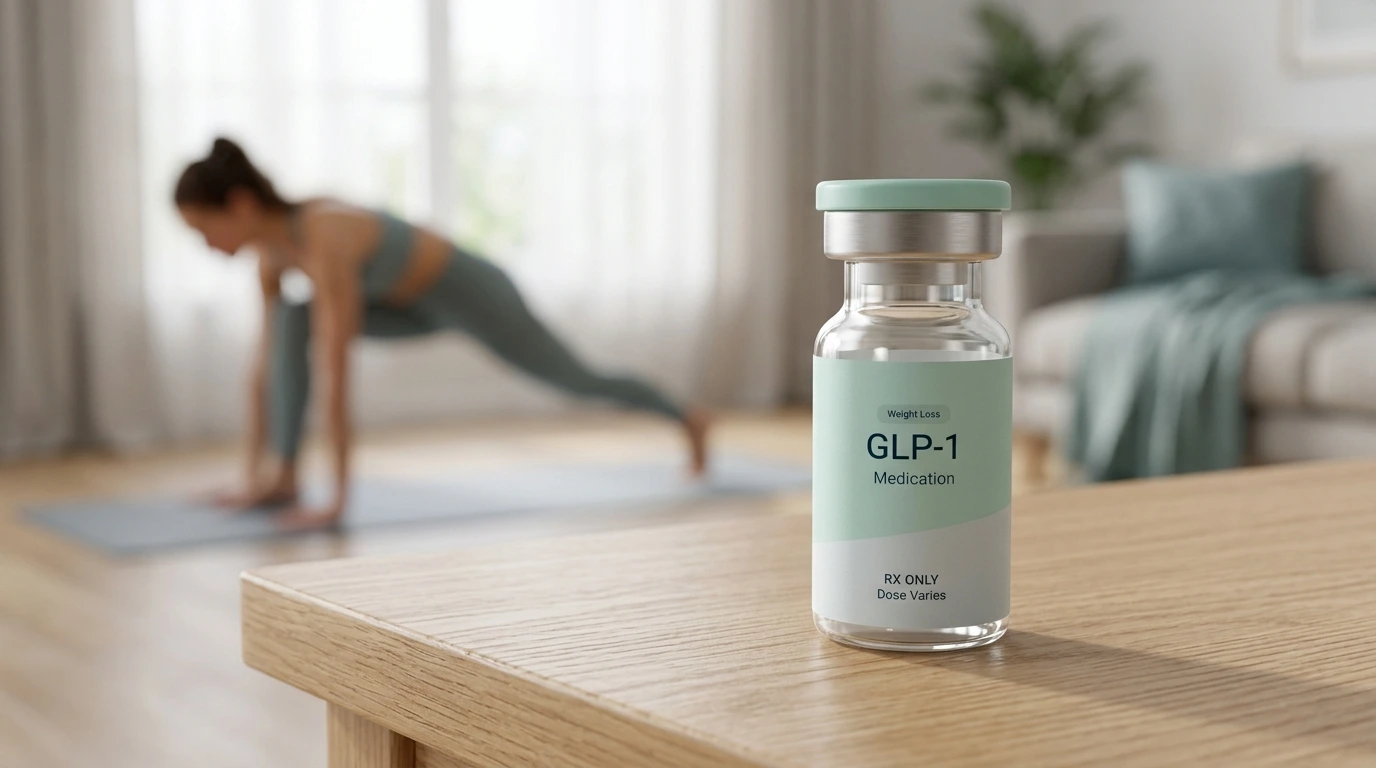
When you are prescribed a GLP-1 receptor agonist—a class of medication that mimics a natural hormone to regulate appetite and blood sugar—the delivery method is typically a subcutaneous injection. Subcutaneous means “under the skin.” This type of injection targets the fatty tissue layer just beneath the surface of the skin but above the muscle.
There are three primary areas on the body recommended for these injections. These spots are chosen because they generally have a higher concentration of subcutaneous fat, which allows the medication to absorb steadily into your system.
The Abdomen
The abdomen is the most common choice for many people. It is easy to see, easy to reach, and usually has the most consistent layer of fatty tissue. When using your stomach as an injection site, you should stay at least two inches away from your navel (belly button). You should also avoid the waistline area where clothing might rub against the skin afterward.
Many people find the abdomen to be the most convenient spot because it allows for a clear view of the pen or syringe. This visibility can help reduce the nervousness associated with the first few doses.
The Front of the Thigh
The front of the thighs is another excellent option. Specifically, you should target the front and outer areas of the thigh, midway between the hip and the knee. This area is often preferred by individuals who find it easier to sit down while administering their medication.
If you are someone with very little body fat on your legs, you may need to gently pinch a fold of skin to ensure the needle reaches the fatty layer rather than the muscle. However, for most people, the front of the thigh provides a stable and accessible surface.
The Back of the Upper Arm
The back of the upper arm, often referred to as the tricep area, is the third approved site. This area is effective because it typically holds a pocket of fatty tissue. However, this is the most difficult site to reach if you are injecting yourself.
If you have a partner or a family member helping you with your weekly dose, the back of the arm is a great choice. If you are doing it alone, you may find it difficult to pinch the skin and press the injection button simultaneously. Using a mirror can help if you choose this location, but most people find the stomach or thigh to be more manageable for self-administration.
Key Takeaway: The abdomen, thigh, and upper arm are all clinically approved sites. The best choice is the one that allows you to feel most comfortable and maintain a steady hand.
Why the Injection Site Matters
You might wonder if the specific location changes how well the medication works. In clinical terms, all three sites are considered effective for delivering the medication. However, there are small differences in how quickly the body absorbs the medicine depending on the area used.
The abdomen typically has the fastest absorption rate, followed by the arm, and then the thigh. While these differences are usually minor, some people find that their body responds slightly differently to each site. For example, some individuals report fewer gastrointestinal side effects when injecting in the thigh compared to the abdomen.
It is important to remember that the medication needs to go into the fat, not the muscle. Muscle tissue has much higher blood flow, which would cause the medication to absorb far too quickly. This could lead to a sudden spike in the medication’s presence in your blood, potentially increasing the intensity of side effects like nausea or dizziness.
Quick Answer: You should give your Ozempic® shot in the abdomen, the front of the thigh, or the back of the upper arm. These areas contain the fatty tissue necessary for the medication to absorb correctly over the course of a week.
The Importance of Site Rotation
One of the most critical parts of your injection routine is rotation. You should never inject into the exact same spot two weeks in a row. Rotating your sites helps prevent a condition called lipohypertrophy. This is a medical term for a localized buildup of fatty tissue or “lumps” under the skin caused by repeated trauma to the same area.
If these lumps develop, the skin may become tough or rubbery. More importantly, injecting into these hardened areas can interfere with how the medication is absorbed. If the medicine cannot reach the bloodstream at the intended rate, you might find that your appetite suppression is inconsistent or that your blood sugar levels are harder to manage. For a deeper look at why rotation matters, read how to rotate injection sites for semaglutide and tirzepatide.
How to Rotate Effectively
You do not need to switch body parts every week, although many people do. You can stay within the same general area, such as the abdomen, as long as you move the injection spot at least one inch away from where you injected the previous week.
A helpful strategy is to imagine a clock face on your stomach. One week you might inject at the “12 o’clock” position, and the next week you move to “3 o’clock.” This simple visual guide ensures that each small patch of skin has several weeks to heal before it is used again.
Step-by-Step Guide to a Successful Injection
Preparation is the key to a stress-free experience. If you take a few minutes to set up your space, the actual injection will feel much simpler.
Step 1: Gather your supplies. / Place your medication pen, a new needle, an alcohol swab, and a sharps container on a clean surface.
Step 2: Check the medication. / Look at the liquid inside the pen. It should be clear and colorless. If it looks cloudy, discolored, or has particles floating in it, do not use it.
Step 3: Wash your hands. / Use warm water and soap to clean your hands thoroughly. This is a simple but vital step to prevent infection at the injection site.
Step 4: Prepare the site. / Use an alcohol swab to clean your chosen injection area. Let the skin air-dry completely. Do not blow on it, as this can introduce bacteria.
Step 5: Attach the needle. / Remove the paper tab from a new needle and screw it onto the pen. Remove both the outer and inner needle caps.
Step 6: Prime the pen (if needed). / If it is a brand-new pen, follow the manufacturer’s instructions to check the flow. This ensures any air bubbles are removed and the needle is ready.
Step 7: Dial the dose. / Turn the dose selector until it shows the exact dose your healthcare provider has prescribed for you.
Step 8: Inject the dose. / Insert the needle into your skin. Press and hold the dose button until the counter returns to zero. Count slowly to six to ensure the full amount of medication has been delivered.
Step 9: Remove and dispose. / Pull the needle straight out. Remove the needle from the pen and place it immediately into a sharps container. Never store the pen with a needle attached.
Note: Always consult your healthcare provider or pharmacist if you are unsure about the specific mechanics of your injection pen. You can also compare this walkthrough with How to Inject Semaglutide: A Comprehensive Guide.
Managing Injection Site Reactions
It is very common to experience mild reactions at the site of the injection. For most people, these are temporary and do not require stopping the medication. You might notice slight redness, a small amount of itching, or a tiny bruise.
These reactions often happen because the skin is sensitive to the alcohol used for cleaning or the tiny prick of the needle itself. To minimize these issues:
- Ensure the alcohol has dried completely before you inject.
- Do not rub the site after the injection; instead, apply gentle pressure with a clean tissue if there is a drop of blood.
- Make sure the medication is not ice-cold. Letting the pen sit at room temperature for about 15 minutes can make the injection feel more comfortable.
If you notice signs of a more serious reaction, such as significant swelling, heat in the area, or a rash that spreads, you should contact a healthcare professional immediately. If you want a broader overview of side effects, see Common GLP-1 Side Effects: What to Expect.
Tips for a Painless Experience
If you are worried about pain, there are several tricks to make the process almost unnoticeable. Most modern needles used for GLP-1 medications are extremely thin—often no thicker than a few strands of human hair.
First, keep your muscles relaxed. If you are tensing your stomach or leg, the needle may feel more resistant. Take a deep breath and exhale as you insert the needle. Second, use the “pinch” technique if you are injecting into a leaner area. Gently bunching up the fatty tissue can create a larger target and keep the needle away from the muscle.
Finally, stay consistent with your timing. Injecting on the same day each week helps your body maintain a steady level of the medication, which can help minimize the side effects that sometimes occur when levels fluctuate.
How TrimRx Supports Your Journey
Navigating the world of prescription weight loss can be complicated, but you do not have to do it alone. Our platform is designed to provide the clinical oversight and personalized care needed for long-term success. We connect you with licensed healthcare providers who review your medical history, goals, and needs to create a program tailored specifically to you. If you want to begin, complete your free intake assessment.
Through our telehealth platform, you have access to a dedicated team that can answer questions about your medication, whether you are using Compounded Semaglutide, Compounded Tirzepatide, or other options. We believe that medical weight loss is not just about the medication; it is about the support system around it. Our programs include doctor consultations and ongoing specialist access, ensuring you have a partner at every step—from your very first injection to your final health milestone.
Storing Your Medication Properly
To keep your medication effective, you must store it correctly. Most GLP-1 pens should be kept in the refrigerator until they are opened. Once you start using a pen, many can be kept at room temperature for a certain number of days (often up to 56 days, depending on the specific brand). For more detail on keeping medication stable, read How to Store Compounded Semaglutide or Tirzepatide at Home.
Never freeze the medication. If a pen accidentally freezes, it must be discarded, as the extreme cold can damage the structure of the protein in the medicine. Also, keep your pens out of direct sunlight and away from heat sources like a car dashboard or a windowsill.
Lifestyle Habits That Complement Your Treatment
While knowing where to give your shot is essential, the medication is most effective when combined with healthy lifestyle choices. GLP-1 medications work by slowing down the emptying of your stomach and signaling to your brain that you are full. You can support this process by focusing on specific nutritional habits.
Prioritizing protein is one of the best things you can do. Protein helps preserve lean muscle mass as you lose weight. Staying hydrated is also vital, as many of the common side effects of these medications, like mild headaches or constipation, can be improved by drinking enough water.
If you are looking for extra support, we offer GLP-1 Daily Support supplement, which is designed to provide the nutrients your body needs during a weight loss program. These quick-access tools are available without a prescription and can be a helpful addition to your routine.
Troubleshooting Common Injection Issues
Even with careful preparation, you might run into a few questions during your first few weeks. Here are some of the most common issues patients face:
“I saw a drop of liquid on the needle after I pulled it out.”
This is very common and usually nothing to worry about. It does not mean you missed your dose. To minimize this in the future, remember to count slowly to six before removing the needle from your skin.
“The dose button is stuck.”
If the button will not press down, the needle might be blocked. Remove the needle, attach a new one, and try again. Never force the button, as this could damage the pen mechanism.
“I forgot if I took my shot this week.”
Consistency is key for GLP-1 medications. Using a calendar or a phone app to track your doses and the location of your injection is a great habit to start on day one. If you do miss a dose, consult the instructions provided with your medication or speak with your provider about the best time to take your next one. How to Track Your Progress on Semaglutide or Tirzepatide is a useful companion resource for monitoring whether your treatment is performing as expected over time.
The Role of Personalized Care
Every body is different, and that means every weight loss journey is different. What works for one person might not be the ideal path for another. This is why a personalized program is so important. When you work with a platform like ours, your treatment is supervised by providers who can adjust your dosage based on your results and how your body is reacting.
We provide a streamlined way to access these treatments through a telehealth model. This means no waiting rooms and no unnecessary in-person visits. You start with a free assessment quiz that helps determine which program is the right fit for your health profile. From there, your medication is shipped directly to your door from FDA-registered, inspected compounding pharmacies, ensuring that you have everything you need to stay on track.
Bottom line: While the technical side of injecting can seem intimidating, it quickly becomes a simple, one-minute habit. Focus on rotating your sites, maintaining proper storage, and following the guidance of your healthcare team.
Conclusion
Mastering your weekly injection is a significant step toward taking control of your metabolic health. By choosing the right sites—the abdomen, thigh, or upper arm—and rotating them consistently, you ensure that your medication is as effective and comfortable as possible. Remember that the initial nervousness is normal and usually fades after the first few doses.
At TrimRx, our mission is to provide you with the clinical expertise, high-quality medications, and empathetic support needed to reach your goals. We believe in a science-backed approach that treats you as an individual, not just a patient. Whether you are curious about the benefits of GLP-1 medications or are ready to start a comprehensive program, find out if GLP-1 medications are right for you. The first step is often the hardest, but with the right tools and a supportive team, sustainable weight loss is within your reach.
FAQ
Does it matter if I inject Ozempic in my stomach or my thigh?
Both sites are clinically approved and effective for delivering the medication. While the stomach generally has a slightly faster absorption rate, some people prefer the thigh to minimize potential gastrointestinal side effects. The most important factor is rotating your injection sites to keep the skin and underlying tissue healthy. If you are still deciding whether a prescription GLP-1 program fits your goals, you can take the free assessment quiz.
What should I do if I hit a muscle instead of fat?
Injecting into a muscle can cause the medication to be absorbed too quickly, which may lead to more intense side effects or reduced effectiveness over the week. If you accidentally inject into a muscle, you might notice more soreness than usual at the site. You do not need to take another dose; simply monitor how you feel and aim for a fattier area for your next scheduled injection.
Can I inject Ozempic into my arm by myself?
Yes, it is possible, but it can be physically awkward to reach the back of your upper arm while trying to pinch the skin and press the pen button. Most people find the abdomen or thigh to be much easier for self-administration. If you prefer the arm, using a mirror or having a friend assist you can ensure the needle is inserted at the correct angle.
Why do I need to count to six before pulling the needle out?
Counting to six ensures that the full dose of medication has left the pen and entered the subcutaneous tissue. Because the needle is very thin, the liquid takes a few seconds to flow completely. Pulling the needle out too early can result in “leakage,” where you see medication on your skin, meaning you did not receive the full intended dose.
Disclaimer: This content is for informational purposes only and does not constitute medical advice. It is not intended to diagnose, treat, cure, or prevent any disease or condition. Individual results may vary. Always consult a qualified healthcare professional before starting any weight loss program or medication.
Transforming Lives, One Step at a Time
Keep reading

Gas and Bloating on Ozempic or Semaglutide: Why It Happens and How to Manage It
Yes, gas, bloating, and belching are common on Ozempic and semaglutide, and for most people they’re a manageable part of the adjustment period. The…

Dizziness on Ozempic or Semaglutide: Why It Happens and What to Do
If you feel dizzy or lightheaded on Ozempic or semaglutide, you’re not alone, and in most cases the cause is manageable. The usual culprits…

Ozempic and Tylenol (Acetaminophen): Is It Safe?
Acetaminophen (the active ingredient in Tylenol) is generally considered safe to take with Ozempic or semaglutide, and there’s no dangerous direct interaction between them….

