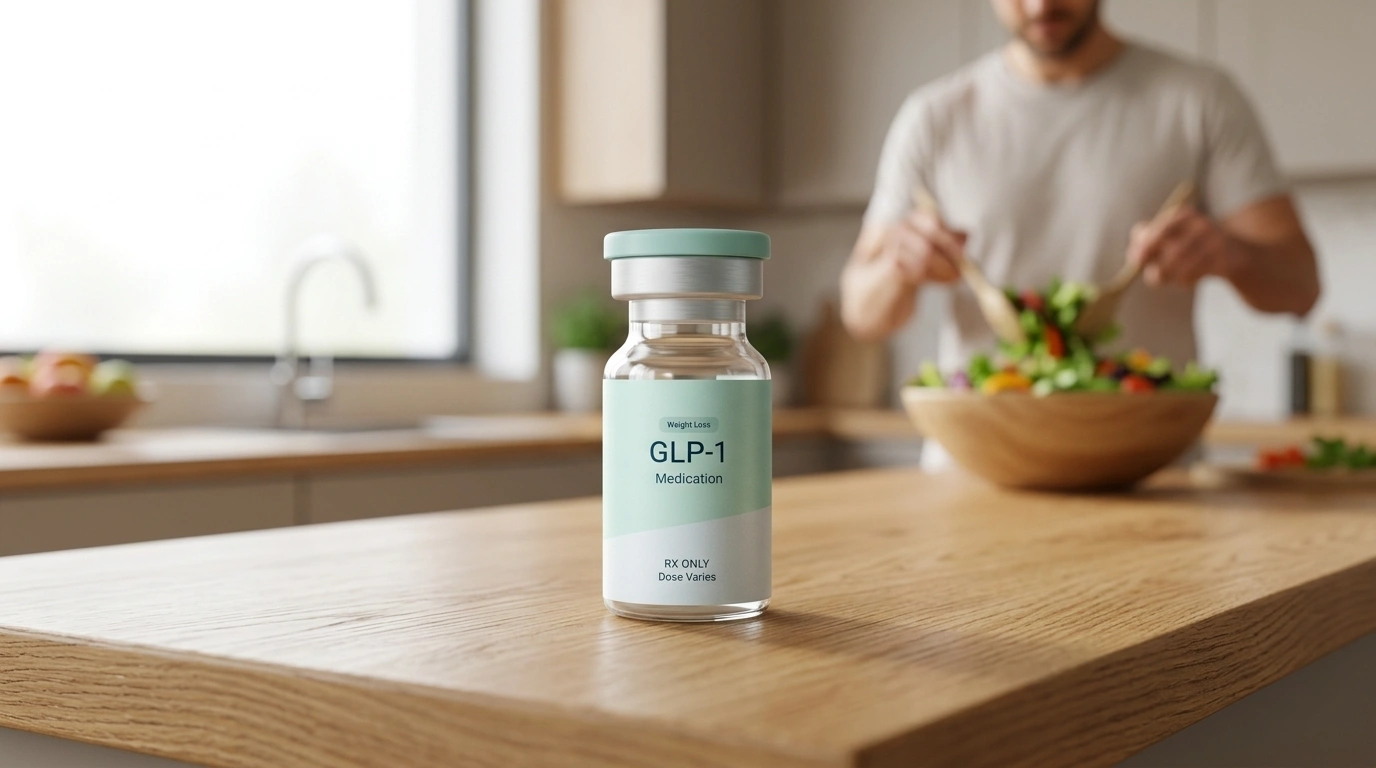
Where Does the Ozempic Shot Go? A Guide to Injection Sites
Introduction
Starting a new health journey is exciting, but it often comes with practical questions that can feel a bit daunting. If you have recently been prescribed a GLP-1 medication, one of the first questions you likely have is: where does the Ozempic shot go? The transition from traditional oral medications to a weekly injectable can feel like a significant shift. Many people feel a natural sense of hesitation or anxiety when it involves needles, even if the needle is very small. At TrimRx, we believe that understanding the “how” and “where” of your treatment is essential for building confidence and achieving long-term success.
This post covers the recommended injection sites, the proper technique for a comfortable experience, and why rotating your sites is a critical part of your routine. We will also discuss how to prepare your medication and what to do if you encounter common site-related issues. By the end of this guide, you will have a clear, step-by-step roadmap to managing your weekly injections with ease. If you’re wondering whether prescription GLP-1 treatment is the right fit, see if a personalized GLP-1 program fits you.
Understanding Subcutaneous Injections
Before we look at the specific locations, it is important to understand the type of injection required. Ozempic® (semaglutide) is a subcutaneous injection. This means the medication must be delivered into the fatty tissue layer just beneath the skin, but above the muscle.
Semaglutide is a GLP-1 receptor agonist. GLP-1 stands for glucagon-like peptide-1, which is a hormone naturally produced in your body that helps regulate appetite and blood sugar. When you inject this medication into the subcutaneous fat, it is absorbed slowly into your bloodstream over the course of a week. This slow release is why you only need to take the medication once every seven days. If the medication were accidentally injected into a muscle or a vein, it would absorb much too quickly, which could increase the risk of side effects and reduce the treatment’s effectiveness. If you want a clearer picture of what GLP-1 does, it helps to understand the hormone before focusing on technique.
Quick Answer: The Ozempic shot goes into the fatty tissue just under the skin in the abdomen, the front of the thigh, or the back of the upper arm. You should never inject into a muscle or a vein.
The Three Primary Injection Sites
There are three main areas of the body recommended for GLP-1 injections. These areas are chosen because they typically contain a consistent layer of subcutaneous fat, making them ideal for steady medication absorption.
The Abdomen (Stomach)
The abdomen is the most common choice for many patients because it is easy to see and reach. When using the stomach, you should stay at least two inches away from your belly button (umbilicus). You can inject anywhere in the general abdominal area, provided you avoid the immediate navel region and any areas where the skin is bruised, scarred, or tender. For a practical site guide, where to inject GLP-1 breaks down the main options.
The Front of the Thigh
The front and outer areas of the thighs are excellent alternatives. This site is particularly popular for individuals who prefer to sit down while administering their dose. You should aim for the middle third of the thigh, on the front or slightly toward the outer side. Avoid the inner thigh, as the skin there can be more sensitive and contains more blood vessels and nerves.
The Back of the Upper Arm
The back of the upper arm (the triceps area) is the third recommended site. This location can be slightly more challenging to reach if you are injecting yourself without assistance. However, many people find that the fatty tissue on the back of the arm is less sensitive than other areas. If you choose this site, it may be helpful to stand in front of a mirror or have a partner help you until you get the hang of the angle.
Choosing the Best Spot for You
While all three sites are clinically effective, you might find that one works better for you than the others. Some patients report fewer gastrointestinal side effects, such as nausea, when they inject in the thigh or arm compared to the abdomen. While scientific evidence on this varies, the personal comfort of the patient is a significant factor in staying consistent with treatment.
| Injection Site | Ease of Access | Visibility | Common Preference |
|---|---|---|---|
| Abdomen | Very Easy | High | Most common; easy to pinch skin |
| Thigh | Easy | High | Good for sitting; often less sensitive |
| Upper Arm | Moderate | Low | May require a mirror or assistance |
The Importance of Site Rotation
One of the most critical rules for injectable medications is site rotation. This means you should never inject into the exact same spot two weeks in a row. For example, if you prefer the abdomen, you should move the injection point at least an inch away from the previous week’s spot.
Why Rotation Matters
If you inject into the same small patch of skin repeatedly, you risk developing a condition called lipohypertrophy. This is a medical term for the accumulation of extra fat or hardened lumps under the skin. These lumps are not only uncomfortable, but they can also interfere with how the medication is absorbed. If the medication is trapped in a hardened area of tissue, your body may not receive the full dose, leading to inconsistent blood sugar levels or a stall in weight management progress.
Creating a Rotation Schedule
A simple way to manage this is to think of your injection sites as a clock or a grid. You might choose the left side of the abdomen one week, the right side the next, and then move to the thighs.
Key Takeaway: Rotating your injection site every week prevents the formation of hard lumps (lipohypertrophy) and ensures that your medication is absorbed consistently and effectively.
Step-by-Step Guide to Injecting
Using a medication pen is designed to be a straightforward process. Once you have selected your site, follow these steps to ensure a safe and effective administration.
Step 1: Preparation and Inspection Wash your hands thoroughly with soap and water. Take your pen out of the refrigerator. Check the label to confirm it is the correct medication and check the expiration date. Look at the liquid through the pen window; it should be clear and colorless. If it is cloudy, discolored, or has particles, do not use it. For a fuller walkthrough, a step-by-step GLP-1 injection guide covers the preparation and technique basics.
Note: If the pen is cold, you may want to let it sit at room temperature for about 15–20 minutes. Injecting cold medication can sometimes cause a slight stinging sensation.
Step 2: Attach the Needle Take a new, disposable needle and remove the paper tab. Push the needle straight onto the pen and turn it until it is tight. Pull off the outer needle cap and the inner needle cap. Do not throw away the outer cap, as you will need it later to safely remove the needle.
Step 3: Check the Flow (New Pens Only) If you are using a brand-new pen for the first time, you must check the flow. Turn the dose selector to the flow check symbol (usually a small dash and a drop). Point the needle upward and press the dose button until the counter returns to zero. You should see a drop of liquid at the needle tip. If not, repeat the process. This ensures there is no air in the needle and the pen is working correctly.
Step 4: Set Your Dose Turn the dose selector until the counter shows your prescribed dose. At TrimRx, we emphasize following the specific dosage schedule provided by your licensed healthcare professional. Never adjust your dose without consulting your provider first.
Step 5: Clean and Inject Clean your chosen injection site with an alcohol swab and let it air dry. Hold the pen so you can see the dose counter. Insert the needle into your skin. You do not usually need to pinch the skin unless you are very lean, but your provider can guide you on this.
Press and hold the dose button down. You will see the counter move back to zero. Once it hits zero, count slowly to six while keeping the needle in your skin. This ensures that the full dose has been delivered.
Step 6: Disposal Pull the needle out of your skin. Carefully place the outer needle cap back onto the needle and unscrew it from the pen. Dispose of the needle immediately in a puncture-resistant sharps container. Never store the pen with the needle attached.
Managing Injection Site Reactions
It is very common to experience mild reactions at the site of the injection. Most of these are temporary and go away on their own.
- Redness or Itching: A small red mark or slight itchiness is normal immediately after the shot. This usually fades within a few hours.
- Bruising: Occasionally, the needle may hit a tiny blood vessel, causing a small bruise. This is harmless and will heal like any other bruise. To minimize this, avoid rubbing the site after injecting.
- A Small Bump: You may notice a tiny “bubble” or bump under the skin right after the injection. This is just the medication sitting in the subcutaneous layer and will disappear as it is absorbed.
Myth: If a drop of blood appears, the injection didn’t work. Fact: A tiny drop of blood or clear liquid at the site is common and does not mean you lost your dose. Simply dab it with a clean tissue.
Storage and Care for Your Medication
Proper storage is essential to keep the medication stable. For branded medications like Ozempic® or Wegovy®, or compounded semaglutide from a licensed pharmacy, temperature control is vital.
Before first use: Store your unused pens in the refrigerator. Do not freeze them. If the medication freezes, it is no longer safe to use. After first use: You can keep your “in-use” pen in the refrigerator or at room temperature (up to 86°F) for up to 56 days. Keep the pen cap on to protect the medication from light.
Always keep your medication and needles out of the reach of children and pets. If you are traveling, use a small insulated bag to keep your pens at a stable temperature, but avoid placing them directly against ice packs.
Navigating Your Journey with TrimRx
At TrimRx, we understand that managing a weight loss program involves more than just a prescription. It requires a partnership between you and a clinical team that understands your goals. Our telehealth-first approach means you can access licensed providers who specialize in metabolic health from the comfort of your home. If you’re ready to move forward, complete a free eligibility assessment.
We provide access to personalized programs that may include compounded medications like semaglutide or tirzepatide. These medications are prepared by FDA-registered, inspected compounding pharmacies. Unlike branded medications which you fill at your local pharmacy, our program includes the convenience of having your personalized treatment plan managed online, with medications shipped directly to your door when prescribed by one of our partner providers.
Our mission is to make sustainable weight loss accessible and transparent. Whether you are curious about the differences between various GLP-1 medications or need guidance on managing side effects, our team is available to support you. We focus on a holistic view of health, combining medical intervention with lifestyle support to help you achieve lasting results.
Overcoming Needle Anxiety
If the thought of an injection makes you nervous, you are not alone. Needle anxiety is a common hurdle, but there are several ways to make the experience easier:
- Numbing the area: You can hold an ice cube against the injection site for a minute before cleaning it with alcohol. This can slightly dull the sensation.
- Focus on your breath: Take a deep breath in as you prepare and exhale slowly as you press the dose button. This helps relax your muscles.
- Use a distraction: Some people find it helpful to listen to music or watch a quick video while they administer their dose to take their mind off the needle.
- Remember the “why”: Remind yourself of your health goals. The brief pinch of a weekly injection is a small step toward a healthier, more vibrant version of yourself.
The needles used for GLP-1 pens are extremely thin and short—often compared to the thickness of a human hair. Most people find that the sensation is much less intense than they anticipated.
Bottom Line: Consistency is Key
The most important factor in your success is consistency. By choosing the right injection sites, rotating them regularly, and following proper technique, you ensure that your body gets the most out of your treatment.
- Abdomen, thigh, and arm are the safe zones.
- Rotate weekly to keep your skin healthy.
- Count to six to ensure the full dose is delivered.
- Consult your provider if you notice persistent skin changes or have concerns about your dose.
Weight management is a marathon, not a sprint. Every weekly injection is a commitment to your long-term metabolic health. If you are ready to take the next step in your health journey, we invite you to check your eligibility for a personalized program.
Bottom line: Mastering your injection technique is a simple skill that empowers you to take control of your metabolic health. With the right site selection and rotation, the process becomes a quick and easy part of your weekly routine.
FAQ
Can I inject Ozempic into my muscle?
No, Ozempic® must be injected into the subcutaneous fat layer just under the skin. Muscle tissue has a higher blood flow, which would cause the medication to absorb too quickly and potentially increase side effects. Always aim for the fatty areas of the stomach, thigh, or upper arm. For a semaglutide-specific walkthrough, how and where to inject semaglutide can help compare the main sites.
Is one injection site better than the others for weight loss?
Clinical studies show that the medication is effective regardless of which of the three recommended sites you choose. However, some individuals find they experience fewer side effects, like nausea, when injecting in the thigh or arm rather than the stomach. You may want to try different sites to see which feels most comfortable for you.
What should I do if I see a drop of liquid on the needle after I inject?
Seeing a tiny drop of liquid on the needle tip after you remove it from your skin is normal and does not mean you missed your dose. However, to ensure the full dose was delivered, make sure you count to six while the needle is still in your skin before pulling it out. If a large stream of liquid comes out, you may have pulled the needle out too early.
Do I need to pinch my skin before I inject?
For most people, pinching the skin is not necessary because the needles are very short. However, if you are very lean or have very little body fat at the injection site, your healthcare provider may suggest gently pinching a fold of skin to ensure the medication stays in the subcutaneous layer. Always follow the specific instructions given by your provider during your consultation. If you’re still deciding whether a personalized GLP-1 program is right for you, take the free assessment quiz.
Disclaimer: This content is for informational purposes only and does not constitute medical advice. It is not intended to diagnose, treat, cure, or prevent any disease or condition. Individual results may vary. Always consult a qualified healthcare professional before starting any weight loss program or medication.
Transforming Lives, One Step at a Time
Keep reading

Semaglutide Molecule Explained: Why It Lasts a Week
Introduction Semaglutide lasts about a week in the body because it is engineered to cling to a blood protein called albumin and to resist…

Semaglutide MASH Approval: What ESSENCE Data Means
The 2026 FDA approval of semaglutide for MASH is a genuine milestone in liver medicine, and the ESSENCE trial is the data behind it.

Mazdutide vs Semaglutide: Head-to-Head Trial Data
Introduction Mazdutide adds a glucagon target to the GLP-1 mechanism that semaglutide uses alone, which in theory should drive more fat loss and better…

