How to Put the Ozempic Shot: A Step-by-Step Injection Guide
Introduction
Starting a new medication can feel like a major milestone, but it often comes with a side of “first-time jitters,” especially when that medication involves a needle. If you have been prescribed Ozempic®, you might feel a bit overwhelmed by the prospect of self-injection. It is a common hurdle, but once you understand the mechanics, the process quickly becomes a simple, thirty-second part of your weekly routine. We understand that weight loss is as much an emotional journey as a physical one, and having clear, reliable instructions can replace anxiety with confidence. At TrimRx, we believe that education is the foundation of a successful health transformation, and our What is GLP-1? A 2026 Breakdown from Our Medical Experts guide can help put the bigger picture in context. This guide will walk you through exactly how to put the Ozempic shot safely and effectively, ensuring you feel supported every step of the way. By the end of this article, you will have a clear roadmap for your weekly administration and a better understanding of how to manage your treatment.
Quick Answer: To put the Ozempic® shot, you must first attach a new needle, check the medication flow, and select your prescribed dose on the pen’s dial. After cleaning a site on your stomach, thigh, or upper arm, insert the needle into the skin, press and hold the dose button until the counter reaches zero, and count to six before removing it.
Understanding Your Medication
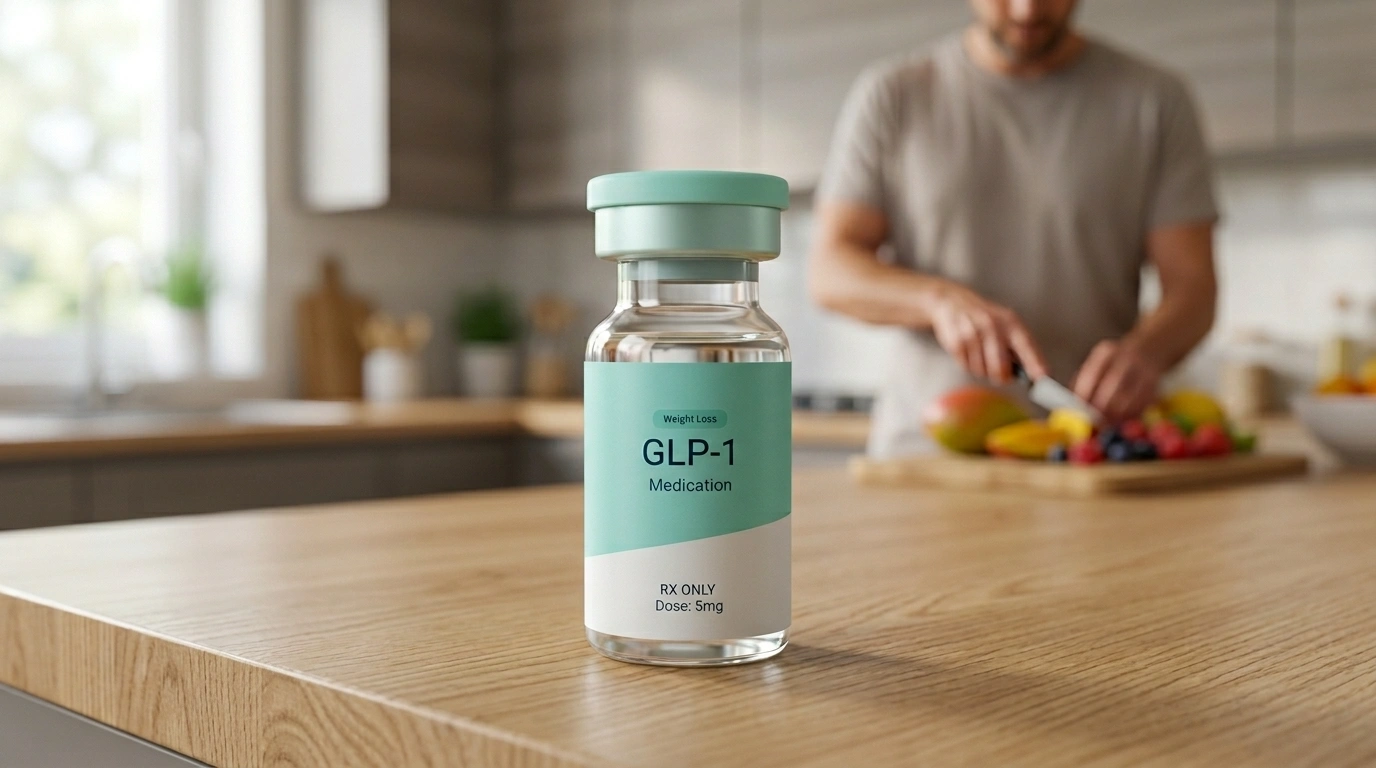
Before diving into the “how-to,” it is helpful to understand what you are actually using. Ozempic® is a branded medication containing semaglutide, which belongs to a class of drugs called GLP-1 receptor agonists (glucagon-like peptide-1). These medications mimic a natural hormone in your body that helps regulate blood sugar and signals to your brain that you are full.
Semaglutide works by slowing down gastric emptying—the speed at which food leaves your stomach—and interacting with the hunger centers in the brain to reduce appetite. Because it is a protein-based medication, it cannot be taken as a traditional pill because your stomach acid would break it down before it could reach your bloodstream. This is why a subcutaneous injection—an injection into the fatty tissue just below the skin—is the most effective way to deliver the medicine, and our Understanding What is a Semaglutide Injection guide breaks that down in more detail.
While Ozempic® is a specific branded product, many people also use compounded semaglutide through platforms like ours. If you are wondering whether a prescription program is the right next step, take the free assessment quiz. It is important to note that compounded semaglutide is not FDA-approved, though it is prepared by FDA-registered and inspected compounding pharmacies to meet specific patient needs. Regardless of whether you are using a branded pen or a compounded version, the principles of a safe, clean injection remain the same.
Step 1: Gather Your Supplies
A successful injection starts with a clean environment and having everything you need within arm’s reach. You do not want to be searching for a bandage or an alcohol wipe while holding a prepared needle.
Essential items for your injection kit:
- Your Ozempic® pen (checked for the correct medication and expiration date)
- A new, sterile needle (one is required for every single injection)
- Alcohol swabs or cotton balls with rubbing alcohol
- A dedicated sharps disposal container (or a heavy-duty plastic container like a laundry detergent bottle)
- A well-lit, comfortable space to sit or stand
Note: If you find that the cold medication from the refrigerator causes a slight stinging sensation, you can take the pen out of the fridge about 15 to 20 minutes before your injection. Letting it reach room temperature can make the process more comfortable. Never use external heat sources like a microwave or hot water to warm the pen; simply letting it sit on a clean counter is sufficient.
Step 2: Prepare and Inspect the Pen
Wash your hands thoroughly with soap and warm water for at least 20 seconds. This is a critical step in preventing infection at the injection site. Once your hands are dry, pick up your pen and remove the cap.
Check the liquid: Look through the clear window on the side of the pen. The medication should be clear and colorless. If the liquid looks cloudy, contains particles, or has changed color, do not use it. This could indicate the medication has been compromised or has expired.
Verify the label: Ensure the pen in your hand is actually the one prescribed to you. It sounds simple, but if you have multiple medications in your refrigerator, a quick label check prevents errors.
Key Takeaway: Always inspect the medication window before every injection. The liquid must be perfectly clear to be safe for use.
Step 3: Attach a New Needle
Every Ozempic® pen requires a fresh needle for every dose. Reusing needles is dangerous because it increases the risk of infection, causes more pain (as the needle dulls after one use), and can lead to the needle becoming blocked.
- Remove the paper tab from a new needle.
- Push the needle straight onto the end of the pen.
- Screw it on tight by turning it clockwise until it feels secure.
- Pull off the outer needle cap and set it aside (you will need this later to safely remove the needle).
- Pull off the inner needle cap and discard it. You will now see the very fine needle exposed.
Step 4: Perform the Flow Check (New Pens Only)
If you are starting a brand-new pen, you must check the flow of the medication before your very first dose. This ensures the pen is working correctly and removes any air bubbles that might have formed during shipping.
- Turn the dose selector until you see the flow check symbol (it looks like a small line with a dot).
- Hold the pen with the needle pointing up.
- Press and hold the dose button until the dose counter returns to “0.”
- A small drop of liquid should appear at the needle tip. If it doesn’t, repeat this step up to six times. If a drop still doesn’t appear, you may need to change the needle and try once more.
Important: You only need to do this flow check the very first time you use a new pen. For your second, third, and fourth doses from that same pen, you can skip this step.
Step 5: Select Your Prescribed Dose
Once the pen is ready, turn the dose selector dial until the counter shows your specific dose (for example, 0.25 mg, 0.5 mg, or 1 mg). Your healthcare provider will determine your starting dose and tell you when it is time to increase it.
The pen will “click” as you turn the dial. If you accidentally turn it too far, do not worry—you can simply turn it backward to the correct number. Do not press the dose button until the needle is actually in your skin.
Step 6: Choose Your Injection Site
Ozempic® must be injected into the fat layer under the skin, not into a muscle or a vein. There are three primary areas where most people have enough subcutaneous fat for a comfortable injection.
Common Injection Sites
| Site | Location Details | Why Choose This Site? |
|---|---|---|
| Abdomen | At least 2 inches away from your belly button. | High fat content; easiest area to see and reach by yourself. |
| Front of Thigh | The middle third of the outer or front thigh. | Stable area if you prefer to sit down while injecting. |
| Upper Arm | The back or outer part of the arm. | Good for rotation, but often requires someone else to help. |
The Importance of Rotation
You should never inject into the exact same spot every week. This is called site rotation. If you inject in the same square inch of skin repeatedly, you may develop lumps or hard spots called lipodystrophy. These lumps can prevent the medication from being absorbed properly.
A good rule of thumb is to imagine your abdomen is a clock. One week you inject at the “3 o’clock” position, the next week at “6 o’clock,” and so on. You can stay in the same general area (like the stomach) as long as you move the specific spot by at least an inch each time.
Step 7: The Injection Process
Now that you have selected and cleaned your site with an alcohol wipe, it is time to put the shot.
Step 1: Position the Pen. Hold the pen so that you can clearly see the dose counter window. This is vital because you need to watch the numbers move back to zero.
Step 2: Insert the Needle. Press the needle into your skin. Most people find that a firm, steady motion is best. You do not need to “stab” the area; the needle is so fine that it should slide in with minimal discomfort.
Step 3: Deliver the Dose. Press the dose button all the way down and hold it. You will see the dose counter window spin back toward “0.”
Step 4: The Six-Second Rule. Once the counter hits “0,” do not pull the needle out immediately. Count slowly to six (1, 2, 3, 4, 5, 6) while keeping the button pressed down. This ensures that every drop of the medication has had time to leave the pen and enter your body.
Step 5: Withdraw. After counting to six, pull the needle straight out of your skin. You might see a tiny drop of blood or a small amount of clear liquid at the site; this is normal and can be blotted with a cotton ball.
Myth: “If I don’t see a bruise, the medicine didn’t work.” Fact: A lack of bruising is actually a sign of a good injection technique. Because the needle is extremely thin and only goes into the fat layer, many people experience no bruising or bleeding at all.
Step 8: Post-Injection Cleanup
Safe disposal is just as important as the injection itself. You must protect yourself and others (like sanitation workers) from accidental needle sticks.
- Carefully place the outer needle cap back onto the needle. Once it is covered, unscrew the needle from the pen.
- Drop the needle into your sharps container immediately. Never throw loose needles into the regular trash.
- Replace the pen cap. This protects the remaining medication from light.
- Store your pen. If the pen still has doses left, store it in the refrigerator or at room temperature (below 86°F) according to the manufacturer’s instructions. A pen in use is typically good for 56 days.
Note: If you are using a telehealth platform, we can often provide guidance on where to find sharps containers or how to dispose of them according to your local state laws.
Tips for a Comfortable Experience
If you are still feeling nervous, these expert-backed tips can help make the process feel second nature.
- Sit Down: Doing your first few injections while seated can help you feel more stable and in control.
- Pinch or No Pinch?: Most people find that “tenting” the skin (pinching about an inch of fat) makes the injection easier, especially if they are leaner. However, it is not strictly necessary for the pen to work.
- Numb the Area: If you are very sensitive to needles, you can hold an ice cube against the injection site for 30 seconds before cleaning it with alcohol. This temporarily numbs the skin.
- Avoid Damaged Skin: Never inject into areas with bruises, scars, stretch marks, or redness. Healthy skin absorbs the medication more predictably.
- Create a Routine: Try to do your injection on the same day and at the same time every week. This helps you remember your dose and keeps the levels of semaglutide consistent in your body.
Managing Common Side Effects
While learning how to put the Ozempic shot is a physical skill, managing the results is a clinical process. Most side effects of GLP-1 medications are gastrointestinal, such as nausea, bloating, or changes in bowel habits. These usually occur because the medication is doing exactly what it was designed to do: slow down digestion. For practical ways to manage nausea, see our Nausea and GLP-1 Medications: Solutions That Work guide.
To help manage nausea:
- Eat smaller, more frequent meals throughout the day.
- Avoid greasy, fried, or highly processed foods.
- Stay hydrated with water or electrolyte-rich drinks.
- Listen to your body’s fullness cues and stop eating as soon as you feel satisfied.
If you experience redness or itching at the injection site, this is often a mild reaction to the needle or the alcohol. Rotating your sites usually solves this. However, if you develop a severe rash, hives, or difficulty breathing, seek medical attention immediately. At TrimRx, we encourage all our members to keep an open line of communication with their healthcare provider to ensure their dosage is being tolerated well.
Bottom line: Preparation and patience are the keys to a successful injection. By following the “Prepare, Check, Select, Inject” method and counting to six, you ensure you get the full benefit of your medication with minimal stress.
The TrimRx Difference
Navigating the world of GLP-1 medications can be confusing, especially with the various branded and compounded options available. For a deeper look at one option we mention below, read our What is the Weight Loss Drug Tirzepatide? guide. Our mission is to simplify this journey. We provide a telehealth-first approach that removes the barriers of traditional weight loss programs. There are no waiting rooms or stressful in-person visits required.
Through our platform, you receive a personalized program tailored to your unique health profile and goals. We connect you with licensed providers who can determine if a medication like Compounded Semaglutide or Compounded Tirzepatide is right for you. If you want to see whether you qualify, take our free assessment quiz.
Our comprehensive service model includes the doctor consultation, necessary lab work, and unlimited support—all without hidden fees.
We also offer specialized supplements like GLP-1 Daily Support supplement to help you manage the transition and maintain your nutritional health.
Our goal is to be more than just a prescription service; we want to be your partner in sustainable health. By combining medical expertise with modern technology and genuine empathy, we help you take control of your metabolic health.
Conclusion
Learning how to put the Ozempic shot is a small but vital skill on your path to better health. While the first few times might require a little extra focus, the process of preparing the pen, selecting the site, and counting to six will soon become a seamless part of your weekly routine. Remember to stay consistent with your injection day, rotate your sites to keep your skin healthy, and always use a fresh needle for safety.
- Gather all supplies before starting to reduce stress.
- Always perform a flow check on a brand-new pen.
- Inject into the fat of the stomach, thigh, or arm.
- Hold the needle in for six seconds after the counter hits zero.
- Dispose of needles in a proper sharps container.
Sustainable weight loss is a marathon, not a sprint, and if you want extra energy support during weight loss, our Weight Loss Boost supplement can fit into a broader plan.
Whether you are seeking clinical guidance or looking for a more personalized approach to metabolic health, we are here to support you. If you are ready to see how a medically supervised, telehealth-based program can help you reach your goals, complete the free health assessment quiz today to see which personalized program is the right fit for your journey.
FAQ
Does the Ozempic shot hurt?
Most people describe the injection as a tiny pinch or a quick sting. Because the needle is extremely fine and only goes into the fat layer rather than the muscle, it is generally much less painful than a flu shot or a blood draw.
What should I do if I miss a dose?
If you miss a dose of Ozempic®, you should take it as soon as you remember, provided it is within 5 days of your scheduled day. If more than 5 days have passed, skip the missed dose and wait for your next regularly scheduled injection day; do not take a double dose to make up for a missed one. If you want a fuller walkthrough of what to do after a missed shot, our Navigating a Missed Ozempic Shot: Your Guide to Staying on Track with TrimRx post is a helpful companion.
Can I inject Ozempic into my arm by myself?
While it is possible to inject into the back of your upper arm, it can be difficult to reach and stabilize the pen with one hand while keeping the needle at a 90-degree angle. If you choose the arm, it is often easier to have a friend or family member assist you to ensure the full dose is delivered.
Do I have to keep my Ozempic pen in the refrigerator?
Unused pens must be stored in the refrigerator between 36°F and 46°F. Once you have started using a pen, you can keep it in the refrigerator or at room temperature (up to 86°F) for up to 56 days, making it easier to manage your doses if you are traveling.
Disclaimer: This content is for informational purposes only and does not constitute medical advice. It is not intended to diagnose, treat, cure, or prevent any disease or condition. Individual results may vary. Always consult a qualified healthcare professional before starting any weight loss program or medication.
Transforming Lives, One Step at a Time
Keep reading

Gas and Bloating on Ozempic or Semaglutide: Why It Happens and How to Manage It
Yes, gas, bloating, and belching are common on Ozempic and semaglutide, and for most people they’re a manageable part of the adjustment period. The…

Dizziness on Ozempic or Semaglutide: Why It Happens and What to Do
If you feel dizzy or lightheaded on Ozempic or semaglutide, you’re not alone, and in most cases the cause is manageable. The usual culprits…

Ozempic and Tylenol (Acetaminophen): Is It Safe?
Acetaminophen (the active ingredient in Tylenol) is generally considered safe to take with Ozempic or semaglutide, and there’s no dangerous direct interaction between them….

