How Do You Give the Ozempic Shot? A Step-by-Step Guide
Introduction
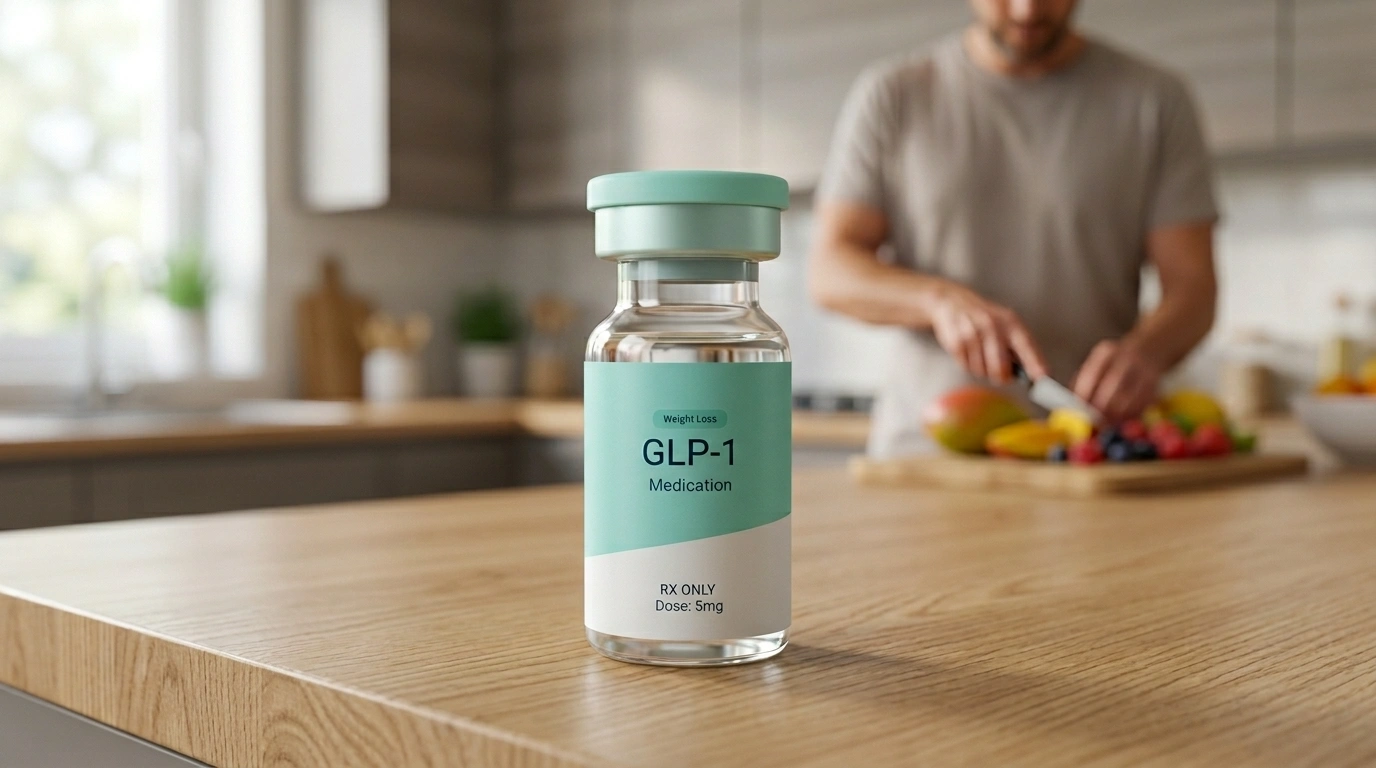
Standing in your kitchen with a small medical pen in your hand can feel like a daunting moment. If you have been prescribed Ozempic®, you are likely excited about the potential for better metabolic health but perhaps a little nervous about the actual mechanics of the injection. It is a common hurdle, and many people find that after the first one or two successful attempts, the process becomes a quick and simple part of their weekly routine. At TrimRx, we believe that understanding your treatment is the first step toward confidence and long-term success. If you are considering a personalized GLP-1 program, you can start with our free assessment quiz to see whether the process is right for you. This guide will walk you through every detail of how to safely and effectively administer your medication. We will cover preparation, the injection process, and how to manage your supplies to ensure your journey is as smooth as possible.
Preparing for Your First Injection
The key to a stress-forward injection is preparation. You do not want to be searching for a clean surface or an alcohol swab once you have already started the process. Setting up a dedicated space helps calm the nerves and ensures hygiene.
Gather Your Supplies
Before you begin, place all your items on a clean, flat surface like a kitchen table or a bathroom counter. You will need:
- Your Ozempic® pen
- A new, sterile disposable needle (provided with your prescription)
- An alcohol swab or a cotton ball with rubbing alcohol
- A dedicated sharps disposal container (or a heavy-duty plastic container with a lid)
- A gauze pad or tissue
Check the Medication
Always take a moment to inspect the pen itself. Look at the label to confirm the medication name and the expiration date. The liquid inside the pen should be clear and colorless. If the liquid looks cloudy, contains particles, or has changed color, do not use it. Instead, contact your pharmacist or healthcare provider.
Key Takeaway: Proper preparation reduces the risk of infection and ensures you have everything you need to complete the process without interruption.
Understanding the Ozempic Pen
The Ozempic® pen is a sophisticated device designed to make dosing simple, but it has several parts you should recognize. At the top is the pen cap, which protects the medication from light. Beneath the cap is the clear window where you see the liquid. At the other end is the dose counter window and the dose selector dial. Finally, there is the injection button, which you will press to deliver the medication. If you want a broader overview of semaglutide itself, our guide to understanding what a semaglutide injection is is a helpful companion.
How the Mechanism Works
Ozempic® is a brand name for semaglutide, a glucagon-like peptide-1 (GLP-1) receptor agonist. A GLP-1 receptor agonist is a type of medication that mimics a natural hormone in your body. This hormone helps regulate blood sugar and slows down how quickly your stomach empties, which can help you feel full longer. For a fuller explanation of the hormone signals involved, how GLP-1 actually works for weight loss is a useful next read. The pen is designed to deliver a precise amount of this medication into the fatty tissue just under your skin, which is known as a subcutaneous injection.
Step 1: Attach the Needle
Wash your hands thoroughly with soap and water. Hygiene is the most important part of this step. Once your hands are dry, pull off the pen cap. Take a new needle and pull off the paper tab.
Line the needle up with the pen and push it straight on. Screw it on until it is tight. The needle is hidden inside two caps: a large outer needle cap and a small inner needle cap.
Remove both caps. Pull off the large outer cap and set it aside; you will need it later to safely remove the needle. Then, pull off the small inner needle cap and throw it away. You should now see the very fine needle at the end of the pen.
Step 2: Perform the Flow Check (New Pens Only)
If you are using a brand-new pen for the first time, you must check the flow of the medication. You do not need to do this for a pen you have already used.
Turn the dose selector dial. Look for the flow check symbol, which looks like a small dashed line with a drop next to it.
Hold the pen with the needle pointing up. Press and hold the injection button until the dose counter returns to zero.
Watch for a drop. A small drop of medication should appear at the needle tip. This indicates that the pen is working correctly and the air has been cleared from the needle. If no drop appears, you can repeat this up to six times. If a drop still does not appear, change the needle and try once more. If it still fails, the pen may be defective.
Note: If you are using a pen that has already been primed, you can skip the flow check and go straight to selecting your dose.
Step 3: Select Your Dose
Turn the dose selector until your prescribed dose is shown. The window will show numbers like 0.25, 0.5, 1.0, or 2.0, depending on which pen you have and what your doctor has ordered.
Ensure the number is perfectly aligned. You will hear a clicking sound as you turn the dial. If you accidentally turn it too far, you can simply turn it back. The pen will not allow you to select a dose higher than what is left in the reservoir.
Step 4: Choose and Clean Your Injection Site
The medication needs to be injected into the layer of fat just beneath the skin. There are three primary areas recommended for this:
- The Abdomen: This is often the easiest spot. Choose an area at least two inches away from your belly button.
- The Front of the Thighs: This is a good option if you prefer to sit down while injecting.
- The Back of the Upper Arm: This spot may require a friend or family member to help you.
Clean the skin. Use an alcohol swab to wipe the area in a circular motion. Let the skin air dry for a few seconds. Do not blow on it or fan it with your hands, as this can introduce bacteria.
The Importance of Site Rotation
It is vital to change your injection spot every week. You can use the same general area, such as your stomach, but you should move the needle at least one inch away from where you injected last time. For a deeper rotation strategy, see how to rotate injection sites for semaglutide and tirzepatide. Constant injections in the exact same spot can lead to “lipodystrophy,” which is a buildup or breakdown of fat that can prevent the medication from absorbing properly.
Key Takeaway: Rotating your injection site ensures the medication is absorbed consistently and helps prevent skin irritation or lumps.
Step 5: Inject the Medication
Insert the needle. Hold the pen so you can see the dose counter. Push the needle straight into your cleaned skin. Most people describe this as a tiny pinch rather than a painful shot.
Press and hold the injection button. You will see the dose counter dial back down toward zero.
The Six-Second Rule. Once the counter hits zero, do not pull the needle out immediately. Keep the button pressed and count slowly to six. This ensures that the full dose has been delivered through the fine needle.
Remove the needle. Pull the pen straight out of your skin. You may see a tiny drop of blood or a small amount of clear liquid; this is normal. You can press a gauze pad or tissue to the spot, but do not rub it.
Step 6: Safe Disposal and Storage
Safety does not end once the needle is out of your skin. Proper disposal is essential for your safety and the safety of others.
Carefully replace the large outer needle cap. Once it is covered, unscrew the needle from the pen.
Drop the needle into your sharps container. Never throw loose needles into the regular trash. If you do not have a red sharps box, a thick laundry detergent bottle with a screw-top lid is often a safe alternative.
Put the pen cap back on. This protects the remaining medication from light.
Storage Rules:
- Unused pens: Store in the refrigerator. Do not freeze.
- In-use pens: You can keep the pen you are currently using at room temperature (up to 86°F) or in the refrigerator for up to 56 days.
- Keep it clean: Never store the pen with a needle attached.
Bottom line: Following a “Prepare, Check, Select, Inject” routine makes the process predictable and safe.
Troubleshooting Common Issues
Even with careful preparation, you might encounter a few hiccups. Here is how to handle common situations.
What if I see a bruise?
Bruising can happen if the needle hits a small blood vessel. It is generally not a cause for concern. To minimize this, ensure you are injecting into a fatty area and avoid rubbing the site after the injection.
What if the dose counter does not go to zero?
If the dial stops before reaching zero, you may have run out of medication in that pen. The window will show you how much was actually delivered. You will need to attach a new needle to a new pen and dial the remaining amount to complete your dose.
What if I miss a dose?
If you miss a dose of Ozempic®, take it as soon as you remember, as long as it is within five days of your missed dose. If more than five days have passed, skip the missed dose and take your next dose on your usual scheduled day. Do not take a double dose to make up for a missed one. For a more detailed walkthrough, read missing a dose of Ozempic. If you are unsure, always message your healthcare provider through our platform or contact them directly.
Telehealth and Personalized Support
Navigating a new medication journey is easier when you have a team behind you. Through the TrimRx platform, we connect individuals with licensed healthcare providers who can determine if a GLP-1 medication is appropriate for their specific health profile. If you are deciding whether to get started, you can also complete the free assessment quiz to see whether you qualify for a personalized program.
While Ozempic® is a well-known branded option, many of our patients utilize a personalized program that may include compounded semaglutide. Compounded medications are prepared by FDA-registered and inspected compounding pharmacies to meet specific patient needs. It is important to note that while these pharmacies are highly regulated, compounded semaglutide is not itself FDA-approved in the same way branded Ozempic® is. Our goal is to provide a comprehensive service that includes provider consultations, lab work, and ongoing support to help you reach your goals.
Managing Potential Side Effects
While the injection itself is usually simple, the medication can cause side effects as your body adjusts. Most commonly, people experience nausea, bloating, or changes in bowel habits. These are often most noticeable right after an injection or when your dose increases.
To manage these:
- Eat smaller, more frequent meals.
- Avoid greasy or very spicy foods on injection days.
- Stay hydrated.
- Speak with your provider about whether supplements like our GLP-1 Daily Support supplement might be appropriate for your routine.
If you experience severe abdominal pain, persistent vomiting, or signs of an allergic reaction (like hives or swelling), contact a healthcare professional immediately.
Traveling with Your Medication
Maintaining your routine while traveling is possible with a little planning. If you are flying, keep your Ozempic® pen in your carry-on bag rather than checked luggage. The temperature in the cargo hold can fluctuate wildly and may freeze the medication, which ruins it.
Most pens can stay at room temperature for several weeks, so a standard travel case is usually sufficient. However, if you are traveling to a very hot climate, consider a small insulated cooling pouch designed for insulin or GLP-1 pens. Always keep your medication in its original packaging with the prescription label attached to avoid issues at security checkpoints.
Conclusion
Learning how to give the Ozempic® shot is a skill that empowers you to take control of your metabolic health. By following the “Prepare, Check, Select, Inject” framework, you ensure each dose is safe and effective. Remember to be patient with yourself during the first few weeks as you adjust to the routine.
Our mission at TrimRx is to simplify this journey. We provide a science-backed, empathetic environment where you can access medical guidance and personalized treatment plans without the stress of traditional waiting rooms. Whether you are just starting or looking to optimize your current program, we are here to support your path toward a healthier lifestyle.
Key Takeaway: Success with GLP-1 medications comes from consistency, proper technique, and the support of a dedicated clinical team.
Ready to take the next step in your health journey? Start with our free assessment quiz to see which personalized program is right for you.
FAQ
Does the Ozempic shot hurt?
Most patients report that the injection feels like a minor pinch or a small prick. The needles used are very thin and short, designed specifically to reach the fatty tissue just under the skin rather than the muscle. If you are nervous, try sitting down and relaxing your muscles before you begin. If you want another walkthrough of the device itself, see our step-by-step guide for beginners.
What is the best time of day to take my injection?
You can take your dose at any time of day, with or without food. The most important factor is consistency; try to take it on the same day each week. Some people prefer taking it in the evening or on a weekend so they can rest if they experience mild nausea as their body adjusts.
Can I reuse the needles to save money?
No, you must never reuse a needle. Reusing a needle dulls the tip, making the injection more painful, and significantly increases the risk of serious infection. Always use a fresh, sterile needle for every single injection and dispose of the used one in a sharps container immediately.
What should I do if I see a bubble in the pen?
A small air bubble in the liquid reservoir is normal and will not hurt you. The flow check (priming) step for a new pen is designed to clear excess air. As long as you see a drop of medication at the needle tip during the flow check, the pen is safe to use.
Disclaimer: This content is for informational purposes only and does not constitute medical advice. It is not intended to diagnose, treat, cure, or prevent any disease or condition. Individual results may vary. Always consult a qualified healthcare professional before starting any weight loss program or medication.
Transforming Lives, One Step at a Time
Keep reading

Gas and Bloating on Ozempic or Semaglutide: Why It Happens and How to Manage It
Yes, gas, bloating, and belching are common on Ozempic and semaglutide, and for most people they’re a manageable part of the adjustment period. The…

Dizziness on Ozempic or Semaglutide: Why It Happens and What to Do
If you feel dizzy or lightheaded on Ozempic or semaglutide, you’re not alone, and in most cases the cause is manageable. The usual culprits…

Ozempic and Tylenol (Acetaminophen): Is It Safe?
Acetaminophen (the active ingredient in Tylenol) is generally considered safe to take with Ozempic or semaglutide, and there’s no dangerous direct interaction between them….

