How to Inject Ozempic With Syringe Safely
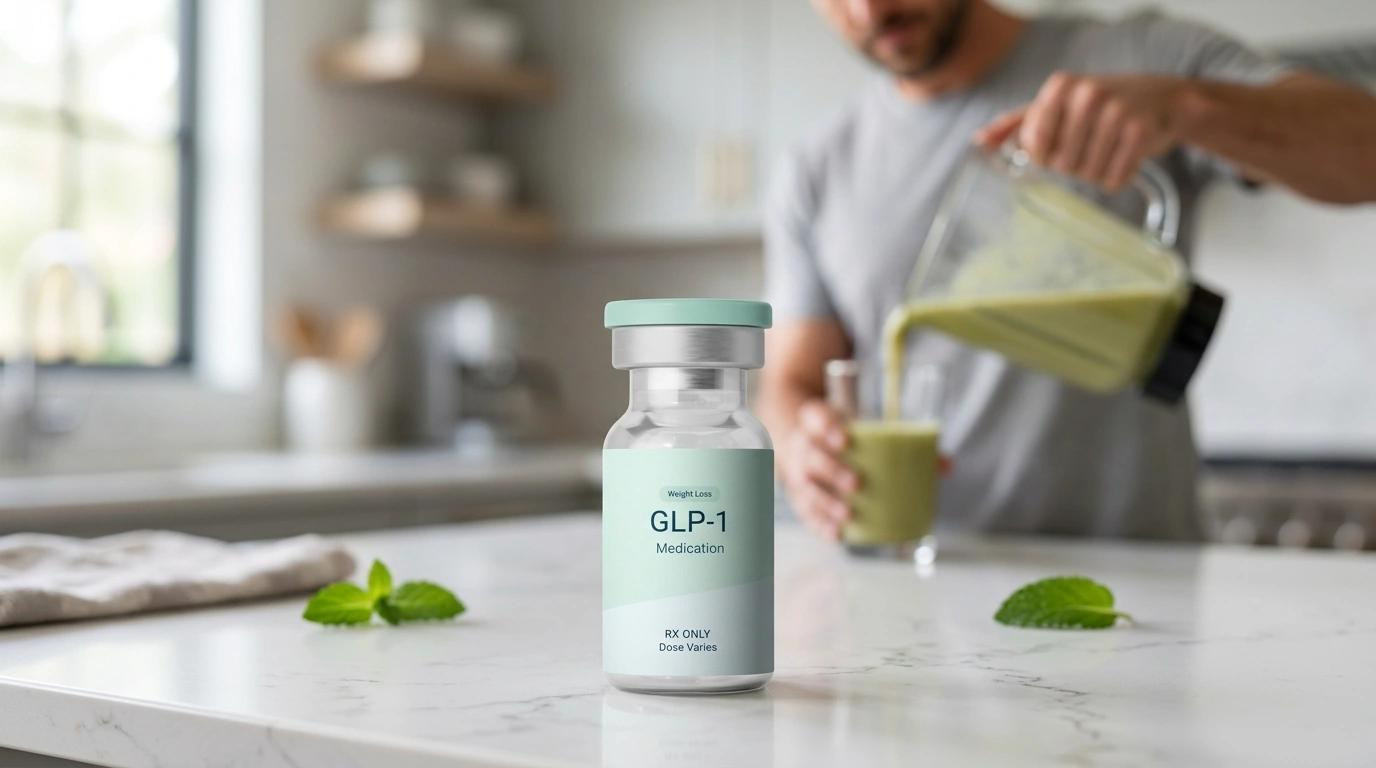
Table of Contents
- Introduction
- Understanding the Subcutaneous Injection
- Essential Supplies for Your Injection
- Preparing the Syringe and Drawing Medication
- Choosing and Preparing the Injection Site
- Administering the Injection
- Safety and Hygiene Best Practices
- Storage and Handling of Semaglutide
- Integrating Injections into a TrimRx Program
- When to Contact Your Healthcare Provider
- Maximizing Your Results
- Conclusion
- FAQ
Introduction
Standing in front of a small vial and a package of syringes can feel overwhelming, especially if you are accustomed to the simplicity of a pre-filled pen. Whether you are transitioning your routine or starting a new program, learning the mechanics of a manual injection is a vital skill for your health journey. At TrimRx, we understand that the move toward medical weight loss involves many new technical steps, and clarity is the best tool for building confidence. If you are ready to see whether a personalized program is a fit for you, you can complete a free assessment quiz to get started. This guide will walk you through the precise steps of preparing, drawing, and administering your medication safely. By mastering the subcutaneous injection technique, you ensure that your treatment is both effective and as comfortable as possible. Understanding how to manage your medication correctly is the first step toward achieving your long-term wellness goals with precision and safety.
Understanding the Subcutaneous Injection
Before learning the physical steps of how to inject Ozempic® with a syringe—or more commonly, how to inject compounded semaglutide—it is helpful to understand what a subcutaneous injection is. A subcutaneous injection delivers medication into the fatty tissue layer located directly between the skin and the muscle.
Semaglutide belongs to a class of medications known as GLP-1 receptor agonists (glucagon-like peptide-1). These medications mimic a natural hormone in the body that regulates appetite and blood sugar. Because the body absorbs medication more slowly from fatty tissue than from the bloodstream or muscle, this injection method allows the medication to work steadily over several days.
While the branded medication Ozempic® is typically delivered via a proprietary pen device, many individuals using telehealth platforms receive compounded semaglutide. Compounded semaglutide is a customized medication prepared by a pharmacy to meet specific patient needs. While these compounded versions are not FDA-approved, they are prepared and shipped by FDA-registered, inspected compounding pharmacies. These versions often arrive in a glass vial and require the use of a traditional insulin syringe.
If you want a deeper look at safe rotation habits, our guide on how to rotate injection sites for semaglutide and tirzepatide is a helpful companion to this process.
Essential Supplies for Your Injection
Preparation is the foundation of a safe injection experience. Before you begin, gather all necessary items on a clean, well-lit surface. Having everything within reach prevents interruptions and maintains a sterile environment.
- Medication Vial: Ensure the vial contains the correct medication and check the expiration date. The liquid should be clear and colorless.
- Insulin Syringes: These are specialized, thin needles designed specifically for subcutaneous use. They are measured in units or milliliters (mL).
- Alcohol Prep Pads: You will need at least two: one for the vial and one for your skin.
- Sharps Container: A puncture-proof container for disposing of used needles. If you do not have a professional sharps bin, a heavy-duty plastic laundry detergent bottle with a screw-on lid can serve as a temporary alternative.
- Gaze or Cotton Ball: Occasionally, a small drop of blood may appear at the injection site.
Key Takeaway: Always inspect your medication before use. If the liquid in the vial appears cloudy, contains particles, or has changed color, do not use it and contact your provider.
Preparing the Syringe and Drawing Medication
Drawing medication from a vial into a syringe requires a few steps to ensure the dosage is accurate and the vial remains sterile. This process uses air pressure to make the liquid move easily into the syringe barrel.
Step 1: Clean Your Hands and the Vial Wash your hands thoroughly with warm water and soap for at least 20 seconds. Dry them with a clean towel. Pop the plastic cap off the medication vial if it is new. Wipe the rubber stopper on top of the vial with a fresh alcohol prep pad and let it air dry.
Step 2: Prepare the Syringe Remove the cap from the needle. Be careful not to touch the needle against any surface, including your fingers. Pull the plunger of the syringe back to the mark that matches your prescribed dose. This fills the syringe with air.
Step 3: Equalize Pressure Place the vial on a flat surface. Insert the needle through the center of the rubber stopper. Push the plunger down all the way, injecting the air from the syringe into the vial. This creates positive pressure, which helps the medication flow out.
Step 4: Draw the Dose Turn the vial and syringe upside down. Ensure the tip of the needle is submerged in the liquid. Slowly pull the plunger back until the top of the black plunger seal aligns perfectly with the line for your prescribed dose.
Step 5: Remove Air Bubbles Check the syringe for air bubbles. Large bubbles can take up space intended for the medication, leading to an inaccurate dose. While the needle is still in the vial, tap the side of the syringe with your finger to make bubbles rise to the top. Gently push the plunger to expel the bubbles back into the vial, then draw back more medication if necessary to reach your exact dose.
Quick Answer: To draw medication into a syringe, first inject an equal volume of air into the vial to create pressure. Turn the vial upside down, keep the needle tip in the liquid, and pull the plunger back to your prescribed mark.
Choosing and Preparing the Injection Site
The effectiveness of semaglutide depends on it being absorbed by the fatty tissue. There are three primary areas on the body recommended for these injections:
- The Abdomen: This is often the preferred site because it has a consistent layer of fat. Choose an area at least two inches away from the belly button.
- The Front of the Thigh: This area is easily accessible for self-administration. Aim for the middle, outer portion of the thigh where the tissue is fleshiest.
- The Back of the Upper Arm: This site is best if someone else is administering the injection for you, as it can be difficult to reach and pinch the skin on your own arm.
If you want a broader overview of approved injection areas, the GLP-1 injection sites guide covers the basics in one place.
The Importance of Site Rotation You should never inject into the exact same spot every week. Repeatedly using one location can cause the fatty tissue to harden or develop small lumps, a condition called lipohypertrophy. This can interfere with how your body absorbs the medication. Imagine a clock on your stomach and move the injection site an inch or two each week.
Preparing the Skin Once you have selected your site, wipe the skin with a fresh alcohol pad. Use a firm, circular motion starting from the center and moving outward. Allow the skin to air dry completely. Do not blow on the skin to dry it, as this can introduce bacteria.
Administering the Injection
Now that the syringe is prepared and the site is clean, you are ready to administer the dose. Most patients find that the anticipation is more intense than the actual sensation, as insulin needles are extremely thin.
Step 1: Pinch the Skin With your non-dominant hand, gently pinch a one-to-two-inch fold of skin and fatty tissue. This pulls the fat away from the underlying muscle, ensuring the needle goes into the correct layer.
Step 2: Insert the Needle Hold the syringe like a dart or a pencil. Insert the needle quickly into the pinched skin. Most providers recommend a 90-degree angle (straight in). If you are very lean, a 45-degree angle may be used to ensure you stay within the fatty layer.
Step 3: Deliver the Medication Slowly push the plunger all the way down until the syringe is empty. Once the plunger is fully depressed, wait about five seconds before withdrawing the needle. This helps ensure all the medication stays in the tissue and doesn’t leak back out.
Step 4: Withdraw and Dispose Pull the needle out at the same angle it was inserted. Release the pinch of skin. If there is a tiny drop of blood, you can press a cotton ball or gauze against the site for a moment, but do not rub the area. Rubbing can irritate the tissue and affect absorption.
Bottom line: A successful injection involves a clean site, a steady hand, and a 90-degree insertion into a pinched fold of fatty tissue.
Safety and Hygiene Best Practices
When handling needles and vials, maintaining a sterile environment is your best defense against infection or irritation. Following these safety protocols is a non-negotiable part of your weight loss program.
- Never Reuse Needles: Syringes are designed for single use only. Even after one use, the tip of the needle becomes dull and microscopic barbs can form. Reusing a needle increases pain, tissue damage, and the risk of infection.
- Avoid Contamination: If the needle touches your finger, the table, or any surface other than the vial or the cleaned injection site, discard it immediately and start over with a fresh syringe.
- Check the Rubber Stopper: Always clean the vial’s stopper with alcohol, even if you just opened the cap. Dust and bacteria can settle quickly.
- Proper Disposal: Place the used syringe directly into your sharps container immediately after use. Do not try to put the cap back on the needle (recapping), as this is the most common time for accidental needle sticks.
Storage and Handling of Semaglutide
Semaglutide is a peptide, which is a delicate string of amino acids. It is sensitive to temperature and light. Proper storage ensures the medication remains stable and effective throughout your treatment cycle.
Most compounded semaglutide and branded GLP-1 medications like Ozempic® or Wegovy® should be kept in the refrigerator between 36°F and 46°F. Do not freeze the medication. If the liquid freezes, it breaks down the protein structure, making it ineffective; if this happens, the medication must be discarded.
Keep the vial in its original box when possible to protect it from light. When you are ready to inject, you can take the vial out of the fridge for a few minutes to let it reach room temperature, as cold medication can sometimes cause a slight stinging sensation upon injection. However, do not leave it out for extended periods or in direct sunlight.
Integrating Injections into a TrimRx Program
Starting a medication journey is more than just learning a physical technique; it is about having a support system that ensures you are never guessing. At TrimRx, we bridge the gap between clinical expertise and at-home care. When you use our platform, you are connected with licensed healthcare providers who review your health profile and goals to determine the most appropriate treatment.
Our programs are designed for simplicity and transparency. After completing a free assessment quiz, eligible patients receive personalized treatment plans. If a GLP-1 medication like compounded semaglutide or compounded tirzepatide is prescribed, it is shipped directly to your door from an FDA-registered pharmacy. This telehealth-first approach means you can manage your metabolic health without ever needing to visit a traditional clinic or waiting room.
We also provide ongoing support. If you are unsure about your injection technique or have questions about how the medication is working for you, our team is available to guide you. This level of personalized care helps you stay consistent, which is the most important factor in achieving sustainable weight loss results.
When to Contact Your Healthcare Provider
While self-injection becomes second nature for most people, it is important to know when to seek professional advice. Every person’s body reacts differently to GLP-1 medications.
You should consult your provider if you experience:
- Signs of infection at the injection site (persistent redness, warmth, swelling, or pus).
- Severe or worsening abdominal pain.
- Persistent nausea or vomiting that prevents you from staying hydrated.
- Signs of an allergic reaction, such as a rash, itching, or difficulty breathing.
- Lumps or changes in skin texture that do not resolve with site rotation.
Your provider can help adjust your dosage or offer strategies to manage common side effects like mild nausea or fatigue. If you want more context on those symptoms, our article on common GLP-1 side effects and what to expect is a useful next read. Remember that these medications are intended to be one part of a broader lifestyle change, including nutrition and physical activity.
Maximizing Your Results
Learning how to inject Ozempic® with a syringe—or using a syringe for compounded semaglutide—is a mechanical task that supports a biological goal. To get the most out of your treatment, focus on consistency and overall wellness.
Hydration is Key GLP-1 medications can sometimes decrease your thirst drive along with your appetite. Make a conscious effort to drink plenty of water throughout the day. This supports kidney function and can help mitigate some common digestive side effects.
Focus on Protein As your appetite decreases, the food you do eat should be nutrient-dense. Prioritizing protein helps preserve lean muscle mass while you lose weight. Many patients find that using the GLP-1 Daily Support supplement can help provide the essential nutrients their bodies need while they are eating less.
Be Patient With Your Body Weight loss is a marathon, not a sprint. The initial weeks of your program are often about titration—slowly introducing the medication to your system so your body can adjust. Don’t be discouraged if you don’t see massive changes in the first few days. Focus on the habit of the weekly injection and the small victories in how you feel.
For readers who want an extra layer of support while staying consistent, the Weight Loss Boost supplement is another option to consider as part of your overall routine.
Note: While GLP-1 medications are powerful tools for weight management, they work best when combined with a balanced diet and regular physical activity. Consult with your healthcare provider to create a sustainable plan that fits your lifestyle.
Conclusion
Mastering the use of a syringe for your semaglutide injections is a significant milestone in taking control of your metabolic health. While it may feel daunting at first, following a standardized, sterile process ensures that your medication is delivered safely and effectively. By preparing your supplies, equalizing pressure in the vial, and rotating your injection sites, you turn a medical necessity into a simple, weekly habit.
We believe that sustainable weight loss is achieved through a combination of science, empathy, and personalized support. Our mission is to provide you with the tools and clinical guidance needed to navigate this journey with confidence, all from the comfort of your home. Whether you are just starting your first week or are well on your way to your goals, your commitment to learning the right techniques is what will drive your success.
- Gather all supplies and wash your hands before starting.
- Use air pressure to help draw the medication accurately from the vial.
- Always rotate your injection sites (abdomen, thigh, or arm).
- Never reuse a needle and always dispose of it in a sharps container.
If you are ready to take the next step in your weight loss journey with a program that offers medical supervision and personalized care, start with a simple evaluation.
Key Takeaway: Taking the time to perform each step of the injection process correctly protects your health and ensures you receive the full benefit of your prescribed dose.
FAQ
Is it hard to use a syringe instead of a pen?
While a pen is pre-filled, using a syringe is a straightforward process that most people master after one or two tries. The most important differences are manually drawing the medication from a vial and ensuring there are no air bubbles in the syringe. Many find that the ultra-thin needles used with syringes are just as comfortable as those used with pen devices.
What should I do if I see an air bubble in my syringe?
If you see a large air bubble, tap the side of the syringe with your finger while the needle is still inside the vial to make the bubble rise to the top. Gently push the plunger to move the air back into the vial, then draw the plunger back down to your correct dose. Small, microscopic bubbles are generally not a cause for concern in subcutaneous injections, but you should always aim for a clear, liquid-filled syringe. If you want a deeper walkthrough on site care and technique, the injection sites guide is worth a look.
Where is the least painful place to inject?
The abdomen is usually considered the least painful site because it typically has a consistent layer of fatty tissue. However, pain is subjective, and some people prefer the thigh. To minimize discomfort, ensure the alcohol on your skin has dried completely before injecting, and try to relax the muscle in the area you are pinching.
Can I travel with my medication and syringes?
Yes, you can travel with your medication, but it should be kept in a cool environment, such as a small insulated travel bag with a cold pack. Always keep your medication in its original packaging with the prescription label visible, especially when going through airport security. It is also helpful to carry a travel-sized sharps container for safe disposal of your used syringes while away from home. If you are weighing next steps before travel or treatment, you can also check your eligibility here.
Disclaimer: This content is for informational purposes only and does not constitute medical advice. It is not intended to diagnose, treat, cure, or prevent any disease or condition. Individual results may vary. Always consult a qualified healthcare professional before starting any weight loss program or medication.
Transforming Lives, One Step at a Time
Keep reading

Semaglutide Molecule Explained: Why It Lasts a Week
Introduction Semaglutide lasts about a week in the body because it is engineered to cling to a blood protein called albumin and to resist…

Semaglutide MASH Approval: What ESSENCE Data Means
The 2026 FDA approval of semaglutide for MASH is a genuine milestone in liver medicine, and the ESSENCE trial is the data behind it.

Mazdutide vs Semaglutide: Head-to-Head Trial Data
Introduction Mazdutide adds a glucagon target to the GLP-1 mechanism that semaglutide uses alone, which in theory should drive more fat loss and better…

