How to Do GLP-1 Injections: A Step-by-Step Guide
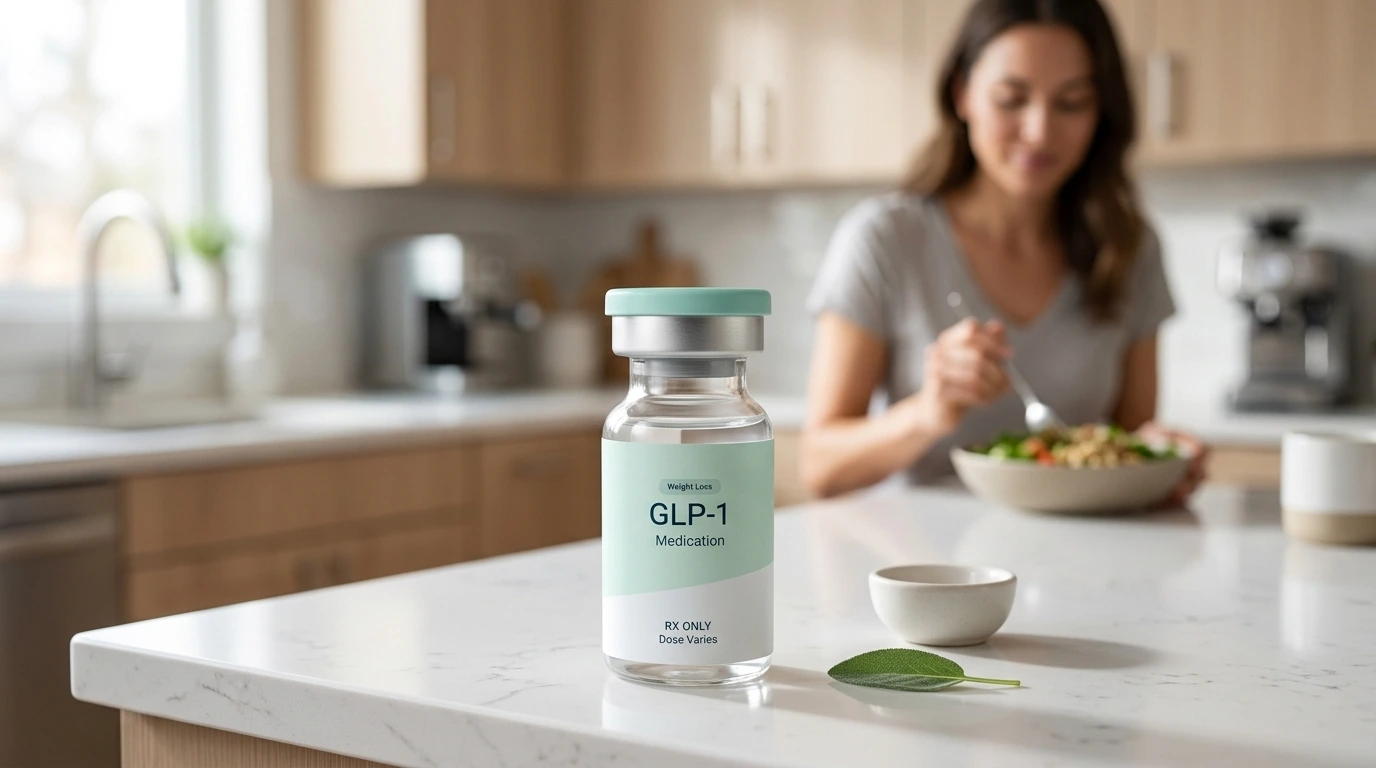
Table of Contents
- Introduction
- What is a GLP-1 Injection?
- Preparing Your Injection Space
- Choosing and Preparing the Injection Site
- Step-by-Step: Injecting with a Vial and Syringe
- Step-by-Step: Injecting with a Pre-filled Pen
- Post-Injection Care and Safety
- Managing Common Injection Challenges
- Optimizing Your GLP-1 Journey
- The TrimRx Difference
- Conclusion
- FAQ
Introduction
The transition from considering a weight loss medication to actually holding the needle in your hand can feel like a significant emotional hurdle. Many people feel a natural sense of hesitation or anxiety when they first learn that their treatment involves self-administered injections. At TrimRx, we understand that this physical step represents a major commitment to your metabolic health, and it is completely normal to want to ensure you are doing everything correctly. Whether you are using a pre-filled pen or a vial and syringe, the process is designed to be simple, relatively painless, and easy to integrate into a weekly routine. This guide covers everything from site selection and preparation to the actual administration of your medication. Our goal is to transform that initial hesitation into confidence, helping you navigate your treatment with ease and safety. If you want to see whether a personalized program is the right fit, you can take the free assessment quiz.
What is a GLP-1 Injection?
Before diving into the “how,” it is helpful to understand the “what.” GLP-1 receptor agonists (glucagon-like peptide-1 receptor agonists) are a class of medications that mimic a hormone naturally produced in your intestines. This hormone plays a vital role in how your body manages blood sugar and signals fullness to the brain. By mimicking this pathway, medications like Compounded Semaglutide and Compounded Tirzepatide help regulate appetite and support sustainable weight management. If you want a broader walkthrough of the process, our how to inject GLP-1 guide covers the same basics in a simple format.
These medications are typically administered through a subcutaneous injection. This means the needle is very thin and short, designed to deliver the medication into the fatty tissue just beneath the skin rather than into a muscle or vein. Because the fatty layer has fewer nerve endings, most people find the sensation to be a minor pinch rather than a painful event.
Key Takeaway: GLP-1 injections are subcutaneous, meaning they target the fatty layer under the skin for slow, effective absorption into the body’s natural metabolic pathways.
Preparing Your Injection Space
Creating a clean and calm environment is the first step toward a successful injection. You do not need a medical suite to do this properly; any well-lit, clean surface in your home will work.
Gathering Your Supplies
Before you begin, gather all the necessary items so you do not have to stop mid-process. You will typically need:
- Your medication (either a pre-filled pen or a vial)
- A fresh, sterile needle or syringe
- Alcohol prep pads
- A sharps disposal container (a heavy-duty plastic container with a lid)
- A clean paper towel or cotton ball
Checking the Medication
Always inspect your medication before use. GLP-1 medications should generally be clear and colorless. If you notice the liquid is cloudy, discolored, or contains visible particles, do not use it. Contact your provider or the pharmacy for guidance. Additionally, check the expiration date on the label to ensure the medication is still potent and safe for use.
Hygiene First
Wash your hands thoroughly with soap and warm water. Dry them with a clean towel. This simple step is the most effective way to prevent surface bacteria from entering the injection site. If you are using a vial, you will also need to use an alcohol pad to wipe the rubber stopper on the top of the bottle to maintain sterility.
Choosing and Preparing the Injection Site
Selecting the right spot on your body is essential for comfort and absorption. There are three primary areas recommended for subcutaneous GLP-1 injections. For a deeper look at placement and rotation, see our GLP-1 injection sites guide.
The Abdomen
The stomach is the most common choice for many because it is easy to reach and usually has a sufficient layer of subcutaneous fat. Choose a spot at least two inches away from your belly button. Avoid areas with scars, moles, or visible stretch marks, as these tissues may not absorb the medication as effectively.
The Thigh
The front or outer part of the thigh is another excellent option. This site is often preferred by people who find it easier to stabilize their hands while sitting down. Ensure you are injecting into the “fleshy” part of the thigh rather than the muscular inner thigh or the bony area near the knee.
The Upper Arm
The back of the upper arm (the triceps area) is a third option. Because it can be difficult to reach this area yourself while maintaining a 90-degree angle, this site is usually best if you have a partner or family member assisting you with the injection.
Note: While all three sites are effective, some individuals find that they experience fewer gastrointestinal side effects when injecting in the thigh or arm compared to the abdomen. While not clinically proven for everyone, it is a common observation you may wish to discuss with our clinical team.
The Importance of Site Rotation
You must rotate your injection site every week. This does not mean you have to switch from the stomach to the thigh every time; you can simply move to a different “quadrant” of the same area. For example, if you injected on the left side of your abdomen last week, move to the right side this week. If you want more detail on why that matters, our best place to inject GLP-1 article explains the practical approach.
Why rotation matters:
- It prevents the buildup of hardened tissue or “lumps” under the skin (lipodystrophy).
- It ensures consistent absorption of the medication.
- It reduces the risk of localized skin irritation.
Step-by-Step: Injecting with a Vial and Syringe
Many personalized programs through TrimRx utilize Compounded Semaglutide or Compounded Tirzepatide in a vial and require the use of a traditional insulin-style syringe. If you are looking for a broader tirzepatide walkthrough, our tirzepatide injection guide breaks down the same process step by step.
Step 1: Prepare the Vial
Wipe the rubber stopper of the vial with a fresh alcohol prep pad. Let it air dry for a few seconds.
Step 2: Draw Air into the Syringe
Remove the cap from the syringe. Pull the plunger back to the line that matches your prescribed dose. This fills the syringe with air.
Step 3: Equalize the Pressure
Push the needle through the rubber stopper and depress the plunger to push the air into the vial. This creates positive pressure, which makes it much easier to draw the liquid out.
Step 4: Draw the Medication
Turn the vial upside down with the needle still inside. Pull the plunger back slowly until the tip of the black seal lines up exactly with your dose marker.
Step 5: Remove Air Bubbles
Check the syringe for air bubbles. If you see any, gently tap the side of the syringe with your finger so the bubbles rise to the top. Push the plunger slightly to move the air back into the vial, then draw more medication if needed to reach your correct dose. Pull the needle out of the vial.
Step 6: Administer the Shot
Clean your chosen skin site with a new alcohol pad. Gently pinch a fold of skin (if needed to ensure you hit the fat layer) and insert the needle at a 90-degree angle. Push the plunger down steadily until empty. Wait 5–10 seconds before pulling the needle out to ensure the full dose stays within the tissue.
Step-by-Step: Injecting with a Pre-filled Pen
Branded medications like Wegovy®, Ozempic®, Zepbound®, and Mounjaro® typically come in pre-filled pens. The basic process stays the same, but the device handles the dose delivery for you.
Step 1: Attach the Needle (If Required)
Some pens require you to screw on a fresh needle for each dose, while others are single-use and have the needle built in. If yours is multi-dose, peel the paper tab off a new needle and screw it onto the pen.
Step 2: Prime the Pen
If using a multi-dose pen for the first time, you may need to “prime” it to remove air. Turn the dose selector to the symbol indicated in the manufacturer’s instructions and press the button until a drop appears at the needle tip.
Step 3: Dial the Dose
Turn the dial at the end of the pen until your prescribed dose appears in the window.
Step 4: Inject
Clean the skin. Press the pen firmly against the skin at a 90-degree angle. Press the injection button. You will usually hear a click or see a color bar move in the window. Hold the pen in place for a full 10 seconds after the dose is delivered before withdrawing the needle.
Quick Answer: To do a GLP-1 injection, clean a site on your abdomen or thigh, insert the needle at a 90-degree angle into the fatty tissue, and hold for 10 seconds to ensure the full dose is absorbed. Always rotate sites weekly to prevent skin irritation.
Post-Injection Care and Safety
Once the injection is complete, there are a few final steps to ensure safety and hygiene.
Proper Disposal
Never throw used needles or syringes into the regular trash. Place them immediately into a sharps container. If you do not have a dedicated sharps bin, a thick-walled plastic container like an empty laundry detergent bottle can work, provided you tape the lid shut and label it clearly.
Managing the Site
It is normal to see a tiny drop of blood or a small red mark at the injection site. You can apply light pressure with a cotton ball or a small bandage, but do not rub the area vigorously, as this can interfere with medication absorption.
Storage Requirements
Most GLP-1 medications must be stored in the refrigerator between 36°F and 46°F. Do not freeze them. If a medication is frozen, it is no longer safe to use. Some medications can stay at room temperature for a limited number of days, but it is always best to keep them chilled when possible to maintain maximum stability.
Managing Common Injection Challenges
Even with a clear plan, you might encounter small hurdles. Here is how to handle the most common concerns.
Needle Anxiety
If you are nervous about the needle, try numbing the site with an ice cube for 30 seconds before cleaning it with alcohol. You can also practice “controlled breathing”—inhale as you prep and exhale slowly as you insert the needle. Remember that these needles are incredibly thin—roughly the width of a few human hairs.
Forgetting a Dose
If you miss a dose, check the specific guidelines for your medication. Generally, if it has been fewer than 5 days since your scheduled day, you can take the dose as soon as you remember. If more than 5 days have passed, skip the missed dose and wait for your next scheduled day. Never “double up” on doses to make up for a missed one.
Localized Reactions
If you experience persistent itching, redness, or a hard lump at the site, it may be a sign that you need to rotate your sites more frequently or that the alcohol was not fully dry before you injected. If the reaction is severe or accompanied by a rash elsewhere on the body, contact a healthcare professional immediately.
Optimizing Your GLP-1 Journey
An injection is just one part of a larger metabolic health strategy. To get the most out of your treatment, consider how you are supporting your body from the inside out.
Nutrient Support
Because GLP-1 medications slow down digestion and reduce appetite, the quality of the food you eat becomes even more important. We often recommend focusing on high-protein intake to preserve muscle mass during weight loss. If you experience minor nausea or digestive changes, our GLP-1 Daily Support supplement is designed to provide targeted nutrients that complement your program.
Staying Hydrated
Hydration is critical when using GLP-1 agonists. Water helps the kidneys process the medication and can mitigate some of the common side effects like headaches or fatigue. Aim for consistent water intake throughout the day, even if you do not feel particularly thirsty.
Telehealth Integration
One of the benefits of using a platform like TrimRx is that you are never alone in this process. Our telehealth model means you have access to specialists who can answer questions about your injection technique or help you manage your dosage schedule without you ever needing to step into a waiting room.
Bottom line: Preparation, hygiene, and site rotation are the three pillars of a safe injection. By following a consistent routine, the process becomes a quick, five-minute task that happens once a week.
| Feature | Pen Injection | Vial & Syringe Injection |
|---|---|---|
| Preparation | Dial the dose on the pen. | Draw liquid from the vial into the syringe. |
| Needle Size | Usually built-in or tiny screw-on. | Very thin, short insulin-style needle. |
| Dose Control | Mechanical dial. | Manual measurement against lines. |
| Primary Use | Branded medications. | Compounded medications. |
| Storage | Refrigeration required. | Refrigeration required. |
The TrimRx Difference
We believe that medical weight loss should be a partnership, not just a prescription. Our mission is to provide you with the tools, the technology, and the clinical expertise to make sustainable health a reality. By offering personalized programs that include everything from the initial doctor consultation to the medication and ongoing support, we remove the friction that often stops people from reaching their goals. If you are ready for a personalized next step, you can see if you qualify for a customized program.
Our approach is built on transparency. Whether you are using Compounded Semaglutide or exploring support options designed for your routine, you can trust that your program is designed specifically for your health profile. We are here to guide you through every step, including that very first injection, so you can focus on the progress ahead.
Conclusion
Mastering the art of GLP-1 injections is a vital skill that empowers you to take control of your metabolic health. By focusing on proper hygiene, choosing the right injection sites, and rotating those sites weekly, you ensure that your medication works effectively with minimal discomfort. While it is natural to feel a bit of “first-time jitters,” most people find that by the third or fourth week, the process becomes a seamless part of their Sunday night or Monday morning routine.
- Prepare: Clean your hands and gather your supplies.
- Select: Choose a fatty area on the abdomen, thigh, or arm.
- Rotate: Never use the exact same spot two weeks in a row.
- Inject: Use a steady 90-degree angle and hold for 10 seconds.
If you are ready to begin a personalized weight loss journey backed by clinical expertise and a dedicated support team, the first step is simple. Complete the free assessment quiz to determine your eligibility for a customized program and see how we can support your goals.
FAQ
Does the injection hurt?
Most patients describe the sensation as a minor pinch or a quick sting, similar to a mosquito bite. Because GLP-1 medications are injected into the subcutaneous fat layer where there are fewer nerve endings, and the needles used are extremely thin, the discomfort is typically very minimal.
Can I inject into my muscle?
No, GLP-1 medications are specifically designed for subcutaneous (under the skin) injection into fatty tissue. Injecting into a muscle can change the rate at which the medication is absorbed into your bloodstream, which may decrease its effectiveness or increase the risk of side effects. For more on choosing the right spot, review our GLP-1 injection sites guide.
What should I do if I see a bruise at the injection site?
Occasional bruising is normal and usually occurs if the needle accidentally hits a small capillary. To minimize this, ensure you are injecting straight in at a 90-degree angle, do not rub the site after the injection, and always rotate your injection locations each week.
Do I need to use an alcohol swab every time?
Yes, using an alcohol swab is a critical safety step to prevent infection. You should wipe the top of the medication vial (if applicable) and the specific area of your skin where you plan to inject, allowing the alcohol to air dry completely before the needle touches the skin.
Disclaimer: This content is for informational purposes only and does not constitute medical advice. It is not intended to diagnose, treat, cure, or prevent any disease or condition. Individual results may vary. Always consult a qualified healthcare professional before starting any weight loss program or medication.
Transforming Lives, One Step at a Time
Keep reading

How to Adjust Weight Loss Goals on GLP-1 Medications
Adjust weight goals on GLP-1 meds by tracking body composition and labs, optimizing protein, activity, sleep, and working with your provider on dosing.

Falsified Mounjaro pens prompt urgent safety advisory
MHRA warns of counterfeit Mounjaro pens (batch D873576); stop use and check batch numbers for infection risk.

Novo Nordisk shares drop as Alzheimer’s hopes for weight-loss drug fade
Novo Nordisk’s semaglutide failed to slow Alzheimer’s in large trials, prompting shares to fall and expert reactions.

