How Do I Give Myself an Ozempic Shot: A Step-by-Step Guide
Introduction
Taking the first step toward a healthier lifestyle often involves navigating new territory, and for many, that includes learning how to use injectable medications. If your healthcare provider has prescribed Ozempic®, you might feel a mix of excitement about your progress and a bit of hesitation regarding the injection process itself. It is completely normal to feel nervous about needles, especially if you have never administered medication to yourself before. At TrimRx, we believe that education and preparation are the best ways to replace anxiety with confidence, and if you have not started a clinical program yet, you can start with the free assessment quiz. This guide will walk you through exactly how to give yourself an Ozempic shot, from preparing your supplies to safely disposing of your needle. By the time you finish reading, you will have a clear, manageable plan for your weekly routine.
Understanding the Ozempic® Pen
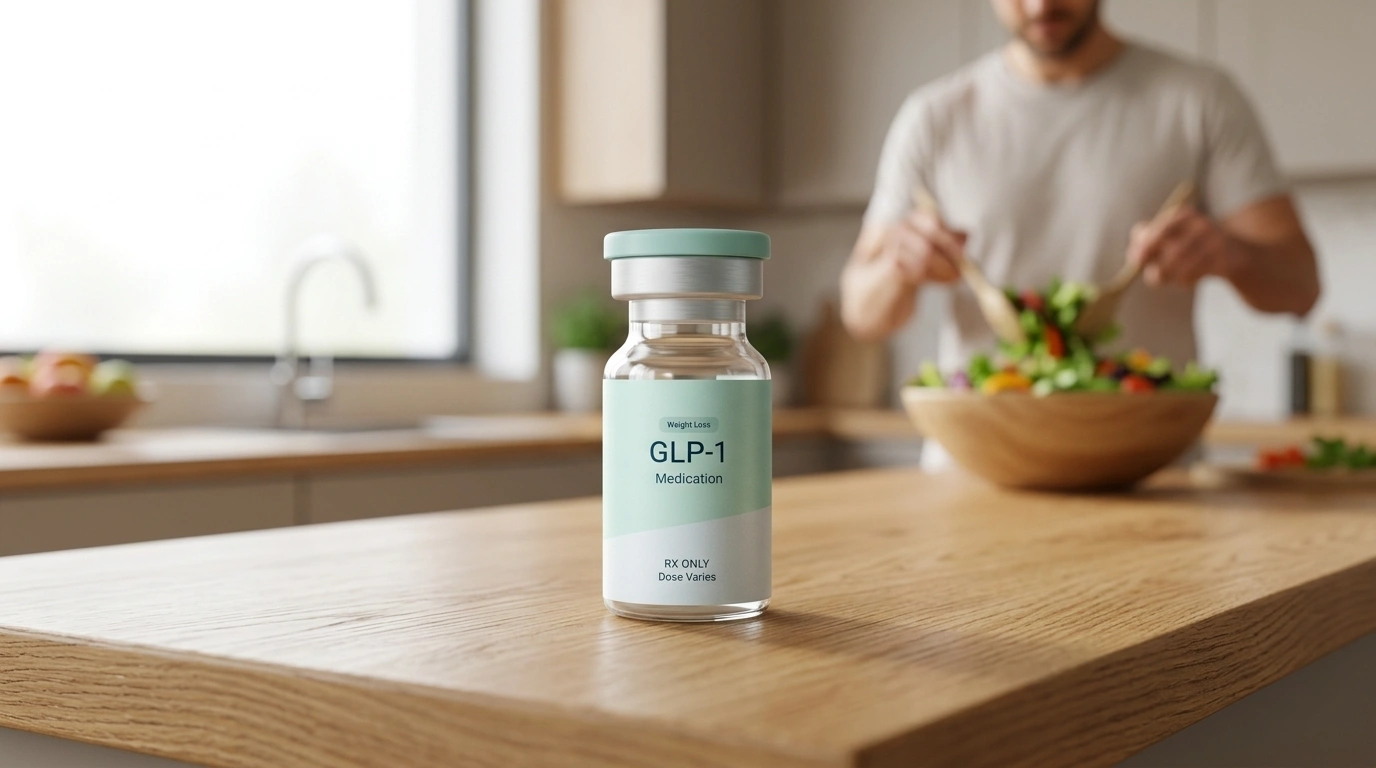
Before you take your first dose, it helps to understand what you are holding. Ozempic® is a branded medication containing semaglutide, which belongs to a class of drugs known as GLP-1 receptor agonists. GLP-1, or glucagon-like peptide-1, is a hormone your body naturally produces to regulate blood sugar and appetite. This medication is FDA-approved for the treatment of type 2 diabetes, though healthcare providers sometimes prescribe it off-label for chronic weight management.
The delivery system is a pre-filled, multi-dose injection pen. For a closer look at the device itself, read our semaglutide injection pen guide. These pens are designed for subcutaneous injection, which means the medication is delivered into the fatty tissue just below the skin. The needles used are remarkably thin and short, often only 4mm to 6mm in length. Because the needle is so small, most people find the sensation to be more like a tiny pinch than a traditional shot.
Key Takeaway: Subcutaneous injections target the fatty layer of the skin, not the muscle. This makes the process much less painful than common vaccinations like a flu shot.
Preparing for Your Weekly Injection
The key to a successful experience is preparation. If you want a broader walkthrough of the process, our guide to taking semaglutide injections can help reinforce the routine. Creating a consistent environment helps reduce stress and ensures you follow every safety step correctly. You should aim to take your medication on the same day each week, at a time that works best for your schedule.
Gather Your Supplies
Find a well-lit, clean surface to set up your supplies. You will need:
- Your Ozempic® pen
- A new, disposable needle (provided with your prescription)
- An alcohol swab or a cotton ball with rubbing alcohol
- A clean tissue or gauze pad
- An FDA-cleared sharps disposal container
Inspect the Medication
Before you begin, always check the label on your pen to ensure it is the correct medication and has not expired. Look through the clear window on the side of the pen. The liquid inside should be clear and colorless. If the medication looks cloudy, discolored, or contains visible particles, do not use it. Contact your pharmacist for a replacement.
Check the Temperature
Many people find that injecting cold medication straight from the refrigerator causes a slight stinging sensation. To make the process more comfortable, you can take your pen out of the refrigerator and let it sit at room temperature for about 15 to 20 minutes before use. Do not attempt to warm it using a microwave, hot water, or direct sunlight, as extreme heat can damage the semaglutide.
Choosing Your Injection Site
Selecting the right location is vital for both comfort and effective absorption. There are three primary areas recommended for subcutaneous injections:
The Abdomen
The stomach area is the most common choice for many individuals. It provides a large surface area with plenty of subcutaneous fat. You should aim for at least two inches away from your belly button. Avoid any areas where the skin is tender, bruised, red, or hard.
The Front of the Thighs
The upper, outer area of your thighs is another excellent option. This site is easy to see and reach while sitting down. Ensure you are injecting into the fatty tissue on the top or side of the leg rather than the muscle. For a site-by-site walkthrough, see our semaglutide injections: where and how to take your shot.
The Upper Arm
The back of the upper arm can be used if you have someone to help you or if you are comfortable reaching behind your shoulder. This area has a good amount of fatty tissue but can be more challenging to navigate on your own.
Note: It is important to rotate your injection sites every week. If you prefer using your abdomen, move the injection spot at least one inch away from where you injected last time. Constant rotation prevents the formation of hard lumps or thickened skin, a condition known as lipohypertrophy.
How to Give Yourself an Ozempic Shot
Once you have your supplies ready and have chosen your site, follow these steps carefully. Taking your time during the first few attempts will help the process become second nature.
Step 1: Wash Your Hands
Clean your hands thoroughly with soap and warm water. This is the simplest way to prevent infection at the injection site.
Step 2: Attach the Needle
Take a new needle and pull off the paper tab. Push the needle straight onto the pen and turn it until it is tight. Pull off the outer needle cap and the inner needle cap. Set the outer cap aside, as you will need it later, but you can discard the inner cap.
Step 3: Check the Flow (New Pens Only)
If you are using a brand-new pen for the very first time, you must check the flow to ensure the needle is not blocked. Turn the dose selector until the flow check symbol (a small line with a dot) lines up with the pointer. Hold the pen with the needle pointing up and press and hold the dose button. A drop of medication should appear at the needle tip. If it does not, repeat this step up to six times. If a drop still does not appear, change the needle and try once more.
Step 4: Select Your Dose
Turn the dose selector until the dose counter shows the exact dose your healthcare provider prescribed (for example, 0.25 mg or 0.5 mg). You will hear a clicking sound as you turn the dial. Ensure the number is perfectly aligned with the pointer.
Step 5: Clean the Skin
Use an alcohol swab to clean your chosen injection site. Move the swab in a circular motion and let the skin air dry completely. Do not blow on the skin to dry it, as this can introduce bacteria.
Step 6: Insert the Needle
Hold the pen so you can clearly see the dose counter. Insert the needle into your skin at a 90-degree angle. The needle is very short, so you should insert it all the way.
Step 7: Deliver the Medication
Press and hold down the dose button. You will see the dose counter move back toward zero. Once the counter reaches zero, do not pull the needle out yet. Count slowly to six while keeping the needle in your skin and the button pressed. This ensures that the full amount of medication has left the needle and entered your body.
Step 8: Remove the Needle
Pull the needle straight out of your skin. If you see a tiny drop of blood, press the area gently with a clean tissue or gauze, but do not rub the site.
What to Do After Your Injection
Proper cleanup is just as important as the injection itself. Handling needles safely protects you and others in your household.
Safe Needle Disposal
Never reuse a needle or share your pen with anyone else. Carefully place the outer needle cap back onto the needle without touching it directly to avoid accidental sticks. Unscrew the needle and drop it immediately into your sharps disposal container. If you do not have a red biohazard container, a heavy-duty plastic household container with a tight-fitting lid, like a laundry detergent bottle, can work in a pinch.
Storing Your Pen
Once the needle is removed, put the pen cap back on.
- Unopened pens: Keep these in the refrigerator between 36°F and 46°F.
- Opened pens: You can keep your active pen in the refrigerator or at room temperature (59°F to 86°F) for up to 56 days. Keep the pen away from excessive heat and direct sunlight. Always store it without the needle attached to prevent leaking or contamination.
Key Takeaway: Counting to six after the dose counter hits zero is the most important step for ensuring you receive your full prescribed dose.
Tips for a More Comfortable Experience
If you are still feeling uneasy about the process, these small adjustments can make a significant difference in your comfort level.
- Numb the area: If you are very sensitive to pain, you can hold an ice cube to the injection site for a minute before cleaning it with alcohol. This can slightly numb the skin.
- Relax your muscles: Try to keep the area you are injecting relaxed. If you are injecting into your thigh, sit down so your leg muscles aren’t tensed.
- Alternate sides: Many people find it helpful to use the “left side on odd weeks, right side on even weeks” rule for their abdomen or thighs.
- Manage side effects: Some people experience mild nausea after their weekly shot. If this happens to you, we recommend exploring support options like our GLP-1 Daily Support supplement, which is designed to help your body manage the transition.
At TrimRx, our goal is to ensure you have the tools you need to succeed. If you want a side-by-side look at branded and compounded options, our Semaglutide vs Ozempic: Key Differences article breaks down the differences.
If you are ready to take the next step but haven’t yet started a clinical program, we invite you to see if you qualify with our free assessment quiz. Through our platform, patients can access compounded semaglutide, which is prepared in FDA-registered, inspected compounding pharmacies. This can be a streamlined way to stay consistent with your treatment without the stress of navigating traditional pharmacy backorders.
Troubleshooting Common Injection Issues
Even with the best preparation, you might encounter a few hiccups. Here is how to handle common situations:
What if I see a drop of liquid on the needle tip after injecting? This is normal and does not mean you missed your dose. However, if you see a stream of liquid, you likely pulled the needle out too fast. Remember to count to six next time. Do not take a second dose to make up for it.
What if the dose counter does not reach zero? This usually means the needle is blocked. Remove the needle, attach a new one, and try again. If it still doesn’t work, your pen may be empty or defective.
What if I forget a dose? If you miss a dose and it has been five days or less since your scheduled day, take it as soon as you remember. If it has been more than five days, skip the missed dose and take your next dose on your usual scheduled day. Do not take two doses at once.
What if the liquid is cloudy? Semaglutide should always be clear. If it is cloudy, it has likely been exposed to extreme temperatures or has expired. Do not use it, as it may be ineffective or unsafe.
Support on Your Weight Loss Journey
Learning how to give yourself an Ozempic shot is just one part of a much larger journey toward metabolic health. While the medication is a powerful tool, it works best when paired with professional guidance and a supportive community. We focus on providing a telehealth-first experience that removes the barriers of waiting rooms and in-person visits. Our mission is to help you achieve sustainable results through a personalized approach that honors your unique health history.
If you are ready to take the next step but haven’t yet started a clinical program, we invite you to complete the free assessment quiz. Whether you are using branded options or exploring the flexibility of compounded semaglutide from our partner pharmacies, we are here to support you every step of the way.
“True health is a marathon, not a sprint. Mastering your weekly routine is a significant milestone in that race.”
By following these steps, you are taking control of your health. The process will become faster and easier each week until it is just a small, unremarkable part of your Sunday or Monday morning. Stay consistent, stay informed, and if you are ready for the next step, complete the free assessment quiz.
FAQ
Where is the best place to inject Ozempic® for the least pain?
Most patients report that the abdomen is the least painful site because it typically contains the most subcutaneous fat, which has fewer nerve endings than muscle. To minimize discomfort, ensure you are at least two inches away from the navel and let the alcohol dry completely before inserting the needle. Rotating your site every week also prevents the skin from becoming sensitive or irritated.
Can I reuse the needles if they look clean?
No, you must never reuse a needle. Even after a single use, the microscopic tip of the needle becomes dull and jagged, which can cause more pain and skin damage during the next injection. Reusing needles also significantly increases your risk of infection and can lead to the needle becoming blocked, preventing you from receiving your full dose of medication.
What should I do if I accidentally inject into a muscle?
While Ozempic® is intended for subcutaneous (under the skin) fat, accidentally hitting a muscle is not usually a medical emergency, but it may cause the medication to absorb more quickly than intended. This could potentially increase the intensity of side effects like nausea. If you experience unusual pain or a significant reaction, consult your healthcare provider for guidance.
Does Ozempic® need to be refrigerated after the first use?
After the first use, you have the choice to keep your Ozempic® pen in the refrigerator or at room temperature (up to 86°F) for up to 56 days. Many people prefer to keep it at room temperature after opening because it makes the weekly injection feel more comfortable. Regardless of where you store it, always ensure the pen cap is on and the needle is removed to maintain the integrity of the medication. If you’re still deciding whether semaglutide treatment is a fit, you can take the free assessment quiz.
Disclaimer: This content is for informational purposes only and does not constitute medical advice. It is not intended to diagnose, treat, cure, or prevent any disease or condition. Individual results may vary. Always consult a qualified healthcare professional before starting any weight loss program or medication.
Transforming Lives, One Step at a Time
Keep reading

Gas and Bloating on Ozempic or Semaglutide: Why It Happens and How to Manage It
Yes, gas, bloating, and belching are common on Ozempic and semaglutide, and for most people they’re a manageable part of the adjustment period. The…

Dizziness on Ozempic or Semaglutide: Why It Happens and What to Do
If you feel dizzy or lightheaded on Ozempic or semaglutide, you’re not alone, and in most cases the cause is manageable. The usual culprits…

Ozempic and Tylenol (Acetaminophen): Is It Safe?
Acetaminophen (the active ingredient in Tylenol) is generally considered safe to take with Ozempic or semaglutide, and there’s no dangerous direct interaction between them….

