How to Give Yourself Your Ozempic Shot
Introduction
Standing in your kitchen with a prescription box in hand, you might feel a mix of excitement and hesitation. For many, the transition to using an injectable medication like Ozempic® (semaglutide) represents a significant step toward better metabolic health, yet the thought of a needle can cause genuine anxiety. It is completely normal to feel nervous about self-administering a medication for the first time. At TrimRx, we believe that education is the most effective tool for replacing fear with confidence. This guide will walk you through the entire process of preparing, administering, and storing your medication safely. We will cover the specific techniques for a painless injection, how to choose the best sites, and what to do if you encounter any issues with your pen. Our goal is to ensure you feel like an expert by the time you reach your second dose. If you want to see whether a personalized prescription program is the right fit, take the free assessment quiz.
Quick Answer: To give yourself an Ozempic® shot, attach a new needle, dial your prescribed dose, and clean a site on your abdomen, thigh, or upper arm with alcohol. Insert the needle at a 90-degree angle, press the button until the counter hits zero, count to six, and then safely dispose of the needle in a sharps container.
Understanding the Medication and the Tool
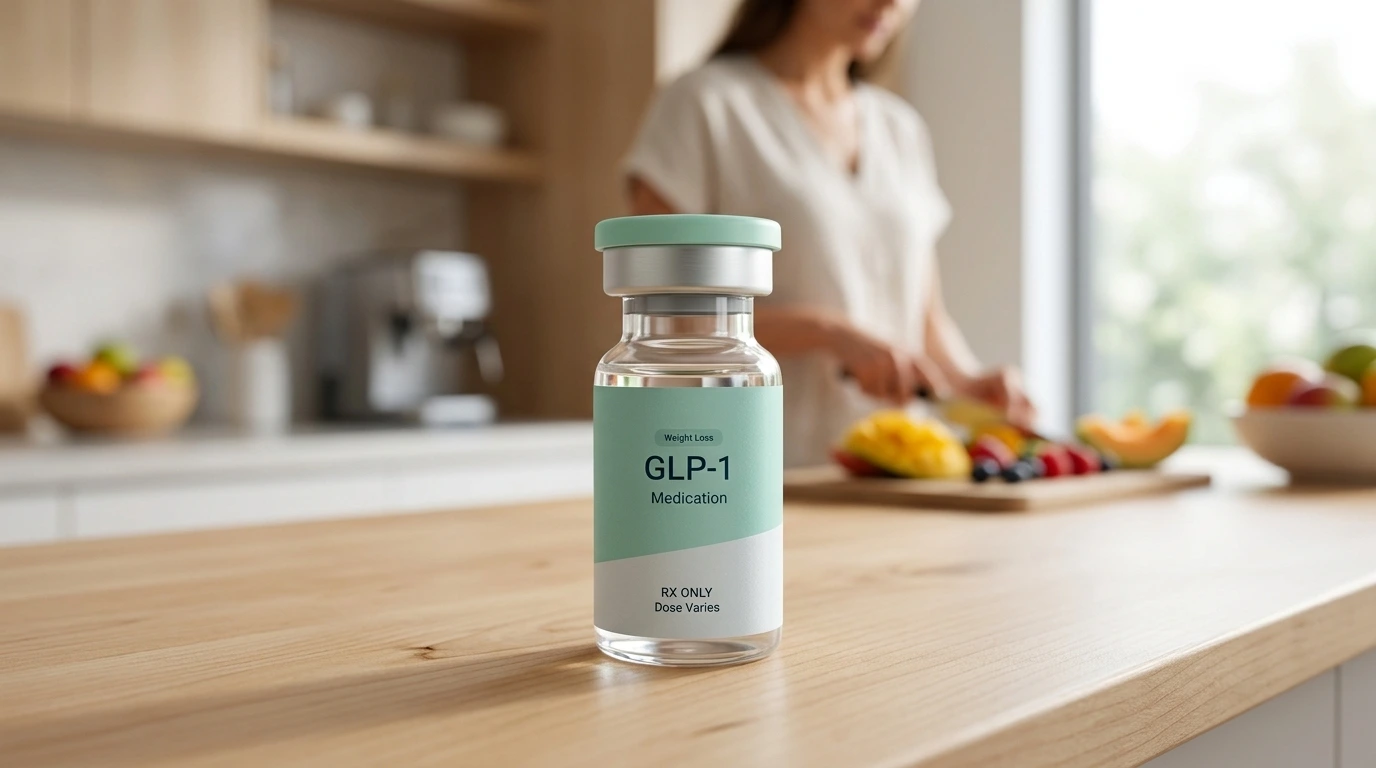
Before your first injection, it is helpful to understand what is happening inside the pen. Ozempic® is a branded version of semaglutide, which belongs to a class of drugs called GLP-1 receptor agonists. GLP-1 (glucagon-like peptide-1) is a hormone your body naturally produces to regulate appetite and blood sugar. This medication mimics that hormone to help your body manage insulin more effectively and slow down digestion, which can lead to significant weight management results when combined with lifestyle changes. For a simpler explanation of the hormone itself, see our what GLP-1 actually is guide.
The delivery system is a pre-filled, multi-dose pen. Unlike traditional syringes where you must manually draw liquid from a vial, these pens are designed for precision and ease. The needles used are remarkably thin—often about the width of two human hairs—and are designed for subcutaneous injection. This means the medication is delivered into the fatty tissue just below the skin, rather than into a muscle or a vein. Because there are fewer nerve endings in this fatty layer, the sensation is typically described as a “tiny prick” rather than a painful sting.
Preparing for Your First Injection
Preparation is the most important step in reducing anxiety. By creating a calm environment and having all your supplies ready, you minimize the risk of technical errors. If you’re planning your first dose, our How to Get Weight Loss Injections: Your First Steps guide is a useful companion.
Gathering Your Supplies
Set aside a clean, well-lit area on a table or counter. You will need:
- Your Ozempic® pen
- A new, sterile pen needle (provided in the box or by your pharmacy)
- An alcohol swab or a cotton ball with rubbing alcohol
- A sterile gauze pad or a clean tissue
- An FDA-cleared sharps disposal container (or a heavy-duty plastic container like a laundry detergent bottle)
Inspecting the Pen
Always check the label to ensure you are using the correct medication and that it has not expired. Look through the clear window on the pen; the liquid inside should be clear and colorless. If the liquid looks cloudy, discolored, or contains visible particles, do not use it.
Note: If your pen has been in the refrigerator, you may want to let it sit at room temperature for 15 to 30 minutes. Injecting cold medication can sometimes cause a slight stinging sensation that is easily avoided by letting the pen warm up slightly.
Choosing and Preparing the Injection Site
There are three primary areas recommended for subcutaneous injections. These areas have sufficient fatty tissue to absorb the medication correctly.
Recommended Sites
- The Abdomen: This is the most common site. Choose an area at least two inches away from your belly button. Avoid your waistline, as tight clothing might irritate the site later.
- The Thigh: Use the front or outer side of your upper thigh. This area is often preferred by those who find it easier to see and reach while sitting down.
- The Upper Arm: This is the back of the upper arm. Because it can be difficult to reach this area yourself, it is often a better choice if you have someone helping you with the injection.
The Importance of Rotation
You must rotate your injection site every week. This does not mean you have to switch from your stomach to your thigh every time; you can simply move to a different spot within the same general area. For example, if you injected on the left side of your abdomen this week, move to the right side next week.
Myth: Injecting in the same spot every week helps the medication “build up” and work better. Fact: Repeatedly injecting in the exact same spot can cause lipohypertrophy, which is the development of fatty lumps under the skin. These lumps can prevent the medication from being absorbed properly, making your treatment less effective.
Cleaning the Area
Once you have selected your spot, wipe the skin thoroughly with an alcohol swab. Use a circular motion, starting at the center and moving outward. Allow the skin to air dry completely. Do not blow on the skin or fan it with your hand, as this can reintroduce bacteria.
The Step-by-Step Injection Process
Now that you are prepared, follow these steps for a successful administration. For a companion walkthrough, see our Navigating Your First Semaglutide Dose guide.
Step 1: Attach the Needle
Remove the paper tab from a new needle. Push the needle straight onto the pen and twist it clockwise until it is tight. Pull off the outer needle cap (save it for later) and then pull off the inner needle cap (discard this).
Step 2: Check the Flow (New Pens Only)
If this is the very first time you are using a new pen, you must perform a flow check. Turn the dose selector to the “flow check” symbol (it looks like a small line with a drop). Hold the pen with the needle pointing up and press the dose button. You should see a tiny drop of liquid appear at the tip. This ensures the needle is not blocked and the pen is working correctly.
Step 3: Set Your Dose
Turn the dose selector until the counter shows your prescribed dose (for example, 0.25 mg or 0.5 mg). Ensure the number lines up exactly with the pointer.
Step 4: Insert the Needle
Gently hold a fold of skin if necessary, though many find the skin at the abdomen or thigh is firm enough without pinching. Insert the needle straight into your skin at a 90-degree angle. You do not need to push hard; the needle is very short and designed to go to the correct depth with light pressure.
Step 5: Administer the Medication
Press and hold the dose button all the way down. You will see the dose counter move back toward zero. Once the counter reaches zero, do not remove the needle yet.
Step 6: The Six-Second Count
Slowly count to six while keeping the needle in your skin and the button pressed. This ensures that the full volume of the medication has been dispensed from the tiny needle into your tissue. After counting to six, pull the needle straight out.
Key Takeaway: Precision and patience are vital. The “count to six” rule is the most important step to ensure you receive your full prescribed dose and avoid medication leaking out after the needle is removed.
| Step | Action | Why it Matters |
|---|---|---|
| Priming | Check for a drop on a new pen | Confirms the needle isn’t blocked |
| Dosing | Turn dial to your specific mg | Ensures you don’t under-dose or over-dose |
| Angle | 90-degree straight entry | Reaches the fatty layer, avoiding muscle |
| Holding | Count to 6 after the dial hits 0 | Allows the full dose to be absorbed |
After the Injection: Storage and Safety
Once the injection is complete, you might notice a tiny drop of blood or a small amount of clear liquid at the site. This is normal. You can press a gauze pad or cotton ball against the skin, but do not rub the area.
Needle Disposal
Carefully put the outer needle cap back on the needle without touching the tip. Unscrew the needle and drop it immediately into your sharps container. Never throw needles directly into the household trash. This protects sanitation workers and your family from accidental needle sticks.
Storing Your Pen
- Unused Pens: Keep these in the refrigerator between 36°F and 46°F.
- In-Use Pens: Once you have used the pen for the first time, you can keep it in the refrigerator or at room temperature (up to 86°F) for up to 56 days.
- Protection: Always keep the pen cap on when not in use to protect the medication from light. Never store the pen with a needle attached.
Troubleshooting Common Issues
Even with the best preparation, you might encounter a minor hurdle. Here is how to handle the most common situations.
The Dose Counter Doesn’t Hit Zero
If the button stops and the counter isn’t at zero, you may have run out of medication in that pen. Do not force the button. Note the number on the counter—that is the amount you did not receive. Attach a new needle to a new pen, dial that remaining amount, and complete your dose in a new injection site.
Liquid Leaks from the Tip
If you see a stream of liquid after removing the needle, you likely didn’t wait long enough or didn’t hold the button down. Do not try to inject more medication to make up for it. Simply wait until your next scheduled dose and remember the six-second rule for next time.
You Missed a Dose
If you miss your injection day, take the dose as soon as you remember, provided it is within five days of the missed dose. If more than five days have passed, skip the missed dose and resume your normal schedule on your next regular injection day. Consult a healthcare provider if you miss more than two doses in a row.
Minimizing Discomfort and Anxiety
For many, the hurdle is mental rather than physical. If you are feeling particularly anxious, consider these strategies to make the experience easier: if you want a more detailed breakdown of nausea, fatigue, and other common reactions, our GLP-1 side effects guide is a helpful read.
The Ice Trick: Briefly hold an ice cube against the injection site for about 30 seconds before cleaning it with alcohol. This can numb the surface of the skin.
Deep Breathing: Take three slow, deep breaths before you insert the needle. Focus on relaxing your muscles, especially in the area where you are injecting. Tense muscles can make the sensation more noticeable.
Visual Distraction: Don’t stare at the needle as it enters. Focus on the dose counter window instead. Seeing the numbers move can give you a sense of control and progress.
A Holistic Approach to Success
Taking the medication is only one part of the journey. To get the most out of a GLP-1 program, it is essential to support your body through nutrition and hydration. Many patients find that focusing on high-protein meals and staying ahead of hydration needs helps minimize common side effects like nausea or fatigue. If you want added nutritional support during treatment, the GLP-1 Daily Support supplement is designed for that purpose.
We understand that every individual’s metabolic profile is unique. That is why our approach at TrimRx emphasizes personalization. We connect you with licensed providers who can help tailor your program to your specific needs. While Ozempic® is a well-known branded option, your provider might also discuss alternatives like Compounded Semaglutide. These are prepared in FDA-registered, inspected compounding pharmacies and can offer a personalized solution when appropriate. For energy support during weight loss, the Weight Loss Boost supplement may be a helpful option. Regardless of the specific medication, the goal remains the same: sustainable, healthy weight loss supported by clinical expertise.
Bottom line: Self-injection is a skill that becomes second nature very quickly. By following a consistent routine and prioritizing safety, you can manage your treatment with ease.
Conclusion
Giving yourself an Ozempic® shot is a straightforward process that fits easily into a weekly routine. By mastering the steps—preparation, site selection, the six-second count, and safe disposal—you take full ownership of your health journey. Remember to be patient with yourself during the first few weeks as you adjust to the routine and the way the medication feels in your body. At TrimRx, we are dedicated to providing the tools, the technology, and the clinical support necessary to make your path to metabolic health as clear and supportive as possible. Our mission is to combine scientific rigor with genuine empathy, ensuring you never have to navigate these steps alone.
Next Steps for Your Journey:
- Stay Consistent: Try to take your injection on the same day every week to maintain steady levels in your system.
- Monitor Your Progress: Keep a log of your injection sites and any symptoms you experience.
- Seek Support: If you have questions about your dosage or side effects, reach out to a healthcare professional.
If you are ready to take the next step in your weight loss journey with a program tailored specifically to your health profile, take the free assessment quiz to see which personalized program is right for you.
FAQ
Does the Ozempic® injection hurt?
Most people describe the sensation as a very minor pinch or a quick prick. The needles are extremely thin and short, designed to reach only the fatty tissue where there are fewer nerve endings compared to muscle. Letting the medication reach room temperature before injecting can further reduce any minor stinging.
What is the best time of day to take my shot?
There is no “perfect” time of day required by the medication, but consistency is key. Many people prefer taking it in the evening before bed to sleep through any initial mild nausea, while others prefer mornings to stay on a strict routine. Choose a time that you can easily remember every week. If you want a broader getting-started overview, our Weight Loss Medication Checklist: Getting Started is a useful companion read.
Can I inject Ozempic® into my arm myself?
While it is possible, it can be physically awkward to reach the fatty tissue on the back of the upper arm while maintaining a 90-degree angle and holding the button. If you do not have a partner to help you, the abdomen or the thigh are generally much easier and safer sites for self-injection.
What should I do if I see a bruise at the injection site?
Minor bruising can occasionally occur if the needle hits a small capillary under the skin. It is usually not a cause for concern. To prevent this, ensure you are not pressing too hard against the skin and that you are rotating your injection sites every week to give the tissue time to heal.
Disclaimer: This content is for informational purposes only and does not constitute medical advice. It is not intended to diagnose, treat, cure, or prevent any disease or condition. Individual results may vary. Always consult a qualified healthcare professional before starting any weight loss program or medication.
Transforming Lives, One Step at a Time
Keep reading

Gas and Bloating on Ozempic or Semaglutide: Why It Happens and How to Manage It
Yes, gas, bloating, and belching are common on Ozempic and semaglutide, and for most people they’re a manageable part of the adjustment period. The…

Dizziness on Ozempic or Semaglutide: Why It Happens and What to Do
If you feel dizzy or lightheaded on Ozempic or semaglutide, you’re not alone, and in most cases the cause is manageable. The usual culprits…

Ozempic and Tylenol (Acetaminophen): Is It Safe?
Acetaminophen (the active ingredient in Tylenol) is generally considered safe to take with Ozempic or semaglutide, and there’s no dangerous direct interaction between them….

