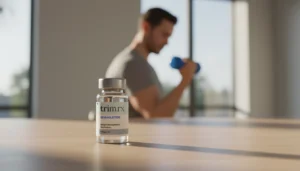
How to Mix Semaglutide Injection: A Step-by-Step Guide

Introduction
Starting a medical weight loss journey can feel like a major turning point. For many, years of restrictive dieting and exhausting exercise routines have led to little more than frustration. You may have finally found a path forward through GLP-1 medications, only to feel a new wave of anxiety when your first shipment arrives. If your medication comes in a vial rather than a pre-filled pen, you might be wondering exactly how to prepare it safely.
At TrimRx, we understand that the clinical aspects of weight loss—like handling vials and syringes—can feel intimidating at first. This guide covers everything from gathering your supplies to the final injection, ensuring you feel confident and empowered. By understanding the process of reconstitution, which is the technical term for mixing a powdered medication with a liquid, you can take control of your health from the comfort of home. This article provides a clear, evidence-based roadmap for preparing your medication safely and effectively. If you want help figuring out whether a prescription program is the right starting point, you can take the free assessment quiz at any time.
Quick Answer: Mixing semaglutide injection involves a process called reconstitution. You typically add a specific amount of bacteriostatic water to a vial containing powdered semaglutide. You must use sterile techniques, avoid shaking the vial, and ensure the powder is completely dissolved before use.
What Is Semaglutide?
Semaglutide is a medication known as a GLP-1 receptor agonist. GLP-1 stands for glucagon-like peptide-1, which is a hormone your body naturally produces in the gut. This hormone plays a vital role in managing how your body processes food and signals fullness to your brain. For a plain-English refresher on the hormone itself, see our GLP-1 basics guide.
When you use semaglutide, it mimics this natural hormone but stays active in your system much longer. It works by slowing down gastric emptying, which means food stays in your stomach for a longer duration. This helps you feel satisfied with smaller portions. Additionally, it communicates with the brain’s appetite centers to reduce intense cravings and “food noise.”
While many people recognize brand-name versions like Ozempic® or Wegovy®, these medications are also available in compounded forms. Compounded semaglutide is often prepared by specialized pharmacies when there is a drug shortage or a need for a specific dosage. It is important to note that while the pharmacies we work with are FDA-registered and inspected, compounded medications themselves are not FDA-approved in the same way branded drugs are.
Why Some Medications Require Mixing
You may wonder why some semaglutide arrives as a ready-to-use liquid while others come as a powder. The powdered form is often referred to as “lyophilized” or freeze-dried. This process is used to stabilize the delicate peptide molecules, ensuring they remain potent and effective for a longer period during shipping and storage. For a broader overview of the medication, see our semaglutide for weight loss guide.
When a medication is lyophilized, it must be “reconstituted” before it can be injected. Reconstitution is simply the process of adding a sterile liquid, known as a diluent, back into the powder to create an injectable solution. For semaglutide, the most common diluent used is bacteriostatic water.
Key Takeaway: Reconstitution is a standard clinical process that turns stable, freeze-dried medication back into a liquid form. Using the correct ratio of liquid to powder is essential for ensuring your dosage is accurate.
Essential Supplies for Your Injection
Before you begin the mixing process, you must gather all your supplies. Having everything within reach helps maintain a sterile environment and reduces the chance of errors.
You will typically need the following items:
- A vial of lyophilized semaglutide: This is the powdered medication.
- Bacteriostatic water (BAC water): This is sterile water containing a small amount of benzyl alcohol, which acts as a preservative to prevent bacterial growth.
- Large mixing syringes: Used for transferring the BAC water to the medication vial.
- Insulin syringes: These have smaller needles and are used for your actual weekly injection.
- Alcohol prep pads: Essential for sanitizing the tops of the vials and your skin.
- A sharps container: A puncture-proof container for disposing of used needles safely.
If you are following a personalized program through our platform, your treatment kit will often include these components. We aim to make the process as straightforward as possible so you can focus on your progress.
Preparing Your Sterile Environment
Safety starts with a clean workspace. Because you are performing a subcutaneous injection (an injection into the fatty tissue just under the skin), preventing contamination is your top priority.
Step 1: Clean your hands. Wash your hands thoroughly with warm water and soap for at least 20 seconds. Dry them with a clean paper towel or a fresh hand towel.
Step 2: Sanitize your workspace. Choose a flat, well-lit surface like a kitchen table or bathroom counter. Wipe the area down with a disinfectant or an alcohol wipe.
Step 3: Inspect your vials. Check the labels on both the semaglutide and the bacteriostatic water. Ensure the expiration dates have not passed. Look at the powder; it should appear white or off-white and should not contain any visible debris or discoloration.
How to Mix Semaglutide Injection: Step-by-Step
Mixing your medication requires precision. If you are unsure about the specific volume of liquid your provider has prescribed, stop and contact your healthcare professional before proceeding.
Step 1: Sanitize the Vials
Remove the plastic flip-caps from both the semaglutide vial and the bacteriostatic water vial. Use a fresh alcohol prep pad to firmly wipe the rubber stopper on the top of each vial. Let the alcohol air-dry completely; do not blow on it, as this can introduce bacteria.
Step 2: Draw Air into the Syringe
Take your mixing syringe and pull back the plunger to fill it with air. The amount of air should be equal to the amount of bacteriostatic water you intend to draw out. For example, if your instructions call for 2ml of water, draw 2ml of air.
Step 3: Equalize the Pressure
Insert the needle of the mixing syringe into the rubber stopper of the bacteriostatic water vial. Push the plunger down to inject the air into the vial. This creates positive pressure, making it much easier to withdraw the liquid.
Step 4: Withdraw the Bacteriostatic Water
Turn the vial and syringe upside down. Ensure the tip of the needle is submerged in the liquid. Slowly pull back the plunger until you have reached the exact measurement prescribed by your healthcare provider. Once finished, remove the needle from the vial.
Step 5: Inject Liquid into the Semaglutide Powder
Insert the needle into the semaglutide vial containing the powder. Do not spray the liquid directly onto the powder. Instead, angle the needle so the water flows slowly down the inside glass wall of the vial. This “gentle” approach protects the delicate peptide structure of the medication.
Step 6: The Reconstitution Process
Remove the syringe and dispose of the needle in your sharps container. You will notice the powder beginning to dissolve. Gently swirl the vial between your palms. Never shake the vial. Shaking can damage the semaglutide molecules and create excessive air bubbles that make accurate dosing difficult.
Step 7: Final Inspection
Set the vial down and let it sit for a few minutes. Once the liquid is completely clear and no powder is visible at the bottom, your medication is ready. If the liquid remains cloudy or has floating particles after several minutes of gentle swirling, do not use it and contact your pharmacy.
Understanding the Titration Schedule
When you start a GLP-1 program, you do not start at the maximum dose. Instead, you follow a titration schedule. This is a gradual increase in your dosage over several weeks. This method allows your body to acclimate to the medication, which significantly reduces the risk of gastrointestinal side effects.
| Phase | Common Dosage | Typical Duration |
|---|---|---|
| Initiation | 0.25 mg | Weeks 1–4 |
| Escalation 1 | 0.5 mg | Weeks 5–8 |
| Escalation 2 | 1.0 mg | Weeks 9–12 |
| Escalation 3 | 1.7 mg | Weeks 13–16 |
| Maintenance | 2.4 mg | Week 17+ |
Note: The table above represents a standard schedule. Your specific dose may vary based on your health profile and how you respond to the medication. Always follow the instructions provided by your licensed healthcare professional.
Where to Inject Semaglutide
Semaglutide is administered via a subcutaneous injection. This means it goes into the fatty layer just beneath the skin, not into a muscle or a vein. There are three primary areas recommended for these injections:
- Abdomen: At least two inches away from your belly button.
- Thighs: The front or outer portion of the upper thigh.
- Upper Arm: The back fatty portion, though this usually requires assistance from another person.
The Importance of Site Rotation You should never inject into the exact same spot every week. Rotating your injection sites helps prevent skin irritation and a condition called lipohypertrophy, which is a buildup of fatty tissue that can interfere with medication absorption. A simple way to track this is to rotate clockwise around your abdomen or switch between your left and right thighs each week. For a deeper look at placement and rotation, see our where to inject semaglutide guide.
Storage and Safety Guidelines
Once you have mixed your semaglutide, it becomes much more sensitive to temperature and light. Proper storage is essential to maintain the integrity of the medication.
- Refrigeration is Mandatory: After reconstitution, the vial must be stored in the refrigerator. The ideal temperature is between 36°F and 46°F. Do not store it in the freezer or the door of the fridge, as temperatures can fluctuate in those areas.
- Protection from Light: Keep the vial in its original box or a dark container to protect it from light exposure.
- Shelf Life: Most reconstituted semaglutide vials are intended to be used within 28 to 56 days, depending on the specific pharmacy instructions. Check your prescription label for the precise “discard after” date.
- Sharp Disposal: Never throw used needles in the regular trash. If you do not have a medical sharps container, you can use a heavy-duty plastic container with a screw-top lid, like an empty laundry detergent bottle. Label it clearly as “Biohazard” or “Sharps.”
Managing Common Side Effects
While semaglutide is highly effective for many people, the body often needs time to adjust. Most side effects are related to the digestive system and are temporary.
Common issues include:
- Nausea or mild stomach upset
- Occasional constipation or diarrhea
- Feeling full very quickly
- Mild fatigue
To help manage these, we recommend staying well-hydrated throughout the day. Eating smaller, more frequent meals can also prevent the “overfull” feeling that leads to nausea. If you find yourself struggling with consistent digestive changes, our GLP-1 Daily Support supplement can be a helpful addition to your routine to support gut health and nutrient absorption.
Myth: “If I feel side effects, the medication is hurting me.” Fact: Most side effects are a sign that the medication is active in your system and slowing down your digestion. These symptoms usually peak during the first few days after an injection and fade as your body adjusts to the new dose.
Why a Personalized Program Matters
At TrimRx, we believe that medication is just one piece of the puzzle. Successful, sustainable weight loss requires a holistic approach that combines clinical expertise with ongoing support. When you join our program, you aren’t just getting a prescription; you are getting a dedicated team.
Our telehealth-first model means you can access specialists and manage your treatment without ever sitting in a waiting room. We connect you with licensed providers who review your medical history and goals through our free eligibility assessment to determine the best path forward. This ensures that your dosage and treatment plan are tailored specifically to your body’s needs.
Optimizing Your Results
Mixing and administering your medication correctly is the first step, but how you live alongside the medication determines your long-term success.
- Focus on Protein: Since your appetite will be reduced, every bite counts. Prioritize lean proteins like chicken, fish, tofu, or beans to help preserve muscle mass while you lose fat.
- Hydration is Key: GLP-1 medications can sometimes mask thirst signals. Aim for at least 64 ounces of water daily.
- Incorporate Movement: You don’t need to run a marathon. Walking 30 minutes a day can significantly enhance the metabolic benefits of semaglutide. If you want extra support while you build that habit, the Weight Loss Boost supplement may be worth exploring.
- Be Patient: Sustainable weight loss is a marathon, not a sprint. While some people see results in the first few weeks, the most significant changes often happen after several months of consistent use.
The TrimRx Approach to Weight Health
We are committed to providing a transparent, supportive environment for your weight loss journey. Our mission is to remove the barriers that often prevent people from accessing modern metabolic treatments. By offering high-quality compounded medications from inspected pharmacies and 24/7 access to specialized support, we empower you to make lasting changes.
Our programs are designed to be simple and all-inclusive. We believe that managing your health shouldn’t be a source of stress. Whether you are navigating your first reconstitution or reaching your maintenance phase, our team is here to guide you with empathy and science-backed expertise.
Conclusion
Learning how to mix semaglutide injection is a practical skill that opens the door to a new way of managing your metabolic health. By following the steps of sanitization, careful measurement, and gentle mixing, you ensure that every dose is safe and effective. While the process may feel clinical at first, it quickly becomes a routine part of a healthier lifestyle.
Remember that you do not have to navigate this alone. If you are ready to take the next step toward a healthier version of yourself, our personalized programs offer the clinical oversight and support you need.
Bottom line: Success with semaglutide comes down to three things: proper preparation, consistent dosing, and a supportive environment.
To see if a personalized GLP-1 program is the right fit for your goals, we invite you to take our free assessment quiz today.
FAQ
How much bacteriostatic water do I add to my semaglutide?
The amount of water, or diluent, depends entirely on the concentration of the powder and the instructions provided by your healthcare professional. Common volumes include 2ml or 5ml, but you must refer to your specific prescription label to ensure your final dosage calculation is correct. If you’re still deciding whether this treatment is right for you, you can check your eligibility with the free assessment before you begin.
What should I do if my semaglutide is cloudy after mixing?
A cloudy solution usually indicates that the medication has not fully dissolved or that there is a problem with the vial’s integrity. Gently swirl the vial for another minute; if it remains cloudy or contains visible clumps, do not inject it and contact your pharmacy or provider for a replacement. For a more detailed overview of prep and handling, see our how to inject compounded semaglutide guide.
Can I mix my semaglutide and store it at room temperature?
No, once semaglutide is reconstituted with bacteriostatic water, it must be kept in the refrigerator. Heat and light can quickly break down the peptide structure, making the medication ineffective and potentially increasing the risk of bacterial growth.
Is it normal to have small air bubbles in the vial after mixing?
Yes, small bubbles can form during the swirling process. Let the vial sit upright in the refrigerator for a few minutes to allow the bubbles to settle. When drawing your dose into an insulin syringe, you can tap the side of the syringe to move any bubbles to the top and push them out before injecting. For a broader walkthrough, see our step-by-step semaglutide injection guide.
Disclaimer: This content is for informational purposes only and does not constitute medical advice. It is not intended to diagnose, treat, cure, or prevent any disease or condition. Individual results may vary. Always consult a qualified healthcare professional before starting any weight loss program or medication.
Transforming Lives, One Step at a Time
Keep reading

What Is CagriSema? The Semaglutide-Amylin Combination Explained
CagriSema is an investigational once-weekly injection from Novo Nordisk that combines two drugs in a single shot: semaglutide (the GLP-1 medication in Wegovy and…
Retatrutide vs Semaglutide: What’s Different
Semaglutide is the GLP-1 medication most people have heard of, sold as Ozempic and Wegovy and now available as a once-daily pill too. It’s…

TrimRx vs HealthRX.com for Compounded Semaglutide: Side-by-Side
Introduction Choosing between TrimRX and healthrx.com semaglutide programs is a choice between two good structures: TrimRX runs a flat $199 per month compounded program…

