Where Can I Give Myself the Ozempic Shot?
Introduction
Standing in your kitchen or bathroom, holding a medication pen for the first time, can feel like a heavy moment. You may feel a mix of excitement for the future and a natural hesitation about the actual process of self-injection. It is a common hurdle, but it is one you can easily clear with the right information. At TrimRx, we believe that understanding the “how” and “where” of your treatment is essential for building the confidence you need to succeed.
This post covers the three approved injection sites for GLP-1 medications, the importance of site rotation, and a clear step-by-step guide to help you administer your medication safely and comfortably. If you want to see whether a GLP-1 program is a fit for you, start with the free assessment quiz. By mastering these simple techniques, you ensure the medication is absorbed correctly while minimizing the risk of skin irritation. Our goal is to provide you with the clarity needed to make your weekly routine a stress-free part of your health journey.
Understanding Subcutaneous Injections
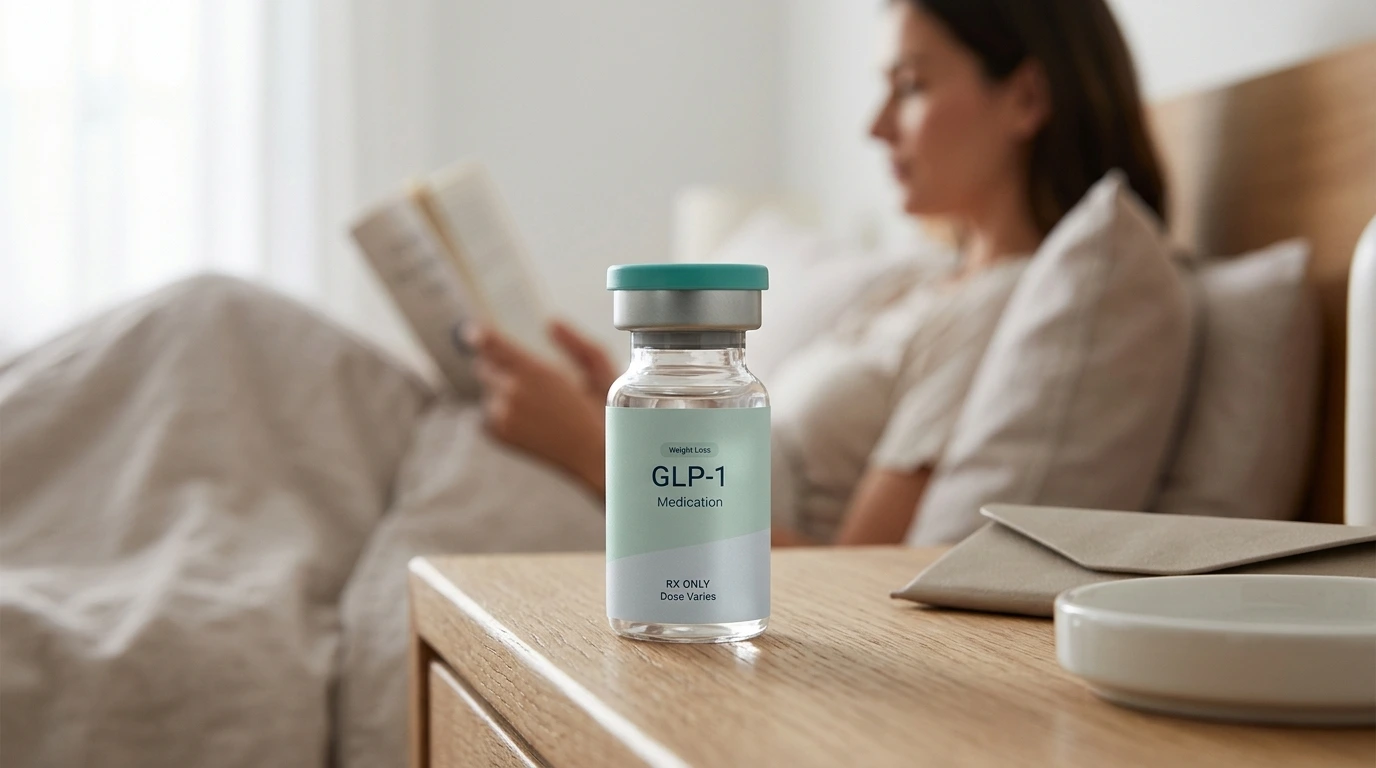
Before looking at specific locations, it is important to understand what a subcutaneous injection is. Medications like Ozempic® (semaglutide) and Wegovy® are glucagon-like peptide-1 (GLP-1) receptor agonists. If you want a broader explanation of what GLP-1 is, it can help make the rest of the injection process feel much clearer. A GLP-1 is a hormone that tells your brain you are full and helps manage blood sugar. These medications are designed to be injected into the subcutaneous tissue, which is the layer of fat directly beneath the skin but above the muscle.
Unlike a shot you might receive in your shoulder at a doctor’s office (which often goes into the muscle), GLP-1 medications need the fatty layer to ensure slow, steady absorption into the bloodstream. This slow release is what allows the medication to work effectively over the course of an entire week. If the medication is accidentally injected too deeply into the muscle, it may be absorbed too quickly, which can lead to increased side effects or reduced effectiveness.
Key Takeaway: Ozempic® must reach the fatty layer (subcutaneous tissue) to work correctly. Avoiding the muscle ensures the medication is released slowly, providing consistent appetite support throughout the week.
The Three Approved Injection Sites
Medical experts and the manufacturers of GLP-1 medications have identified three primary areas where the body has enough subcutaneous fat to support proper absorption. While all three are equally effective, you may find that one feels more comfortable or convenient for you.
1. The Abdomen (Stomach)
The abdomen is the most frequently used site for self-injection. It offers a large surface area with plenty of fatty tissue, making it easy to reach and see. For a more detailed walkthrough of where to inject semaglutide, this area is a great place to start.
- Where to inject: Choose an area on the front of your stomach.
- The Safety Zone: You must stay at least two inches away from your belly button (navel) in any direction.
- Why it works: The stomach typically has a consistent layer of fat that allows for predictable absorption of the medication.
2. The Front of the Thighs
The thighs are an excellent alternative for those who prefer not to use their abdomen or who find the thigh easier to stabilize while sitting down.
- Where to inject: Focus on the front or the outer-front portion of the thigh.
- The Safety Zone: Aim for the area halfway between your hip and your knee. Avoid the inner thigh, as the skin there can be more sensitive, and there is less subcutaneous fat.
- Why it works: This site is highly visible, making it easier to ensure the needle is at the correct angle.
3. The Back of the Upper Arm
The upper arm is a third approved site, though it is often considered the most difficult for self-administration.
- Where to inject: You are aiming for the “fleshy” part on the back of the arm, roughly where the triceps are located.
- The Safety Zone: Stay away from the bony part of the shoulder and the elbow.
- Why it works: Some people find they experience fewer gastrointestinal side effects when using the arm, though clinical evidence on this is anecdotal.
Note: Because it is difficult to pinch the skin on your own arm while simultaneously using the pen, many individuals choose the arm only if they have a partner or family member available to assist with the injection.
Comparison of Injection Sites
| Site | Ease of Self-Use | Visibility | Fat Density |
|---|---|---|---|
| Abdomen | Very High | Excellent | High |
| Thigh | High | Good | Moderate to High |
| Upper Arm | Low | Poor | Moderate |
Why Injection Site Rotation Matters
You should never inject into the exact same spot two weeks in a row. This practice, known as site rotation, is critical for maintaining the health of your skin and the fatty tissue beneath it. If you repeatedly use the same square inch of skin, you may develop a condition called lipohypertrophy. If you want a deeper dive into site rotation for semaglutide and tirzepatide, this is the section to bookmark.
Lipohypertrophy is the buildup of hardened, rubbery lumps under the skin caused by repeated trauma to the fat cells. These lumps are not just a cosmetic concern; they can physically block the medication from being absorbed. If you inject into a hardened area, the medication might not enter your system at the intended rate, leading to “stalls” in your progress or inconsistent blood sugar levels.
The “Clock Method” for Rotation
A simple way to manage rotation is to visualize your abdomen as a clock face.
- Week 1: Inject at the 12 o’clock position (above the belly button).
- Week 2: Move to the 3 o’clock position.
- Week 3: Move to the 6 o’clock position.
- Week 4: Move to the 9 o’clock position.
By moving at least one inch away from your previous site each week, you give the tissue a full month to heal before you return to the same general area.
Step-by-Step Guide to Your Injection
Following a consistent routine can turn a nerve-wracking task into a two-minute habit. Here is how to prepare and administer your dose correctly.
Step 1: Preparation. Check your medication pen to ensure the liquid is clear and colorless. If it looks cloudy or contains particles, do not use it. Wash your hands thoroughly with soap and water.
Step 2: Attach the needle. Remove the paper tab from a new, disposable needle and screw it onto the pen. Always use a fresh needle for every injection to prevent infection and ensure the sharpest, least painful entry. Remove both the outer and inner needle caps.
Step 3: Prime the pen (if needed). If it is a brand-new pen, you may need to perform a “flow check” to remove air bubbles. Turn the dose selector to the flow check symbol and press the button until a drop appears at the needle tip.
Step 4: Select your dose. Turn the dose selector until the window shows your prescribed dose. Ensure you have the correct number dialed in before proceeding.
Step 5: Clean the site. Wipe your chosen injection site with an alcohol swab. Let the skin air-dry completely. If the skin is still wet with alcohol, the needle may sting more upon entry.
Step 6: Inject the medication. Gently pinch a fold of skin if you are lean, or simply hold the skin taut. Insert the needle straight into the skin (at a 90-degree angle). Press the dose button all the way down and hold it.
Step 7: The Six-Second Rule. After the dose counter returns to zero, do not pull the needle out immediately. Count slowly to six. This ensures that every drop of the medication has left the needle and entered the subcutaneous tissue.
Step 8: Disposal. Pull the needle straight out. Do not rub the site, as this can cause bruising. Carefully remove the needle from the pen and place it in a sharps disposal container or a puncture-resistant plastic bottle with a lid.
Managing Common Injection Site Reactions
It is normal to see a small drop of blood or a tiny amount of clear liquid at the site after you withdraw the needle. You can gently press a cotton ball or gauze pad against the area for a few seconds. For a broader look at common GLP-1 side effects, it helps to know what is normal versus when to call your provider.
Some people experience mild redness, itching, or a small “wheal” (a raised bump) at the site. These are usually harmless and go away within a day or two. However, if you notice the following, you should contact your healthcare provider:
- A rash that spreads across the body.
- Severe pain or swelling that lasts more than 48 hours.
- Signs of infection, such as pus or warmth at the site.
- Hard lumps forming under the skin that do not go away.
Maximizing Your Results Through Personalized Care
While the injection itself is a mechanical process, the success of your journey depends on a holistic approach. Medications like compounded semaglutide or tirzepatide are powerful tools, but they work most effectively when integrated into a program that respects your unique biology.
At TrimRx, our platform connects you with licensed providers who evaluate your health history and goals to create a personalized treatment plan. We provide access to medications prepared by FDA-registered, inspected compounding pharmacies, ensuring you have the support you need without the frustration of traditional waiting rooms. Our programs are designed to be comprehensive, including the medical consultation, lab work, and the medication itself in one consistent experience.
For many, the transition to GLP-1 therapy is also an opportunity to optimize nutrition. We offer GLP-1 Daily Support supplement, which can help manage the common side effects that sometimes arise during the first few weeks of treatment. This integrated approach ensures that you are not just losing weight, but building a foundation for long-term metabolic health.
Bottom line: Success with GLP-1 therapy requires more than just the medication; it requires the right technique, consistent monitoring, and a support system that addresses your specific needs.
Overcoming Injection Anxiety
If the idea of needles makes you feel uneasy, you are not alone. Many people starting their weight loss journey share this concern. However, the needles used for GLP-1 pens are incredibly thin—often no thicker than a few strands of human hair. Most people report that the sensation is much less than a standard vaccination or even a mosquito bite.
To make the process easier, try these tips:
- Temperature Matters: If you keep your medication in the refrigerator, take the pen out about 30 minutes before your injection. Injecting cold liquid can sometimes cause a slight stinging sensation.
- Relax the Muscle: Even though you are injecting into fat, tensing the underlying muscle can make the area feel more sensitive. Take a few deep breaths before you start.
- Numb the Area: If you are particularly sensitive, you can hold an ice cube against the injection site for a minute before cleaning it with alcohol. This can help dull the initial sensation of the needle.
The Role of Telehealth in Your Journey
The modern approach to weight management has moved beyond the constraints of the traditional doctor’s office. Through our platform, you can complete your initial free assessment quiz online, which allows a provider to determine if a GLP-1 program is right for you. This telehealth-first model means you don’t have to navigate the stress of a waiting room to get the answers and treatment you need.
Our specialized team is available to help guide you through the onboarding process, including how to use your medication and what to expect as your body adjusts. This level of access ensures that you never have to feel like you are figuring it out on your own. Whether you are using a branded medication like Mounjaro® or Zepbound®, or a compounded version of semaglutide or tirzepatide, having professional oversight is the key to safety and sustainability.
Preparing for Long-Term Success
Mastering the injection site is just the beginning. As you progress, you will likely find that the once-weekly routine becomes second nature. The focus then shifts to maintaining the healthy habits that support the medication’s work and your energy. For added metabolic support during that phase, some people also look to the Weight Loss Boost supplement. This includes staying hydrated, prioritizing protein to protect lean muscle mass, and incorporating gentle movement into your daily life.
We are committed to being your partner through every stage of this transformation. Our mission is to combine the best of medical science with a compassionate, human-centered approach to weight loss. We believe that everyone deserves a path to health that is transparent, personalized, and free from the shame often associated with weight management.
FAQ
What is the best injection site for weight loss?
Clinical studies show that the abdomen, thigh, and upper arm are equally effective for medication absorption and weight loss outcomes. Most people choose the abdomen because it is the easiest to reach and generally has the most fatty tissue, but the best site for you is the one where you feel most comfortable and can consistently rotate your shots. If you want more context on technique, how to use GLP-1 for effective weight loss is a helpful next read.
What should I do if I see a drop of blood after the injection?
Seeing a small drop of blood or a tiny amount of medication at the site is common and usually not a cause for concern. Simply apply light pressure with a clean tissue or cotton ball for a few seconds, but do not rub the area, as rubbing can cause bruising or affect how the medication is absorbed.
Can I inject into my muscle if I have low body fat?
No, you should always aim for the fatty tissue rather than the muscle. If you are very lean, you can ensure you hit the subcutaneous layer by gently pinching a fold of skin at your abdomen or thigh and inserting the needle at a 45-degree angle rather than straight in.
Is it okay to use the same injection site every week?
You should avoid using the exact same spot every week to prevent the development of hardened tissue called lipohypertrophy. Use the “clock method” to move your injection site at least one inch away from the previous week’s spot, which allows the skin and fat cells to heal properly.
Disclaimer: This content is for informational purposes only and does not constitute medical advice. It is not intended to diagnose, treat, cure, or prevent any disease or condition. Individual results may vary. Always consult a qualified healthcare professional before starting any weight loss program or medication.
Transforming Lives, One Step at a Time
Keep reading

Gas and Bloating on Ozempic or Semaglutide: Why It Happens and How to Manage It
Yes, gas, bloating, and belching are common on Ozempic and semaglutide, and for most people they’re a manageable part of the adjustment period. The…

Dizziness on Ozempic or Semaglutide: Why It Happens and What to Do
If you feel dizzy or lightheaded on Ozempic or semaglutide, you’re not alone, and in most cases the cause is manageable. The usual culprits…

Ozempic and Tylenol (Acetaminophen): Is It Safe?
Acetaminophen (the active ingredient in Tylenol) is generally considered safe to take with Ozempic or semaglutide, and there’s no dangerous direct interaction between them….

