Where Should I Give My Ozempic Shot for the Best Results?
Introduction
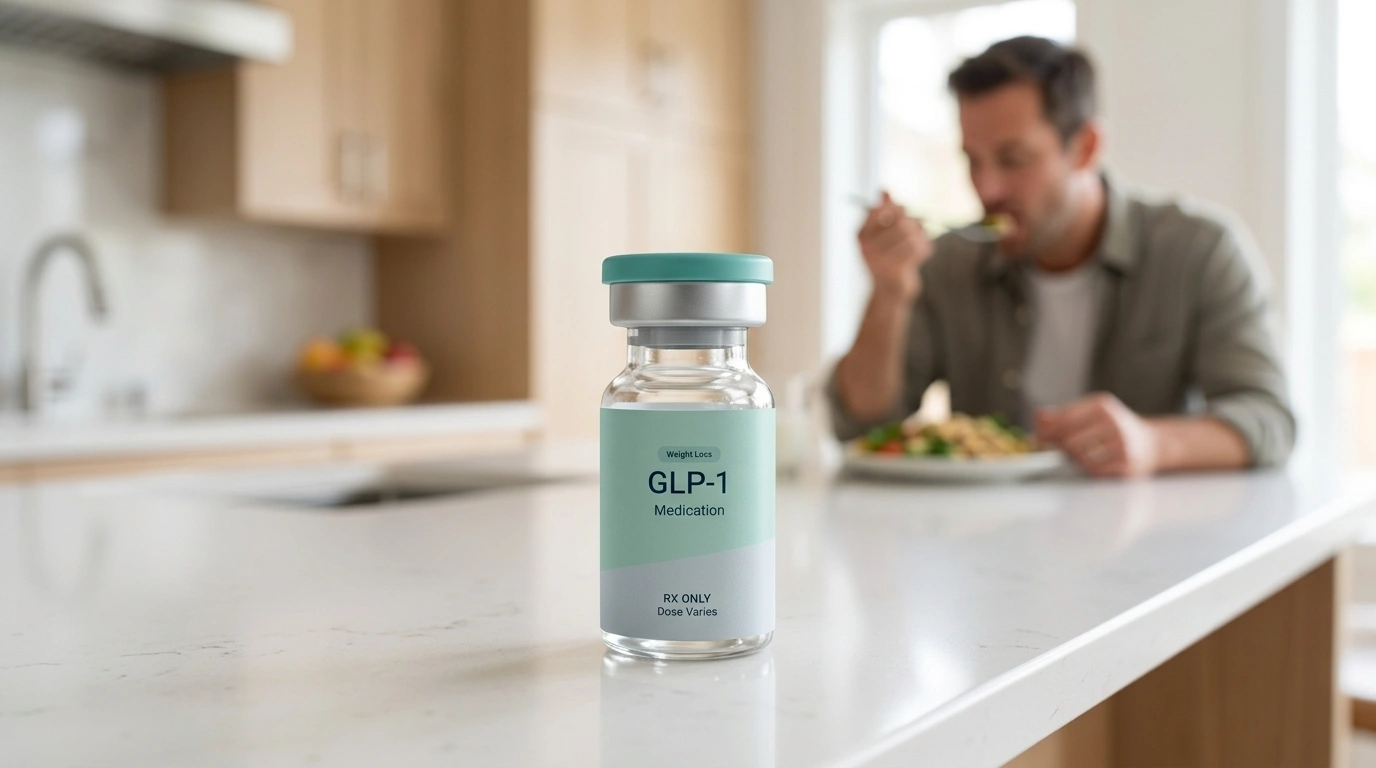
Standing in your kitchen with a new prescription pen can feel like a major milestone and a source of nervousness all at once. Whether you are using Ozempic® (semaglutide) for type 2 diabetes management or weight loss, the first question is almost always the same: where exactly does the needle go? Finding the right injection site is not just about comfort; it is about ensuring the medication is absorbed correctly so you can see the results you are working for. If you want a broader look at the medication itself before focusing on technique, what is semaglutide for weight loss? is a helpful place to start.
At TrimRx, we believe that understanding the “how” and “where” of your treatment is the first step toward a successful health journey. This post will cover the approved injection sites, the science of subcutaneous delivery, and professional tips to make your weekly routine as painless as possible. By the end of this guide, you will feel confident in your technique and ready to take the free assessment quiz if you want a personalized next step. Finding the right location for your shot is a simple skill that makes a world of difference in your long-term consistency and comfort.
Quick Answer: The three FDA-approved areas for an Ozempic® injection are the front of the thighs, the abdomen (at least two inches away from the belly button), and the back of the upper arms. These sites contain subcutaneous fat, which allows the medication to be absorbed slowly and steadily into your system over the course of a week.
The Three Approved Injection Sites
To get the most out of your medication, you must inject it into the subcutaneous layer. This is the layer of fatty tissue found just under the skin but above the muscle. Because Ozempic® is a once-weekly medication, it is designed to release slowly. Muscle tissue has high blood flow, which would cause the drug to absorb too quickly, potentially increasing side effects like nausea. The fatty tissue in these three areas provides the perfect reservoir for steady release. If you want a fuller walkthrough of site selection and rotation, how and where to inject semaglutide for effective weight loss covers the process in more detail.
The Abdomen (Stomach Area)
The abdomen is the most popular choice for many patients. It offers a large surface area, making it very easy to rotate your injection spots each week.
- Target Area: Use the area between your ribs and your pubic bone.
- The Two-Inch Rule: Always stay at least two inches away from your belly button (navel).
- Avoid: Do not inject into skin that is bruised, scarred, or tender.
The Front of the Thighs
If you prefer to sit down while giving your shot, the thigh is an excellent option. It is easily accessible and provides a firm surface.
- Target Area: Use the front or the outer side of your upper thigh.
- Pro Tip: Avoid the inner thigh, as the skin there can be more sensitive and there are more blood vessels near the surface.
The Back of the Upper Arm
The upper arm is a great alternative, but it can be a bit tricky to reach by yourself.
- Target Area: Aim for the fleshy, fatty part on the back of your arm (the triceps area).
- Assistance: Many people find they need a partner or a mirror to ensure they are hitting the right spot in the arm without accidentally reaching the muscle.
Key Takeaway: The best site is often the one you can reach comfortably and see clearly. While the abdomen is the most common, switching between the stomach and thighs is a great way to keep the skin healthy.
Why Location and Technique Matter
Subcutaneous fat is the secret to why these three sites are recommended. Unlike an intravenous (IV) injection that goes into a vein or an intramuscular (IM) injection that goes deep into the muscle, a subcutaneous injection sits in the fat. If you want a deeper look at the hormone-driven side of treatment, how GLP-1 actually works for weight loss breaks down the science behind appetite and fullness.
When you use the fatty tissue in the abdomen, thigh, or arm, the medication enters the bloodstream at a controlled pace. This helps maintain a stable level of the drug in your body, which is critical for managing blood sugar and appetite suppression. Research suggests that while absorption rates are fairly similar across all three sites, some patients report fewer gastrointestinal side effects when injecting into the thigh compared to the abdomen, though this varies from person to person.
| Injection Site | Accessibility | Common Patient Feedback |
|---|---|---|
| Abdomen | Excellent | Easiest to see; most common site used. |
| Thigh | High | Preferred by those who experience nausea. |
| Upper Arm | Moderate | Good for rotation; may require a helper. |
The Golden Rule: Rotating Your Injection Sites
One of the most common mistakes people make is picking one “favorite” spot and using it every single week. While it might feel comfortable, repeating the same exact location can lead to a condition called lipohypertrophy. This is the development of fatty lumps or thickened skin under the surface.
If you inject into these lumps, the medication may not absorb properly. This can lead to “phantom” stalls in your weight loss or unexpected spikes in blood sugar because the medication is essentially trapped in the thickened tissue.
How to Rotate Effectively
- The Clock Method: If you prefer the abdomen, imagine a clock face around your belly button. Move one “hour” over each week.
- Side-to-Side: If you use your thighs, use the right thigh on week one and the left thigh on week two.
- The One-Inch Rule: Always try to be at least one inch away from the spot you used the previous week.
Bottom line: Rotating your site every week protects your skin and ensures that every milligram of medication is working as intended.
Step-by-Step Guide to a Perfect Injection
Taking your medication should not be a stressful event. By following a consistent routine, you can minimize the risk of irritation and ensure you receive the full dose. We focus on making this process clear for all our members.
Step 1: Preparation
Wash your hands thoroughly with soap and water. Take your Ozempic® pen out of the refrigerator. Important Note: Many patients find that injecting cold medication causes a slight sting. You can let the pen sit at room temperature for about 15 to 30 minutes before injecting to make the process more comfortable. Check the liquid in the pen; it should be clear and colorless. If it looks cloudy or has particles, do not use it.
Step 2: Attach the Needle
Remove the paper tab from a new, sterile needle. Push the needle straight onto the pen and turn it until it is tight. Pull off the outer needle cap and the inner needle cap. Do not throw away the outer cap; you will need it later to safely remove the needle.
Step 3: Check the Flow (New Pens Only)
If you are starting a brand-new pen, you must check the flow before the first injection. Turn the dose selector to the flow check symbol (a small dashed line). Hold the pen with the needle pointing up and press the dose button. A drop of liquid should appear at the tip. If it doesn’t, repeat this up to six times. If a drop still doesn’t appear, change the needle and try once more.
Step 4: Select Your Dose
Turn the dose selector until the counter shows your prescribed dose (for example, 0.25 mg or 0.5 mg). Ensure the number lines up exactly with the pointer.
Step 5: Clean and Inject
Clean your chosen injection site with an alcohol swab and let it air dry completely. Note: Injecting into wet alcohol can cause a stinging sensation. Insert the needle into your skin. Press and hold the dose button. You will see the counter return to 0.
The 6-Second Rule: After the counter hits 0, keep the needle in your skin and count slowly to six. This ensures the full dose has left the needle and entered your body.
Step 6: Disposal
Remove the needle from your skin. Carefully place the outer needle cap back on and unscrew the needle. Dispose of it in a sharps container. Never throw needles directly into the household trash.
Key Takeaway: Precision and patience are your best friends. Counting to six and letting the alcohol dry are two small steps that significantly improve the experience.
Maximizing Your Comfort
If you are nervous about needles, you are not alone. However, the needles used for GLP-1 medications are extremely thin and short—usually only about 4mm to 5mm long. This is much thinner than the needles used for blood draws or vaccinations. Most people describe the sensation as a tiny prick or a “mosquito bite.”
Tips for a Painless Shot
- Relax the Muscle: If you are injecting into your thigh, make sure your leg is relaxed and not tensed up. Tense muscles can make the injection feel more significant.
- The Pinch Technique: If you are quite lean, you can gently pinch a fold of skin and fat between your fingers to create a thicker “target” for the needle. This ensures you stay in the subcutaneous layer.
- Avoid Hair and Blemishes: Try to find a clear patch of skin. Injecting through a hair follicle or a mole can be more sensitive.
- Room Temp Medication: As mentioned earlier, cold liquid is more “viscous” and can feel sharper. A room-temperature pen is almost always more comfortable.
Myth: You need to rub the site after the injection to help it absorb. Fact: You should avoid rubbing the site. Rubbing can cause bruising or push the medication into the muscle. If you see a tiny drop of blood, simply press a cotton ball or tissue gently against the area for a few seconds.
Managing Common Injection Site Reactions
It is perfectly normal to see some mild changes at the site of your shot. Most of these go away on their own within a few hours or a couple of days. If you want a more detailed look at nausea, digestive upset, and other treatment reactions, understanding semaglutide side effects: what you need to know can help you separate common effects from more serious concerns.
What is Normal?
- Slight Redness: A small pink or red circle around the injection spot.
- Minor Itching: A faint itchy sensation shortly after the shot.
- A Small Bump: Sometimes a tiny “wheal” or bump appears if the liquid is very close to the surface. This usually disappears as the medicine absorbs.
When to Consult Your Healthcare Provider
While complications are rare, you should reach out to a licensed healthcare professional if you experience:
- A rash that spreads far beyond the injection site.
- Severe pain, heat, or swelling that lasts more than 48 hours.
- Signs of an allergic reaction, such as hives, swelling of the face, or difficulty breathing.
At TrimRx, we prioritize your safety. Our programs connect you with licensed providers who can help you troubleshoot any concerns you have about how your body is reacting to the treatment.
Common Mistakes to Avoid
Even seasoned patients can slip into bad habits. Avoiding these common pitfalls will keep your journey on track.
- Injecting Through Clothing: Never inject through your pants or shirt. This can introduce bacteria from the fabric into your skin and may cause the needle to bend or break.
- Reusing Needles: Each needle is designed for a single use. Reusing them makes them duller (causing more pain) and significantly increases the risk of infection.
- Using the Same Spot: As discussed, failing to rotate leads to lumps. Even if one spot “doesn’t hurt at all,” move an inch away next time.
- Hesitating: When you are ready to inject, use a firm, steady motion. Slowly “creeping” the needle into the skin can actually cause more discomfort than a quick, confident entry.
Storage and Handling for Safety
The way you store your Ozempic® pen affects the quality of the medication and the comfort of the shot.
- Before First Use: Keep all new, unused pens in the refrigerator between 36°F and 46°F.
- After First Use: Once you have used the pen for the first time, you can keep it in the refrigerator or at room temperature (up to 86°F) for up to 56 days.
- Never Freeze: If a pen has accidentally frozen in the back of the fridge, throw it away. Freezing destroys the protein structure of the medication.
- Keep Out of Light: Store your pen with the cap on to protect the medication from direct sunlight.
Beyond the Injection: Supporting Your Journey
While the injection is the “engine” of your progress, your lifestyle is the “fuel.” Many people find that they want to do more to support their bodies while they are on a GLP-1 program. This is why we offer more than just access to prescriptions.
For instance, managing the common side effects of semaglutide—like occasional nausea or changes in digestion—is a common concern. We offer quick-access supplements like GLP-1 Daily Support supplement to help bridge the gap.
Our mission at TrimRx is to provide a telehealth-first experience that feels personal. We don’t just send you a pen and leave you to figure it out. We provide the tools, the professional oversight through our partner providers, and the ongoing support needed to help you embrace a healthier lifestyle.
If you want added support during a busy week of progress, Weight Loss Boost supplement is another option many people explore alongside their routine.
Note: While Ozempic®, Wegovy®, Mounjaro®, and Zepbound® are FDA-approved branded medications, TrimRx also provides access to compounded semaglutide and compounded tirzepatide. These compounded versions are prepared in FDA-registered, inspected compounding pharmacies. It is important to note that compounded medications themselves are not FDA-approved, though they use the same active ingredients found in the branded versions.
Taking the Next Step
Injecting yourself might feel like a big deal today, but in a month, it will likely be a 60-second part of your week that you hardly think about. The key is to start with the right information, use the approved sites, and be patient with yourself as you learn.
By choosing a program that offers medical supervision and a personalized touch, you aren’t just taking a medication—you are investing in a comprehensive approach to your metabolic health. Sustainable weight loss is a marathon, not a sprint, and having a dedicated team in your corner makes every mile easier.
If you are ready to begin or want to see which program is right for your unique health profile, your next step is simple.
Next Step: Take our free assessment quiz to see if a personalized weight loss program is right for you. Our licensed providers will review your history and help determine the best path forward for your goals.
FAQ
Which injection site is the least painful?
Most patients find the abdomen to be the least painful because it usually has the most subcutaneous fat and fewer nerve endings near the surface. However, some people prefer the thigh because the skin is firmer and easier to stabilize. It is a personal preference, so feel free to try both to see which works better for you.
Can I inject into my arm if I am alone?
Yes, you can, but it requires some flexibility. You may need to stand in front of a mirror to ensure you are hitting the fatty back part of the arm and not the muscle. If you find it difficult to pinch the skin and inject at the same time, the abdomen or thigh may be a safer and easier choice for self-administration.
What should I do if I see a drop of liquid on the needle after I inject?
Seeing a tiny drop of liquid on the tip of the needle after you pull it out is normal and does not mean you missed your dose. However, if you see a significant stream of liquid or a large puddle on your skin, you may have pulled the needle out too quickly. Remember to count slowly to six after the dose counter hits 0 before removing the needle.
Does it matter if I switch from the stomach to the thigh every week?
It does not matter if you switch between the different approved zones (stomach, thigh, arm) each week. In fact, many healthcare providers recommend rotating between these larger zones to give each area of skin plenty of time to recover. The most important thing is that you never use the exact same spot two weeks in a row.
Disclaimer: This content is for informational purposes only and does not constitute medical advice. It is not intended to diagnose, treat, cure, or prevent any disease or condition. Individual results may vary. Always consult a qualified healthcare professional before starting any weight loss program or medication.
Transforming Lives, One Step at a Time
Keep reading

Gas and Bloating on Ozempic or Semaglutide: Why It Happens and How to Manage It
Yes, gas, bloating, and belching are common on Ozempic and semaglutide, and for most people they’re a manageable part of the adjustment period. The…

Dizziness on Ozempic or Semaglutide: Why It Happens and What to Do
If you feel dizzy or lightheaded on Ozempic or semaglutide, you’re not alone, and in most cases the cause is manageable. The usual culprits…

Ozempic and Tylenol (Acetaminophen): Is It Safe?
Acetaminophen (the active ingredient in Tylenol) is generally considered safe to take with Ozempic or semaglutide, and there’s no dangerous direct interaction between them….

