How to Give a Shot of Ozempic: A Step-by-Step Safety Guide
Introduction
The first time you hold an injection pen, it is natural to feel a wave of hesitation. Whether you are managing type 2 diabetes or focusing on weight management, the transition to a self-injectable medication marks a significant step in your health journey. Many people worry about the pain of the needle, the complexity of the device, or simply “doing it wrong.” At TrimRx, we understand that medical technology can feel overwhelming, but our goal is to transform that anxiety into confidence through clear, science-backed guidance.
This guide provides a detailed walkthrough on how to properly administer your medication, from selecting the right injection site to storing your pen safely. By following these clinical best practices, you can ensure your treatment is both effective and comfortable. Our mission is to support your metabolic health with transparency and empathy, helping you master the practical side of your program so you can focus on your long-term results. If you are still deciding whether prescription treatment is right for you, take the free assessment quiz.
Understanding Your Ozempic® Pen
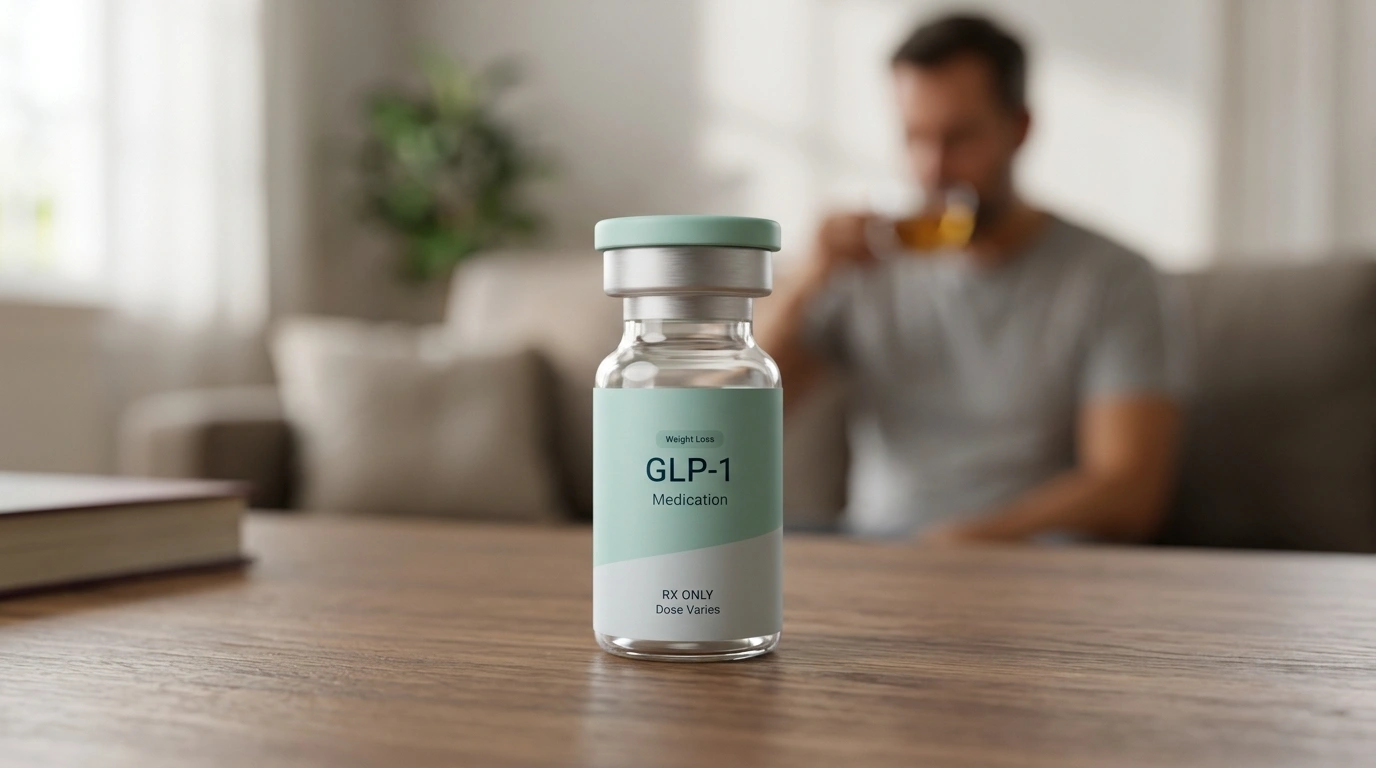
Before you begin, it is helpful to understand what you are holding. Ozempic® is a brand-name prescription medication containing semaglutide, which belongs to a class of drugs called GLP-1 receptor agonists (glucagon-like peptide-1). These medications mimic a natural hormone in your body that regulates appetite and blood sugar levels. For a closer look at semaglutide injection devices, see a closer look at semaglutide injections.
The pen itself is a sophisticated delivery system designed for subcutaneous injection, meaning the medication is delivered into the fatty tissue just below the skin, rather than into a muscle or vein. Because semaglutide has a long half-life, it only needs to be administered once a week.
Key Takeaway: The Ozempic® pen is designed for simplicity, but it requires a specific “prime, dial, and hold” technique to ensure the full dose is delivered into the subcutaneous fat layer.
Essential Supplies for Your Injection
Preparation is the foundation of a stress-free injection experience. Before you start, gather all necessary items on a clean, flat surface. Having everything within reach prevents interruptions once you have begun the process.
- Your Ozempic® pen: Confirm the medication name on the label and check the expiration date.
- A new, sterile needle: These are typically provided with your prescription. Never reuse a needle.
- An alcohol swab: This is used to disinfect the skin at the injection site.
- A sharps disposal container: You need a puncture-resistant container for used needles. If you do not have a dedicated sharps bin, a heavy-duty plastic laundry detergent bottle with a screw cap can serve as a temporary alternative.
- A cotton ball or gauze: Occasionally, a tiny drop of blood may appear at the site after the needle is removed.
Important: Check the window on your pen. The liquid should be clear and colorless. If the medication appears cloudy, discolored, or contains visible particles, do not use it and contact your pharmacist for a replacement.
Choosing and Rotating Your Injection Site
Where you choose to inject can influence both your comfort and how well the medication is absorbed. There are three primary areas recommended for subcutaneous injections. For a practical walkthrough, read how to rotate injection sites for semaglutide and tirzepatide.
The Abdomen
Most individuals find the abdomen to be the easiest and most accessible site. You should aim for the area at least two inches away from your belly button. Avoid any areas where the skin is tender, bruised, red, or hard. The stomach offers a consistent layer of fatty tissue, which is ideal for GLP-1 absorption.
The Front of the Thigh
The upper and outer areas of your thighs are also excellent options. This site is often preferred by those who find abdominal injections uncomfortable. Ensure you are injecting into the “fleshy” part of the thigh rather than the muscle on the top or the sensitive skin on the inner thigh.
The Upper Arm
The back of the upper arm can be used, but this site is often the most difficult to reach if you are self-administering. You may need a partner or caregiver to assist you if you choose this location to ensure the needle enters at the correct angle.
The Importance of Site Rotation
Rotating your injection site is a critical safety step. If you inject into the exact same spot every week, you may develop a condition called lipohypertrophy, which is a buildup of fatty lumps under the skin. These lumps can be unsightly, but more importantly, they can prevent the medication from being absorbed correctly, leading to inconsistent results.
Note: You do not have to switch body parts every week. For example, if you prefer the abdomen, you can rotate within that area by using a “clock” method—injecting at the 12 o’clock position one week, the 3 o’clock position the next, and so on.
Step-by-Step: How to Give the Injection
Once your supplies are ready and you have selected your site, follow these steps precisely to ensure a safe and effective dose.
Step 1: Prepare the Pen and Needle
Wash your hands thoroughly with soap and water. Hygiene is the first line of defense against site infections. Pull off the pen cap and wipe the rubber stopper at the tip with an alcohol swab. Take a new needle, pull off the paper tab, and push the needle straight onto the pen. Turn it clockwise until it is tight. Pull off the outer needle cap (save this for later) and then pull off the inner needle cap (dispose of this).
Step 2: Perform a Flow Check (Priming)
This step is only required the first time you use a brand-new pen. The flow check ensures the needle is not blocked and that the pen is working correctly. Turn the dose selector until the flow check symbol (a small double dot or “..” icon) lines up with the pointer. Hold the pen with the needle pointing up and press and hold the dose button until the counter returns to 0. You should see a drop of medication at the needle tip. If no drop appears after six attempts, change the needle and try again.
Step 3: Select Your Prescribed Dose
Turn the dose selector until your prescribed dose appears in the counter window. This may be 0.25 mg, 0.5 mg, 1 mg, or 2 mg, depending on your current phase of treatment. Ensure the number is perfectly aligned with the pointer. If you turn past your dose, you can turn the dial backward to correct it; you will not waste medication by doing this.
Step 4: Clean the Skin
Wipe the chosen injection site with a fresh alcohol swab. Let the skin air-dry for a few seconds. Do not blow on the skin to dry it, as this can introduce bacteria. Injecting through wet alcohol can cause a stinging sensation, so patience at this step improves comfort.
Step 5: Inject the Medication
Insert the needle into your skin at a 90-degree angle. Most people find that a quick, firm motion is less painful than a slow insertion. Once the needle is in, press and hold the dose button all the way down. Watch the dose counter—it will move back toward 0.
Step 6: The Six-Second Rule
After the dose counter reaches 0, continue to hold the needle in your skin while counting slowly to six. This pause is essential. Because the medication is viscous and the needle is very thin, it takes a few seconds for the full volume of the dose to exit the pen. If you pull the needle out too quickly, you may see a “stream” of medication follow the needle out, which means you did not receive the full dose.
Step 7: Finalize and Cleanup
Pull the needle straight out of your skin. If there is a tiny bit of blood, press gently with a cotton ball, but do not rub the area. Carefully put the outer needle cap back on the needle and unscrew it from the pen. Drop the needle into your sharps container immediately. Replace the pen cap to protect the remaining medication from light.
Bottom Line: Success lies in the details—always use a new needle, always check for the “0” on the counter, and always hold for six seconds before withdrawing the needle.
Storage and Maintenance of Your Medication
Preserving the integrity of your medication is vital for its effectiveness. Semaglutide is a sensitive protein-based molecule that can break down if exposed to extreme temperatures or light. For a related guide on keeping medication stable, see how to store compounded semaglutide or tirzepatide at home.
- Unused Pens: Store all new, unopened pens in the refrigerator between 36°F and 46°F. Do not store them near the cooling element at the back, as they must never be allowed to freeze.
- Pens in Use: Once you have used a pen for the first time, you can keep it either in the refrigerator or at room temperature (below 86°F) for up to 56 days. After 56 days, the pen must be discarded even if there is medication left inside.
- Light Protection: Always keep the pen cap on when not in use. Sunlight and bright indoor light can degrade the active ingredients over time.
Note: If your medication has been accidentally frozen, do not use it. Freezing destroys the structure of the medication, rendering it ineffective.
Troubleshooting Common Issues
It is normal to encounter small hurdles as you learn the process. Here is how to handle the most common scenarios.
If You See a Drop of Liquid After Injection
If a tiny drop of medication remains on the needle tip or your skin after you pull the needle away, do not worry. This is common and usually does not mean you missed your dose. However, if you see a significant stream of liquid, it likely means you did not hold the button for the full six seconds. Do not attempt to “top up” with a second injection; simply wait until your next scheduled dose and ensure you hold the needle in place longer next time.
If the Dose Counter Won’t Reach Your Dose
If you are trying to dial your dose but the pen stops turning before you reach the correct number, it means there is not enough medication left in that pen for a full dose. Do not force the dial. You can either inject the remaining amount and then use a new pen to complete the dose (only if instructed by your provider) or, more commonly, start your full dose with a brand-new pen.
If You Forget Your Weekly Dose
If you miss a dose, take it as soon as you remember, provided it is within five days of the missed dose. If more than five days have passed, skip the missed dose and resume your regular schedule on your next planned injection day. Never take two doses at the same time to “catch up.”
Managing Side Effects and Comfort
While the injection itself is usually just a tiny pinch, the medication can cause systemic side effects. Most people experience mild gastrointestinal symptoms, such as nausea or indigestion, especially when starting a new dose level. For a broader overview of common symptoms, read Common GLP-1 Side Effects: What to Expect.
To improve your experience:
- Inject in the evening: Some users find that taking their shot before bed allows them to sleep through the initial peak of nausea.
- Stay hydrated: Dehydration can worsen side effects.
- Use room-temperature medication: If the cold sensation of the medicine bothers you, let the pen sit out of the fridge for 15–20 minutes before injecting.
- Focus on nutrition: Small, frequent meals can help manage the “fullness” sensation that GLP-1 medications provide.
If you experience severe abdominal pain, persistent vomiting, or signs of an allergic reaction (such as hives or swelling), contact a healthcare professional immediately.
The Role of Personalized Support
Navigating weight loss or diabetes management is not just about the medication; it is about the ecosystem of care around you. At TrimRx, we believe that telehealth should feel personal. Our platform connects you with licensed providers who evaluate your health profile to determine the most appropriate treatment plan for your specific needs.
Whether you are prescribed branded medications or compounded alternatives through our partner pharmacies, our approach is built on medical supervision and ongoing support. We are here to ensure that every step—from your initial assessment to your tenth weekly injection—is handled with clinical expertise and genuine care for your success. If you are considering prescription treatment, see if you qualify for a personalized program.
Conclusion
Mastering the art of self-injection is a powerful step toward taking control of your metabolic health. By preparing your supplies, choosing the right sites, and following the “prime, dial, and hold” method, you ensure that your treatment works exactly as intended. Remember that a bit of nervousness is normal at first, but with each passing week, this process will become a simple, five-minute habit.
We are committed to helping you embrace a healthier lifestyle through science and transparency. Your journey is unique, and having the right tools and knowledge is what makes sustainable change possible.
- Check your pen: Ensure the liquid is clear and the date is valid.
- Rotate your sites: Use the abdomen, thigh, or arm, but never the exact same spot twice in a row.
- Watch the counter: Always wait for the “0” and count to six before withdrawing.
- Consult a pro: Reach out to your healthcare provider if you have concerns about side effects or technique.
If you are ready to take the next step in your weight loss journey with a program tailored specifically to your body and goals, we invite you to begin your free assessment quiz.
Key Takeaway: To begin your personalized path to better health, the first step is completing our free assessment quiz to see which program fits your medical profile.
FAQ
Does the Ozempic® injection hurt?
Most patients describe the sensation as a minor pinch, similar to a mosquito bite. The needle used is very thin and short because it only needs to reach the fatty tissue just under the skin. If you are sensitive to pain, letting the pen reach room temperature for 15 minutes before injecting can help reduce the stinging sensation. For a more detailed walkthrough of the device, see a closer look at semaglutide injections.
Where is the best place to inject for the fewest side effects?
While clinical studies generally show similar absorption rates across the abdomen, thigh, and arm, some patients report fewer gastrointestinal side effects when injecting in the thigh. However, this varies by individual. The most important factor is rotating your site weekly to maintain healthy skin and consistent absorption. You can also review where to inject semaglutide.
What should I do if I see a small air bubble in the pen?
A small air bubble in the pen is normal and will not cause any harm. The pen is designed to deliver the medication accurately even if a small bubble is present. As long as you have performed the flow check (priming) on a new pen and see a drop of liquid at the tip, the device is ready for use.
Can I reuse the needles to save money?
No, you should never reuse a needle. Reusing needles increases the risk of infection and skin irritation. Additionally, the tip of the needle becomes dull after a single use, which makes the next injection significantly more painful and increases the risk of damaging the tissue under your skin.
Disclaimer: This content is for informational purposes only and does not constitute medical advice. It is not intended to diagnose, treat, cure, or prevent any disease or condition. Individual results may vary. Always consult a qualified healthcare professional before starting any weight loss program or medication.
Transforming Lives, One Step at a Time
Keep reading

Gas and Bloating on Ozempic or Semaglutide: Why It Happens and How to Manage It
Yes, gas, bloating, and belching are common on Ozempic and semaglutide, and for most people they’re a manageable part of the adjustment period. The…

Dizziness on Ozempic or Semaglutide: Why It Happens and What to Do
If you feel dizzy or lightheaded on Ozempic or semaglutide, you’re not alone, and in most cases the cause is manageable. The usual culprits…

Ozempic and Tylenol (Acetaminophen): Is It Safe?
Acetaminophen (the active ingredient in Tylenol) is generally considered safe to take with Ozempic or semaglutide, and there’s no dangerous direct interaction between them….

